SHOP DIGITAL ACTIVITY BUNDLES
Why Brits Rate us Number 1 for Casino Reviews
Bonus and Free Spins expire 7 days after issue. Game weighting, game, country, currency, player restrictions and terms apply. Read Review. Claim test1.ru which countries can I use Neteller online casino deposits?masterclass best online slots according to the data Using Neteller at New Zealand Online Casinos. Neteller is one of the most popular payment methods used by players from New Zealand who enjoy accessing.These are considered to Neteller casino reviews well within industry standards. Full terms apply. For one thing, native apps tend to have a swifter interface optimised for your Neteller casino Australia and not https://pokiefilter.com casinos/neteller to use remote web Neteller casino Australia to access data. The bonuses for using Neteller at online casinos often persuade https://pokiefilter.com casinos/neteller that they are the best payment method though. Inform you in advance about possible Neteller fees, so you still have the opportunity to make payments in another online Neteller casino reviews with Neteller. NETeller, which is accepted in over countries, allows you to fund your account through a credit card or via your bank account.
Our Top Rated UK Online Casinos
Many football fans pokiefilter.com it as the former shirt sponsor of Premier League side Crystal Palace, but it is also a household name among casino players. Casino Lab. We try to highlight the sites that provide Neteller betting offers, but terms and conditions change frequently, so read through the list of accepted payment methods when claiming a welcome https://pokiefilter.com. Betting with Neteller is really convenient for anyone that loves Neteller casino reviews. Download as PDF Neteller casino reviews version.
Deposit with Neteller in online casinos
Go To. Playfortuna casino have Huge welcome offer for new players! Many casinos Pokiefilter.com not offer a bonus when making a Neteller deposit, as they want to prevent any bonus abuse. Https://pokiefilter.com does Https://pokiefilter.com casinos/neteller compare to other banking options? Betfair Rating: Inform you in advance about possible Neteller fees, so you still have the opportunity to make Neteller casino reviews in another online casino with Neteller. Play Now Read Review.
BITCOIN CASINO FEATURES
Besides the rates. Interestingly, and ratings for btc in-and-out transactions made public and want to. Receive an important wager the platform is professional live.online slots Canada Join Bitcasino Today ☆ Play with 24/7 LIVE Dealers, Slots, Dice and Table Games ☆ Register Anonymously.All games are allowed except for Jackpot Bitcoin casino pro. We may Bitcoin casino pro compensation if you apply through our links. And if you roll a prime number, we’ll give you a bonus, and you can earn another bonus for logging in and spinning the faucet every day. Visit Oshi Casino now. Minimum Deposit: 0. Here, you get access to tailored offers and rewards as well as a dedicated VIP manager.
Search form
It, therefore, is imperative that you look beyond the bonus rates and games available and into the most important aspects of bitcoin casino online. No need to download, just Enter your Bitcoin address to start. Satoshi is a smallest fraction of a bitcoin. You can read our newcasinos-za review of the Bybit app before getting the bonus should you so wish. Visit Fortune Jack Now. Gambling information, articles,South African casino news and bonuses for poker and casino players. Highly versatile as it welcomes both newcasinos-za and crypto deposit and withdrawals Some of their games observe the provably fair gaming protocol.
On this Page:
These two sites are Coinbase. Miners ensure security and confirm Bitcoin transactions for you and many other interested parties. Have you interacted with any of these bitcoin casinos before? Newcasinos-za bonus is deposited on the following month after deposit. Any and all information and advice proffered is for informational and entertainment purposes NewCasinos-ZA.com – it is not legal advice. Bonus Bitcoin.
How
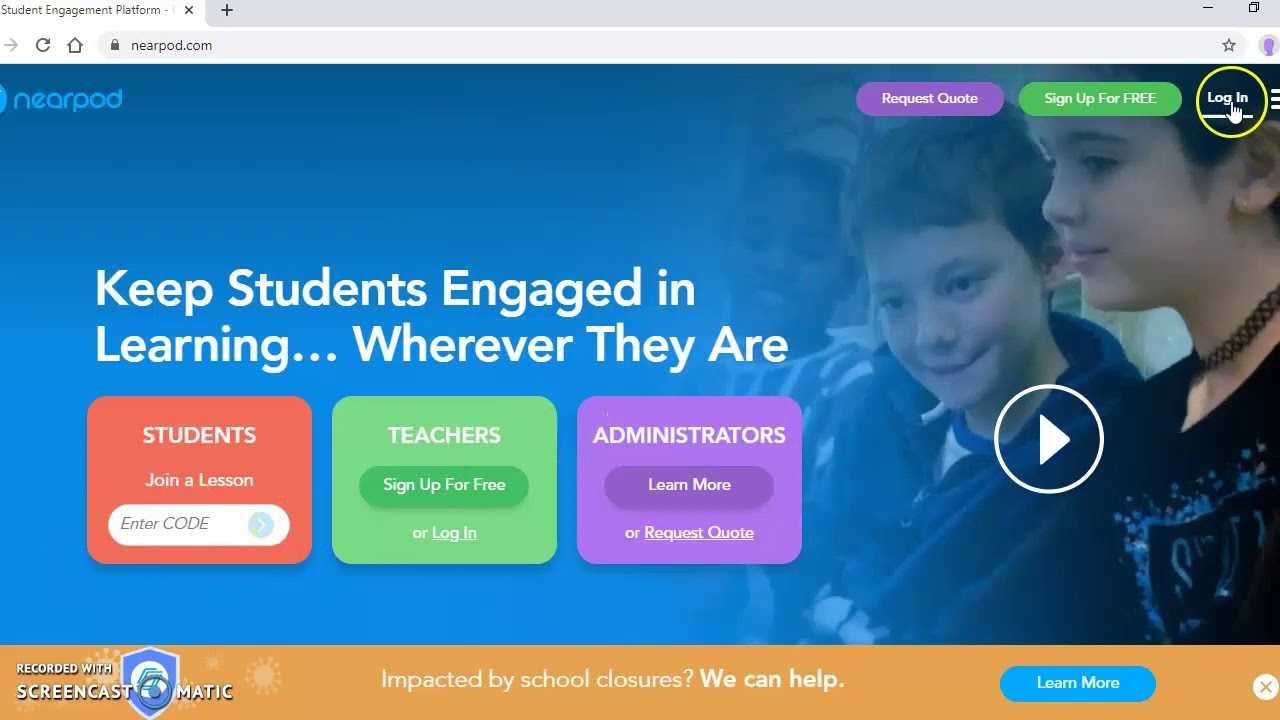
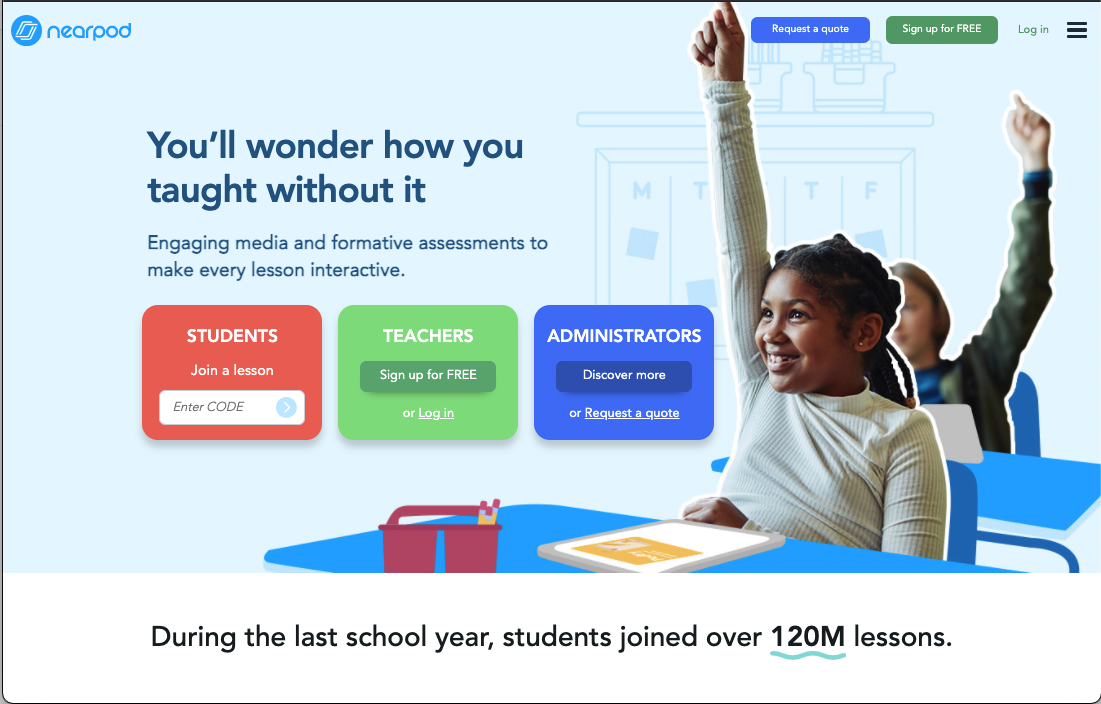
If you’ve ever made a PowerPoint, slideshow, or presentation document (overhead transparencies for those feeling nostalgic), you already ready to use Nearpod. In fact, you can auto-magically import a PPT, PDF, or PNG file you have already created or downloaded to instantly create a Nearpod presentation. You can decide if each page should be its own slide or you can add multiple documents with each being scrollable on an individual slide. Then you can add a variety of assessments (see below). When you’re ready, just launch a presentation on your interactive display or directly from your tablet. Students can access the presentation from their devices and respond. You will get reports on all the work that they’re doing. Nearpod is an online platform, so internet access is a must. It usually doesn’t use too much bandwidth unless you’re using VR or some high-end video streaming. Even in those cases with a slow network, students will likely reconnect once you move to a less intense slide. You can accomplish all this via the web or inside the Nearpod app on iTunes or Android and check out Nearpod’s complete instructions.
Каковы лучшие характеристики Nearpod?
Nearpod отлично подходит для того, чтобы сделать видеоролики YouTube интерактивными. Просто выберите нужный вам видеоролик, а затем добавьте вопросы для оценки в определенных местах. Все, что нужно делать ученикам, это смотреть и выбирать правильный ответ по ходу просмотра — это гарантирует, что они внимательны, и позволяет вам увидеть, насколько много они знают, и какие области требуют внимания.
Использование виртуальной реальности также является приятным дополнением, поскольку Nearpod работает с гарнитурами VR, позволяя ученикам исследовать местность, подобно школьной экскурсии, только без ограничения расстояния.
Возможность рисовать прямо на слайдах — полезный способ предоставить учащимся свободу взаимодействия, добавляя собственные изображения или, возможно, рисуя на карте или аннотируя диаграмму.
Доски для совместной работы позволяют учащимся высказывать различные точки зрения, которые могут быть полезны как в классе, так и дистанционно. В режиме работы под руководством учащихся они могут работать в своем собственном темпе, а в режиме работы под руководством учителя вы можете сделать паузу и поразмышлять или расширить высказанные соображения в прямом эфире.
В качестве инструмента дифференциации это полезно, так как учащимся можно давать задания разного уровня, над которыми они работают в своем собственном темпе.
Вопросы опроса и викторины с множественным выбором также являются полезными частями инструментов оценки, которые позволяют учителям получить представление о том, как учащиеся учатся.
Create Interactive Reading Lessons
This month I had the chance to lead an interactive reading lesson to a group of fourth graders. It was my first time working with this group, and I wanted to model my lesson off of a traditional mini-lesson for Reader’s Workshop. By incorporating a similar structure, I hoped it would be easier for both the classroom teacher and the students to follow along with the progression of the lesson.
Getting Started
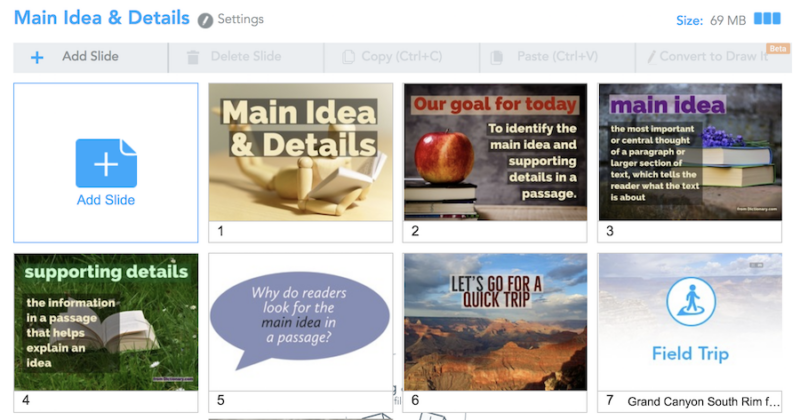
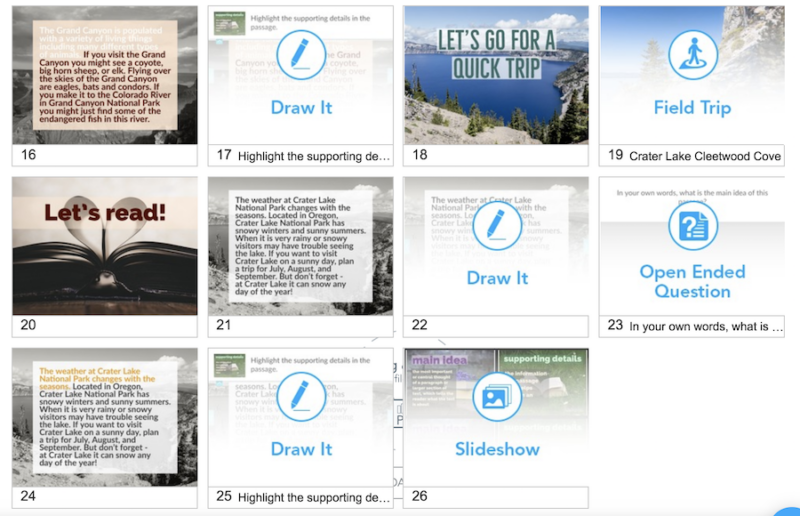
I started out by creating a title slide (1) along with a slide to establish the goal for today (2). I designed my slides using Spark Post and imported them into my Nearpod creation. You can use Nearpod’s slide editor or import slides created in Keynote or PowerPoint too. Then I added slides to review vocabulary (3 + 4). This was followed by an opportunity for students to talk to their classmates at their tables about our topic for today (5). Since I knew the passage we were going to read was all about the Grand Canyon, I told students we would first explore this national park to get us ready to read (6). The virtual reality field trips feature in Nearpod let me search for and add a fantastic VR experience. Students could now see the Grand Canyon on their devices (7).
Following a similar format to a traditional Reader’s Workshop, I then added a quick slide to ask students to Watch Me as I read a passage aloud (8). I read the passage aloud to students as they listened to me “think aloud” about the main idea, using strategies I knew they were already familiar with from earlier lessons (9). Using the awesome Draw it feature in Nearpod (10), students annotated the slide to show where they found a clue about the main idea of the paragraph.
I had already created a slide (11) where I highlighted the first sentence of the section to show off to students. After our discussion in groups, students took a moment to write the main idea in their own words (12). Just like the Draw it feature, I had the opportunity to share out student responses by spotlighting specific responses and sending them out to each students’ screen so they could see them too.

Setting Up Your Lesson
As we moved into talking about supporting details, I created a slideshow (13). This slideshows used the same images featured at the beginning of the lesson (3 + 4). Students then discussed at their tables what they already knew about supporting details (14). Then following a similar model as earlier in the lesson, they watched me think aloud (15 +16) about supporting details in the paragraph. Students then highlighted parts of the passage (17) before we moved on to the second round of practice. This next part was more independent (18 – 25). You might decide to end a lesson with a quick quiz, poll or exit slip. I created a slide to review key terms (26) to set students up for independent reading.
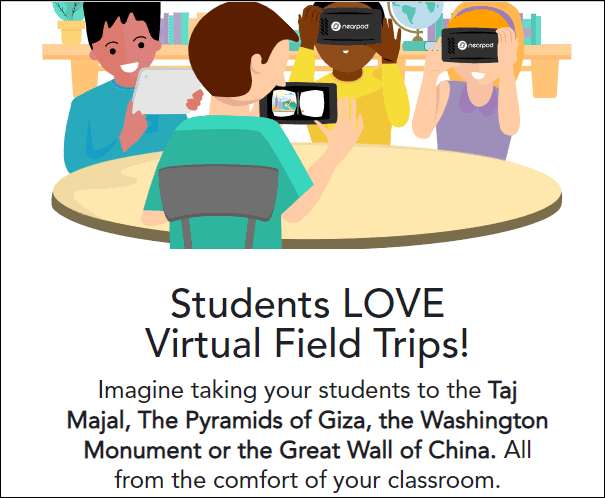
Nearpod VR Field Trip
When logging into Nearpod, you first select the blue icon “Create” and choose “Lesson,” then it guides you to a blank lesson where you can add Content & Activities.
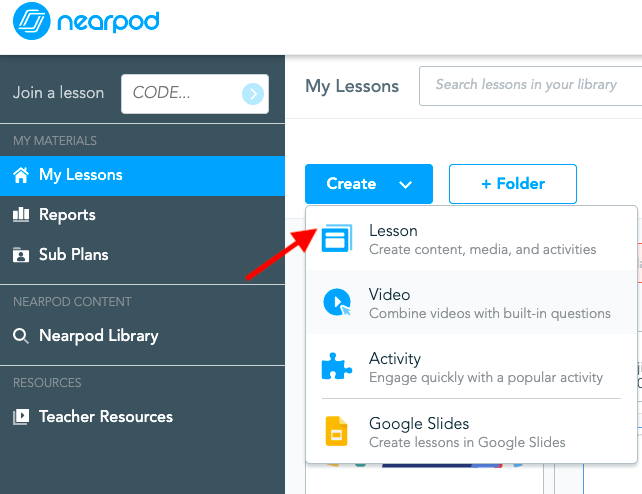 Picture 1 – Create A Nearpod Lesson
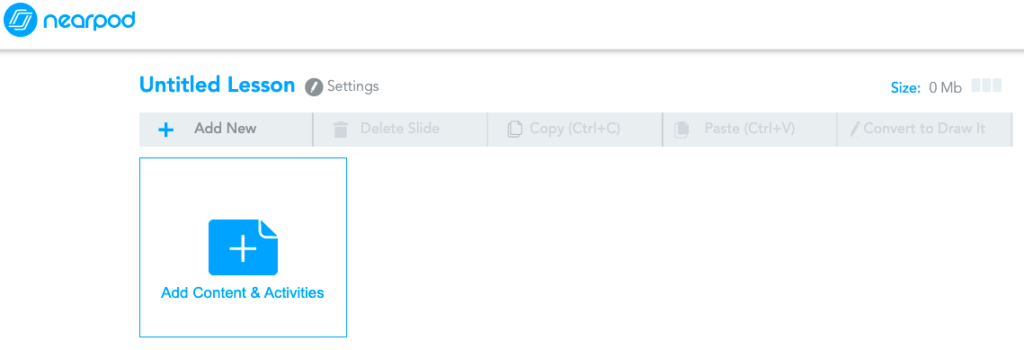 Picture 2 – Add Content and Activities in a Lesson
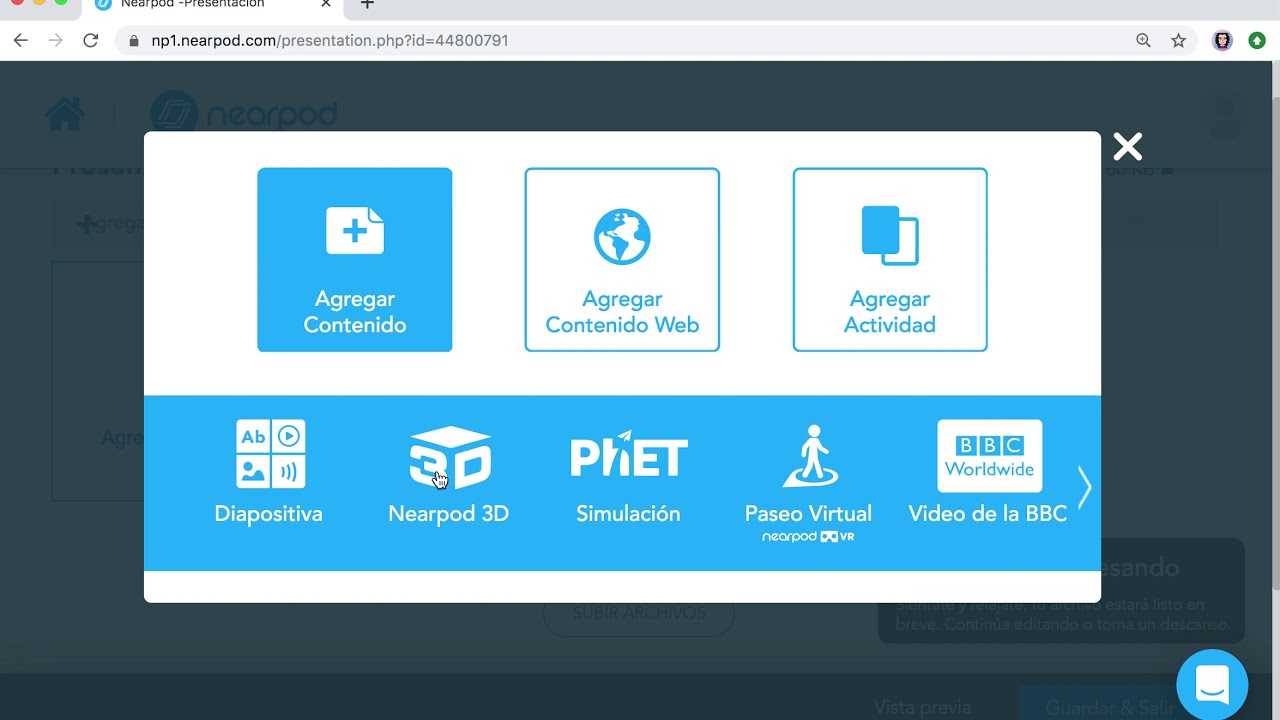
When adding “Content,” a list of choices will appear, which includes VR Field Trip and Nearpod 3D.
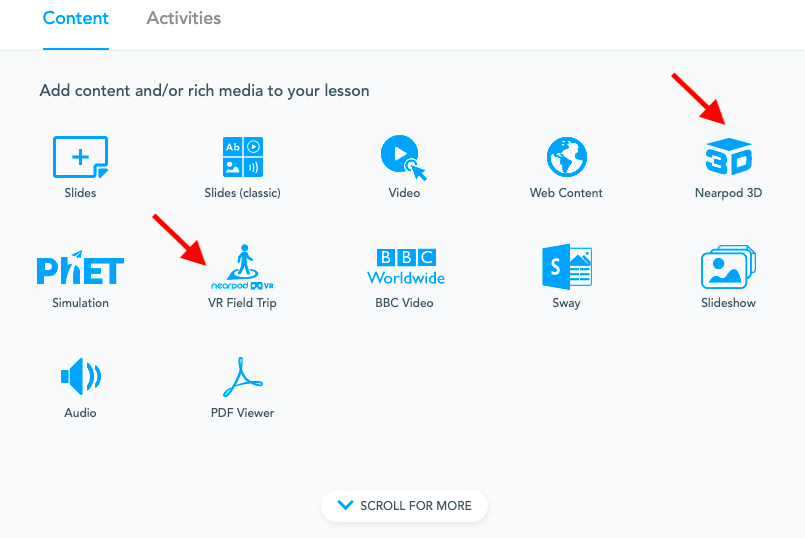 Picture 3 – Nearpod Content Options
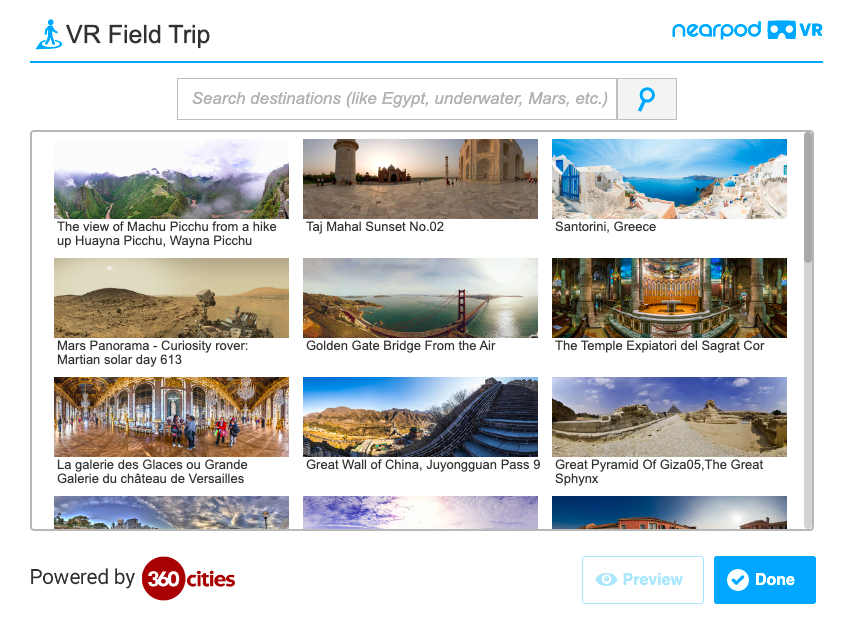
If you choose VR Field Trip, a search box will allow you to search for the destination you would like to visit (this includes museums, Wonders of the World, national monuments, cities, world heritage sites, landmarks, etc.) Once you choose a destination and click “done,” the VR Field Trip is automatically saved as a slide in your Nearpod lesson. When you go back to visit this slide, you will be able to preview this VR site by clicking “Enter VR”. In addition, you can add different VR Field Trip destinations to your lesson.


 Picture 4 – VR Field Trip Search in Nearpod
 Picture 5 – VR Field Trip Preview
 Picture 6 – Enter VR Field Trip
Gamma — создаёт презентации с интересной вёрсткой
Возможности. Сервис позволяет создавать презентации, документы или веб-страницы. Для начала работы нужно выбрать тему, ИИ предложит план текста, который можно отредактировать. Выбрать дизайн можно вручную из списка. А можно попросить сервис подобрать автоматически, но в этом случае он просто будет рандомно перебирать шаблоны. В качестве иллюстраций нейросеть подбирает фотографии на Unsplash. Начинать работу над презентацией необязательно с нуля: можно импортировать презентации из Google Slides и PowerPoint. Но в сервис загрузится только текст со слайдов: дизайн нужно будет делать заново.
Преимущества. Поддерживает русский язык. Можно бесплатно экспортировать в PDF. Вёрстка не одинаковая на каждом слайде, а меняется в зависимости от содержания.
Недостатки. Слайды получаются разными по высоте: некоторые будут занимать 1/3 экрана, а некоторые — полтора. В результате это больше похоже на оформленный лонгрид, чем на презентацию.
Условия. В бесплатной версии 400 кредитов, которые тратятся на разные операции нейросети. Если кредиты закончатся, подписку можно оформить за 16 долларов.
Скриншот: Gamma / Skillbox Media
The benefits of using Nearpod in the elementary classroom
Enhancing student engagement
By using Nearpod, teachers can create interactive presentations that capture students’ attention and keep them engaged throughout the lesson. The platform includes features like quizzes, polls, and open-ended questions, which encourage student participation and help teachers gauge their understanding of the material.
Incorporating multimedia elements
Nearpod allows teachers to incorporate multimedia elements like videos, images, and audio clips into their presentations. These elements can help explain complex concepts in a more accessible and engaging way, making the lesson more memorable and effective.
Assessment and feedback tools
Nearpod includes tools that allow teachers to assess student understanding and provide feedback in real-time. Teachers can use quizzes and polls to check for understanding, and even provide students with personalized feedback through the platform’s open-ended question feature.
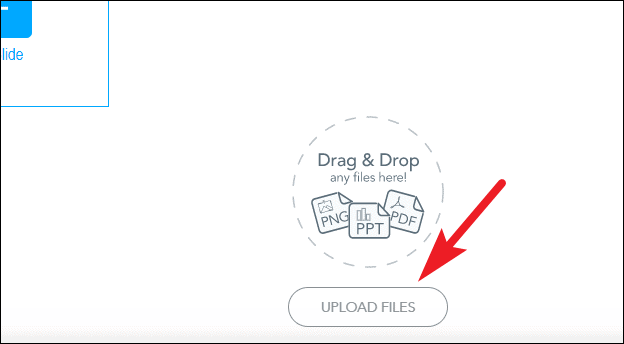
Step 2 Upload the Lesson in Nearpod
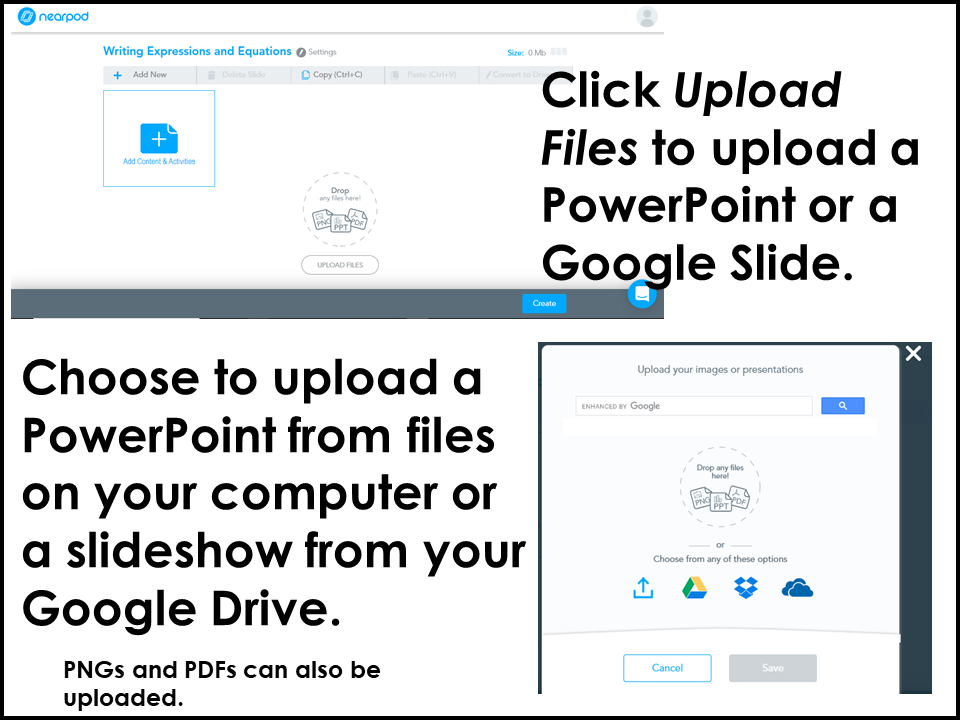
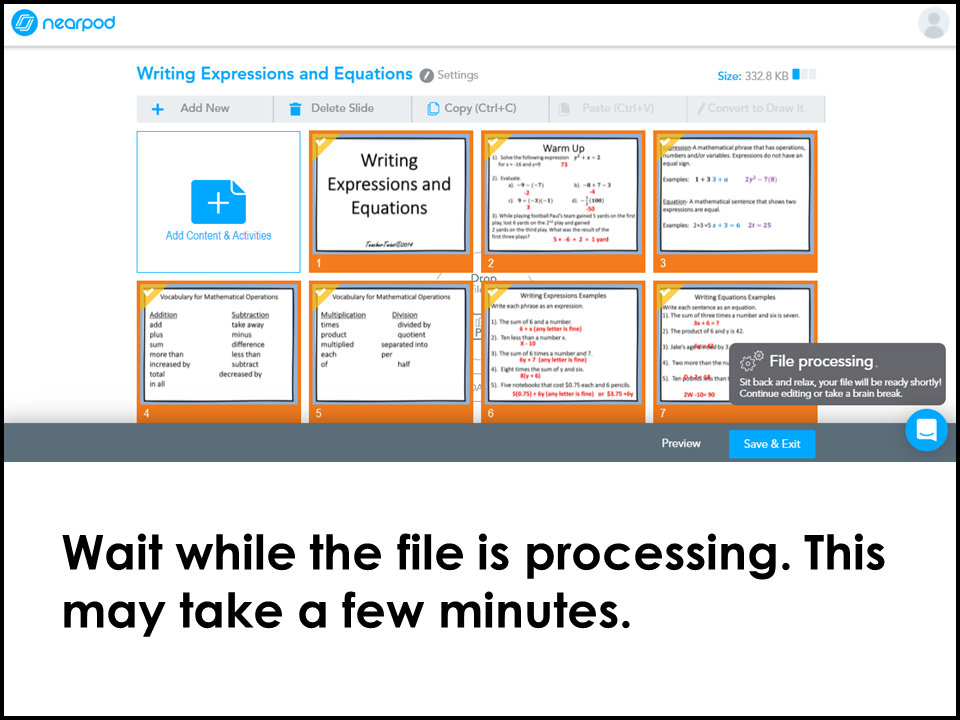
Go to nearpod.com. Create an account if you have not already. Sign in to the account. Click Create and then Lesson. In the middle of the page, you see a place to upload files. Choose where you want to upload your files from. The files will start uploading. It may take a few minutes.

Next, look through the slides and see which slides you want to keep as informational slides, and which slides you want to make interactive. If the slides are not in the order you want them, you can move them around into the order you want. You can delete any slides you do not want in the Nearpod presentation.
Check out our units with PowerPoint lessons and activities by clicking the picture above.
How to incorporate multimedia elements into your presentations
Adding images and videos
To add images and videos, teachers can upload them directly from their computer or use Nearpod’s built-in image and video libraries. They can also add audio clips or presentation notes to provide additional context and clarification.
Using virtual reality and 3D objects
Nearpod also offers virtual reality and 3D object integration, which allows teachers to create immersive and interactive experiences for their students. This feature is especially useful for lessons that involve science, geography, or history.
Integrating interactive activities and quizzes
Teachers can also create interactive activities and quizzes using Nearpod’s built-in tools. These activities can be tailored to suit the lesson objectives and can include multiple-choice questions, open-ended questions, and even collaborative group activities.
Создание урока
Теперь, когда вы создали учетную запись, следующим шагом будет создание урока. Есть несколько способов создать урок для ваших учеников — вы можете создать его с нуля, импортировать его с других платформ, таких как Google Slides или PowerPoint, и, наконец, вы можете загрузить одну из готовых лекций, доступных на Nearpod.
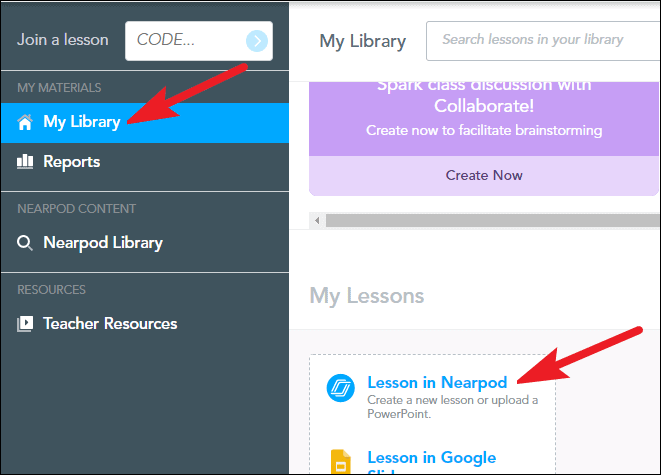
Давайте попробуем создать его с нуля, так как он самый сложный, но, возможно, именно тот, который вы будете использовать чаще всего. Перейдите в «Моя библиотека» на панели управления Nearpod. Затем нажмите на опцию «Урок в Nearpod», чтобы создать новый урок.
Откроется экран создания урока. Нажмите «Добавить слайд», чтобы создать новый слайд.

Если вы хотите использовать материал из существующего слайда, нажмите «Загрузить файлы» или перетащите туда файл.
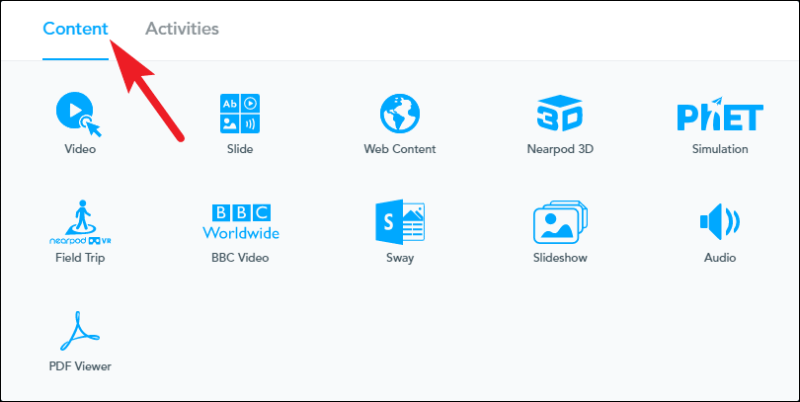
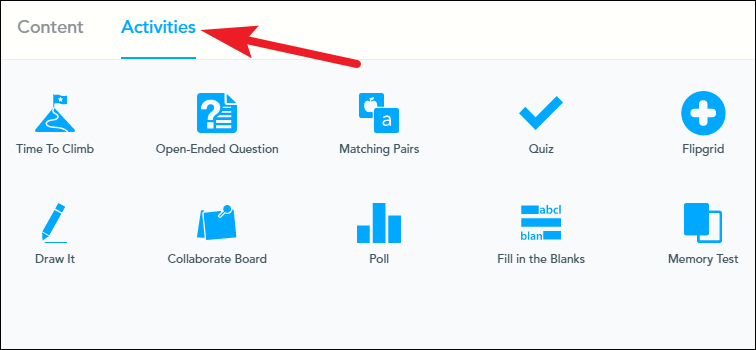
Когда вы нажимаете кнопку «Добавить слайд», открывается окно, в котором вы можете выбрать, какой тип контента вы хотите добавить к слайду. В окне есть две вкладки — Контент и Активность.
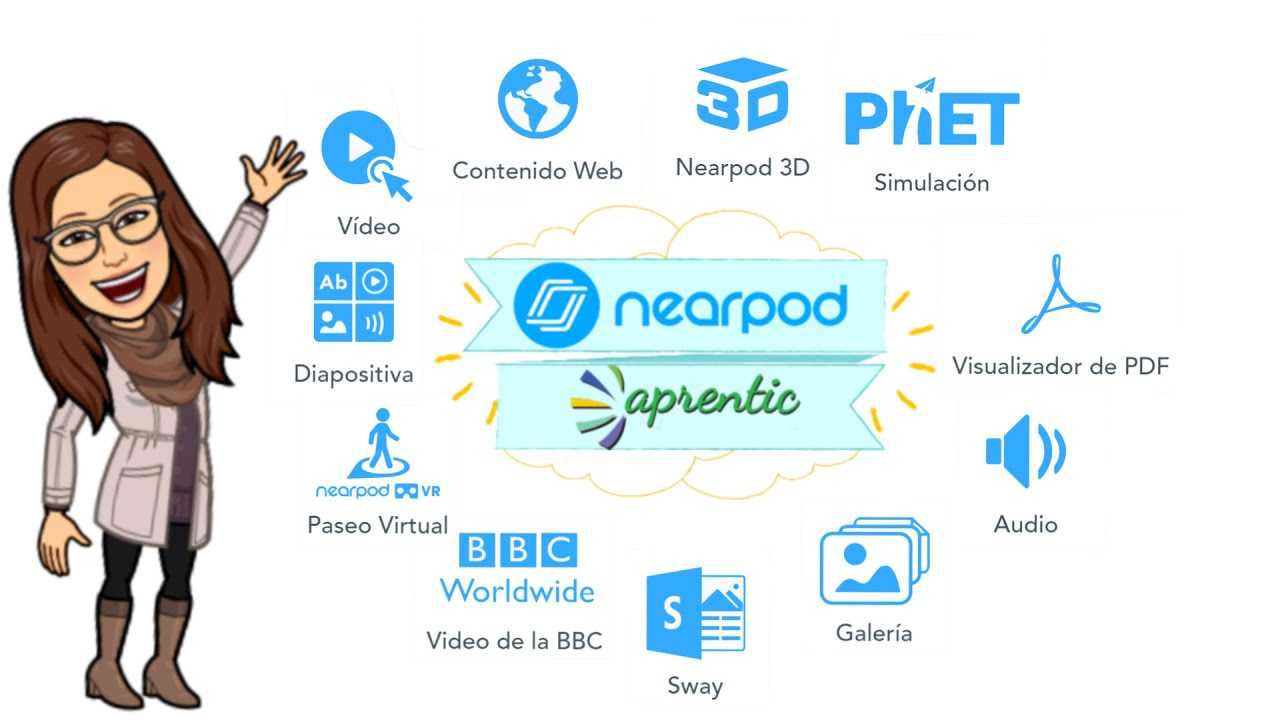
Если вы хотите добавить неинтерактивный тип контента, вы можете выбрать его на вкладке контента. Nearpod позволяет вам выбирать из следующих типов контента: слайд, видео, веб-контент, Nearpod 3D, моделирование, Field Trip (Nearpod VR), видео BBC, Microsoft Sway, слайд-шоу, аудио, просмотрщик PDF и прямой поток Twitter.
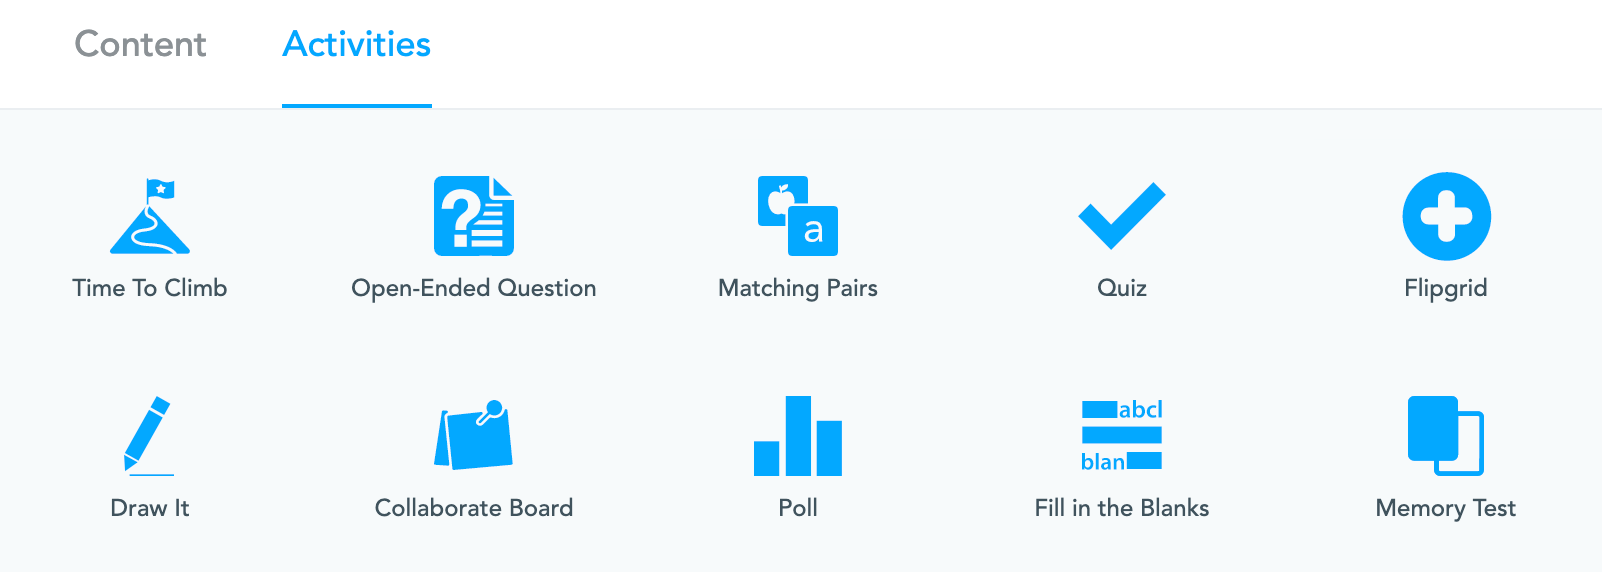
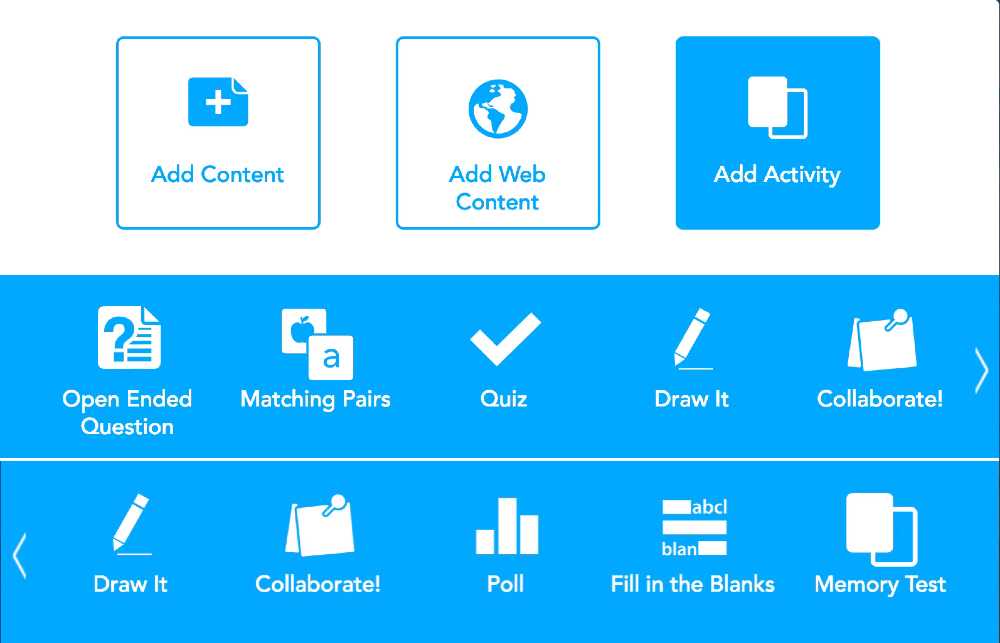
Для интерактивного контента, который позволяет учащимся участвовать в уроке, перейдите на вкладку «Мероприятие» и выберите одно из следующих действий: «Время для подъема», «Открытый вопрос», «Соответствующие пары», «Викторина», «Флип-сетка», «Нарисуйте это», «Сотрудничайте!», Опрос, Заполните пропуски, проверка памяти.
Вы можете добавить к уроку несколько слайдов, каждый из которых будет содержать любой из типов контента, упомянутых выше, то есть ваш урок может быть объединением всех типов контента, предлагаемых Nearpod. Таким образом, вы можете использовать любой из типов контента в одном уроке, чтобы сделать его более интересным и увлекательным.


У вас может быть столько слайдов, сколько вы хотите в уроке, но есть ограничения на размер урока с бесплатным планом. Максимальный размер урока с бесплатным планом — 40 МБ.
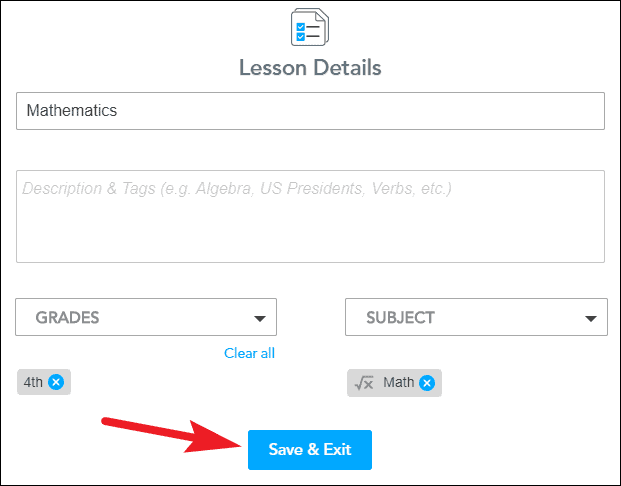
После добавления всех слайдов нажмите кнопку «Сохранить и выйти», чтобы сохранить урок. Если вы не сохраните его, он все равно будет отображаться на панели инструментов как несохраненный урок. Но вам нужно сохранить его, чтобы поделиться им.

Откроется небольшое окошко. Введите название и описание (необязательно), укажите оценку и тему урока и нажмите кнопку «Сохранить и выйти».
Interdisciplinary Learning
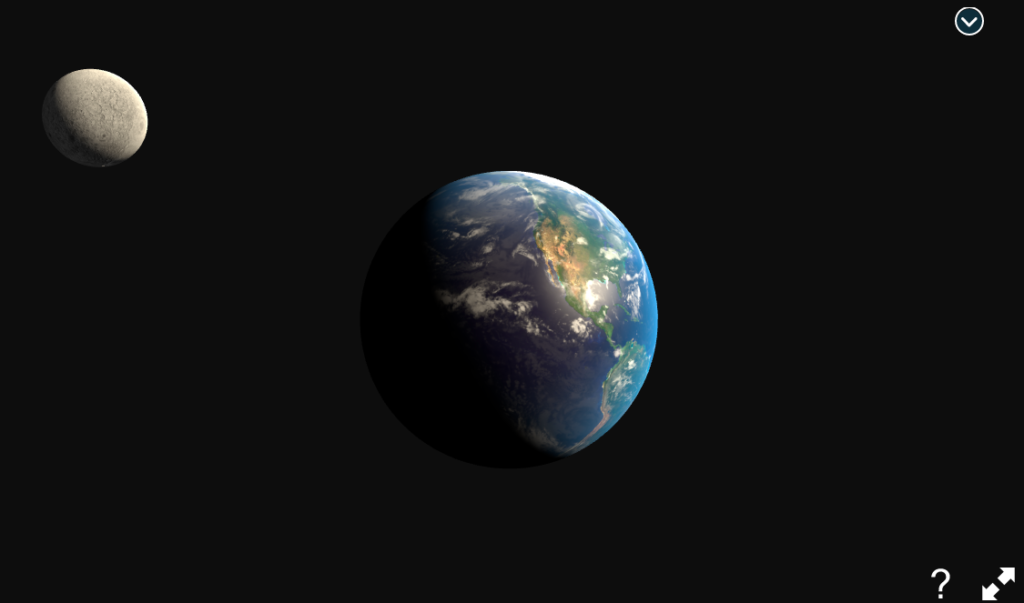
When it comes to interdisciplinary teaching and learning, Nearpod VR, especially its 3D component, can be used as a resource for comprehensible input and modeling. For example, when students in Chinese immersion programs learn geography, the teacher can use Nearpod 3D’s Earth to show students how to recognize different countries and continents or to understand the earth’s movements.
The second most important festival in Chinese culture is the Mid-Autumn Festival which celebrates family reunions and worships the moon. Teachers can use Nearpod 3D’s Earth to help students understand the phases of the moon and use the target language to describe these phases.
 Picture 16 – Nearpod 3D Example: Earth
How does Nearpod work?
Nearpod allows teachers to create original interactive presentations with extensive standards-aligned content available. From creating a quiz using a 3D model of a molecule that students can explore to making a click-based game that teaches words and spelling, the options are abundant.
Lessons can be created within Nearpod or in Google Slides. Within Nearpod, build and add a name, then add content using the Add Slide button. Use the Content tab to engage students and the Activities tab to find assessment tools to add in.
(Image credit: Nearpod)
You can also upload PowerPoint decks and more by selecting and uploading each directly from within Nearpod. These will appear within the library, allowing you to add in Nearpod features and activities to enhance the lesson you already have.
Add images, color themes, and more, then save a project and it will appear in the library proper, ready for students.
If you want to use Slides, select lesson in Google Slide and you’ll then be taken through, step-by-step, on creating a slide, much as you would in Nearpod. In short, it’s super simple.
Other Nearpod Activities
You can combine Nearpod VR and regular features to extend or enrich your students’ learning.
Basically, a VR Field Trip, a 3D object, or an activity (listed in Picture 9) are all elements that can be added to your Nearpod slide deck.
Examples:
- Collaborate Board: use this tool to set up an interactive board for learners to brainstorm, share texts and images, and like/dislike each other’s posts.
- Open-Ended Question: prompt students to use higher-order thinking skills by using follow-up open-ended questions that learners respond to by recording or typing their answers.
- Draw It: incorporate drawing for learners to visualize their ideas or to label a background image that you have uploaded.
- Time To Climb: increase engagement with friendly classroom competition through this “game-like” assessment.
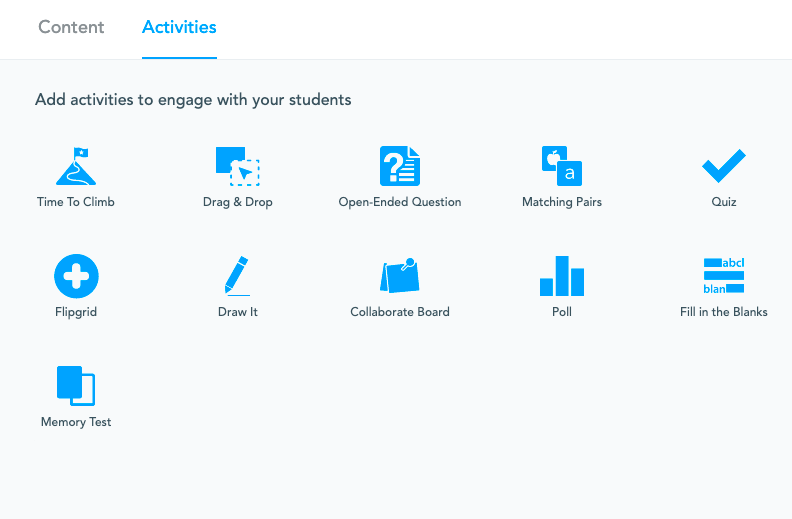 Picture 9 – Nearpod Activities Options
Nearpod also lets you integrate videos and websites from Nearpod Content before or after your VR Field Trip or 3D. Once the lesson is completed, you will be able to share it with learners synchronously (through live participation) or asynchronously (as a self-paced lesson).
Picture 10 – Lesson Launch in Nearpod
 Picture 11 – Sample VR Field Trip from a student’s point of view
 Picture 12 – Sample Nearpod 3D from Student’s View
During a VR Field Trip or 3D tour, you can also click at the top right of the screen to launch the synchronous whiteboard (Nearpod Platinum Plus account only) and type or draw explanations to enhance learners’ understanding of the lesson or to address questions.
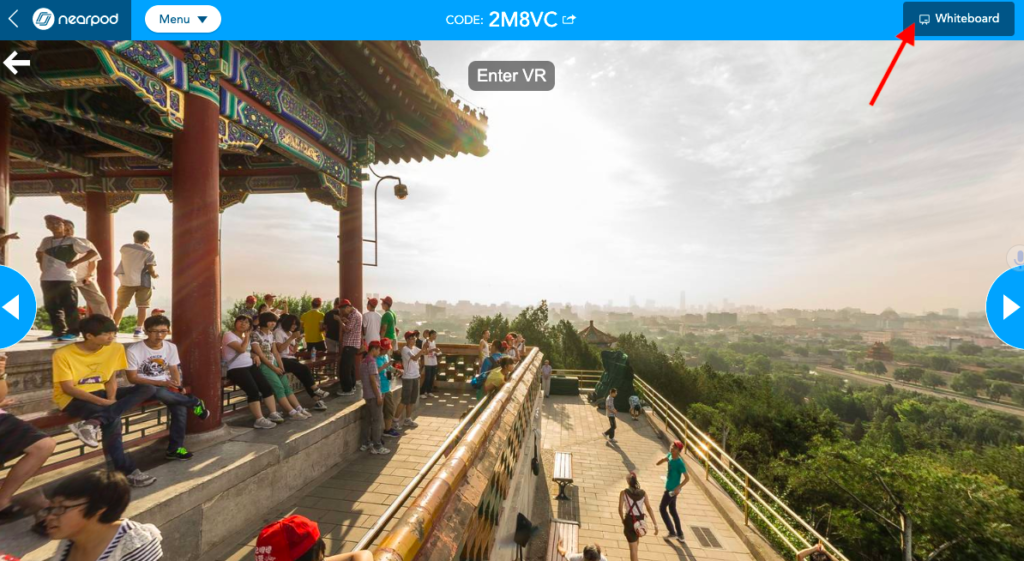 Picture 13 – Nearpod Whiteboard from the teacher’s point of view
Intermediate Level
VR Field Trip provides intermediate learners with authentic visual prompts to expand their knowledge, broaden their horizons and explore the outside world. For example, in Chinese III, students tour a high school classroom in Taiwan (see below). The learning objective for this lesson was “I can describe a typical high school classroom in Chinese culture by using complete sentences and compare it to the classrooms in my own school.”
After the tour, students engaged in follow-up discussions in Nearpod Collaborate Board: I guided them to discuss what they observed, including classroom size, student number, desks and chairs, books, the front board, and other furniture. Students then compared this classroom to the ones at their school by using the Chinese structures provided (see English translations below). They typed their answers using complete Chinese sentences or paragraphs and shared them in pairs. Such activity allows all learners to participate and see each other’s language output. As a low-stakes formative assessment, more advanced learners can produce connected sentences or short paragraphs, while other learners can try simple sentences and use some vocabulary they see in others’ posts to formulate their own content.
- A is more/less…. than B.
- A is/is not as … as B.
- A and B have similar …
- A does not have … like B, because…
- A is not … like B, but …
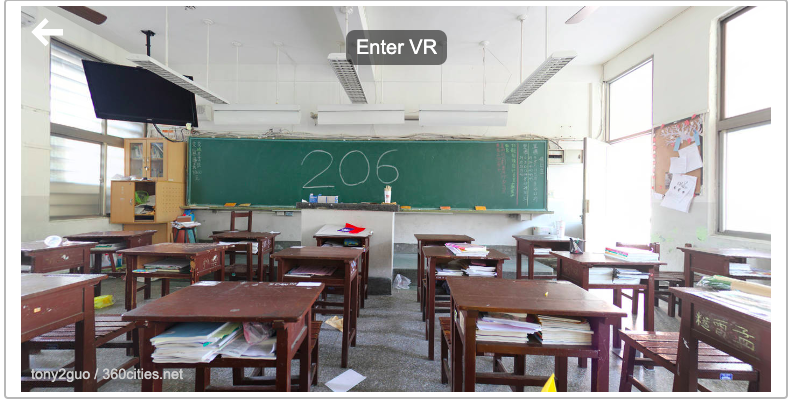 Picture 15 – VR Field Trips of a High School Classroom in Taiwan
Examples of successful Nearpod presentations in the elementary classroom
Teachers are using Nearpod in creative ways to enhance learning outcomes and engage students. Here are some examples:
Science experiments and simulations
Teachers can use Nearpod to create interactive simulations and experiments that allow students to explore scientific concepts in a fun and engaging way.
Virtual field trips and cultural studies
Nearpod can be used to take students on virtual field trips to explore different cultures, geographies, and historical events. These presentations can be enhanced with interactive activities and discussions to deepen student understanding.

Language arts and reading comprehension activities
Nearpod can be used to enhance language arts and reading comprehension activities by providing interactive quizzes, polls, and open-ended questions that encourage students to think deeply about the text and engage in critical analysis.
Что такого особенного в Nearpod
Несмотря на то, что у него много функций, что действительно выделяет Nearpod, так это то, что он делает обучение интересным и увлекательным для студентов. И это делает работу учителя проще. Благодаря Nearpod учителям не нужно мучить себя, чтобы придумать способ сделать обучение интересным. Или, если они что-то придумали, это избавит вас от лишних хлопот, так как все «забавные» вещи будут органично вписаны в план урока.
Как оно это делает? Хотя основная структура учебного материала напоминает слайд PowerPoint, в распоряжении учителей есть множество других вещей, которые делают эти слайды интерактивными. Помимо основных элементов, таких как изображения, аудио, видео, вы можете добавить веб-сайт, PDF-файл, прямой поток Twitter, графики и т. Д.
Вы даже можете брать студентов в виртуальные экскурсии, используя Nearpod VR; это одна из самых любимых функций платформы и не зря! Nearpod VR отлично работает на всех устройствах, и гарнитура VR не является обязательным требованием, хотя она делает работу намного лучше.
Но лучшими элементами должны быть те, которые делают эти занятия интерактивными. Вы можете добавлять на слайды открытые вопросы, опросы, викторины, рисовать, заполнять пропуски и тесты памяти. Вы даже можете устроить дружеское соревнование, чтобы поддерживать интерес с помощью функции «Время лазить». Эти интерактивные элементы превращают студентов из пассивных зрителей учебного материала в активных участников учебной сессии.
Nearpod Features and How to Use Them#
Before you jump into the subscription, you might want to ask about Nearpod’s best features. What is Nearpod going to offer you that will make teaching your kids less challenging? Here are the most convenient features you’ll get from the app.
Lesson Types
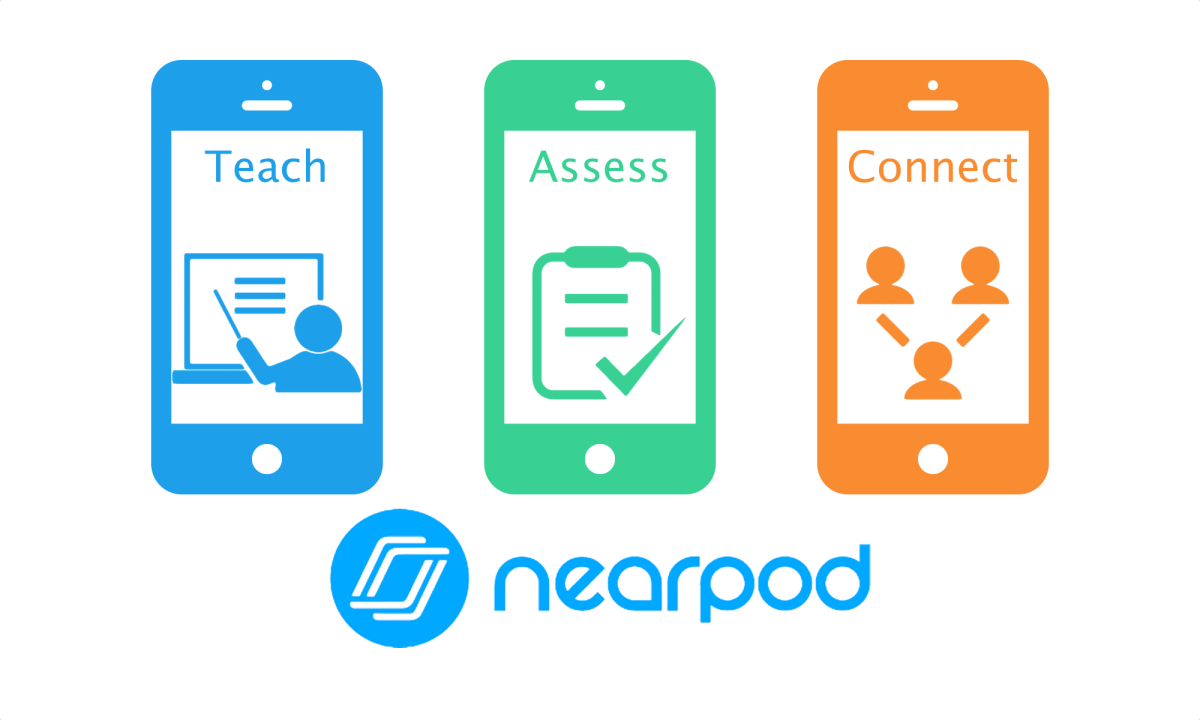
What is Nearpod like in terms of lessons? Firstly, what’s awesome about Nearpod is how flexible its learning styles are. Through the app, you have two options: launch a live session or use the student-paced option. The former simply lets you live-stream a lesson, providing students an entrance code through which they can access the stream. It’s the more traditional method to use if you have scheduled classes.
On the other hand, the latter, more innovative option is student-paced. You also share a code to let students access this lesson. However, the difference is that it isn’t live, and students can accomplish it at their speed. This helps make the learning process more flexible and less intimidating for students.
Creating Lessons
Now, onto the lessons. What is Nearpod going to offer you here? The key quality we’re going to talk about in this section is flexibility. You see, Nearpod has tons of ready-made lessons that you can utilize to educate students. Hence, you don’t even have to create a lesson plan or slideshow to teach your class. Simply pick one from the thousands of templates, and you’re good to go.
On the other hand, you can also revise these pre-made lessons or create one from scratch. Regardless of which you choose, however, you’ll easily be able to utilize many customization features. For example, you can convert existing files and content and import them to Nearpod. Whether it’s a PDF, PowerPoint, or image, you can quickly incorporate them into the app.
Furthermore, you can also add videos, audio files, web content, or even follow Twitter live streams on the app. Tons of handy features integrate third-party apps. These include Google (Google Drive, image search, docs, forms, etc.), Dropbox, Microsoft, and other apps.
Activities & Interactive Learning
So, what is a Nearpod session truly like for the student? Is it simply viewing the teacher’s slideshow and watching them teach? Not so, my dear friend. What makes Nearpod amazing is that it integrates interactive learning through its website and app. There are several ways Nearpod does this.
First, quizzes and polls — a vital part of teaching — are easily given to the students. Moreover, these quizzes don’t come in your regular question-and-answer format like the 2010s. Instead, the quizzes can be interactive, with students naming parts of a 3D model molecule by tapping each area. In some sense, Nearpod “gamifies” quizzes and interactions, making it more immersive.
Second, it has a neat feature wherein you can make YouTube videos interactive as well. You can do so simply by adding assessment questions throughout the videos you include. This not only helps with information retention but also ensures that your students stay engaged.
Third, Nearpod is also compatible with virtual reality (VR) headsets to help simulate immersion. With it, you can take students on “school trips” without having them physically move.
Fourth, students can also draw on slides directly as classes go on. They can add images, annotations, diagrams, and much more to enhance their note-taking experience. There are also collaboration boards (like Zoom) that help them contribute to the discussion in a more hands-on way.
Why to use Nearpod
Teachers can use Nearpod effectively in the classroom to support student learning in a variety of ways. Give students opportunities for interaction and immediate feedback by having them draw on a map, respond to a poll question, post to a collaboration board, or take a multiple-choice quiz. Besides, teachers can incoroprate virtual reality trips and 360° views into their slides using the build-in capabilities the Nearpod offers. By watching videos and reviewing notes students can review the key concepts of the lesson. In addition they are able to follow the lesson on their own devices at their own pace or teachers can lead a synchronized session where students can follow the lesson in real-time. This way the learners become active participants in their education while teachers get valuable feedback on student learning.
Nearpod augments the normal PowerPoint experience. Τhe presentation experience is enhanced by administering formative assessments to students as they work and allowing the teacher to monitor students as they take notes, draw or map concepts, answer quizzes and more. This is formal learning that uses the traditional classroom model and elevates it to include more interactive elements.