
Keyboard Shortcuts
So far, we’ve covered two keyboard shortcuts:
- Ctrl + ,: Open settings
- Ctrl + Shift + P: Open command palette
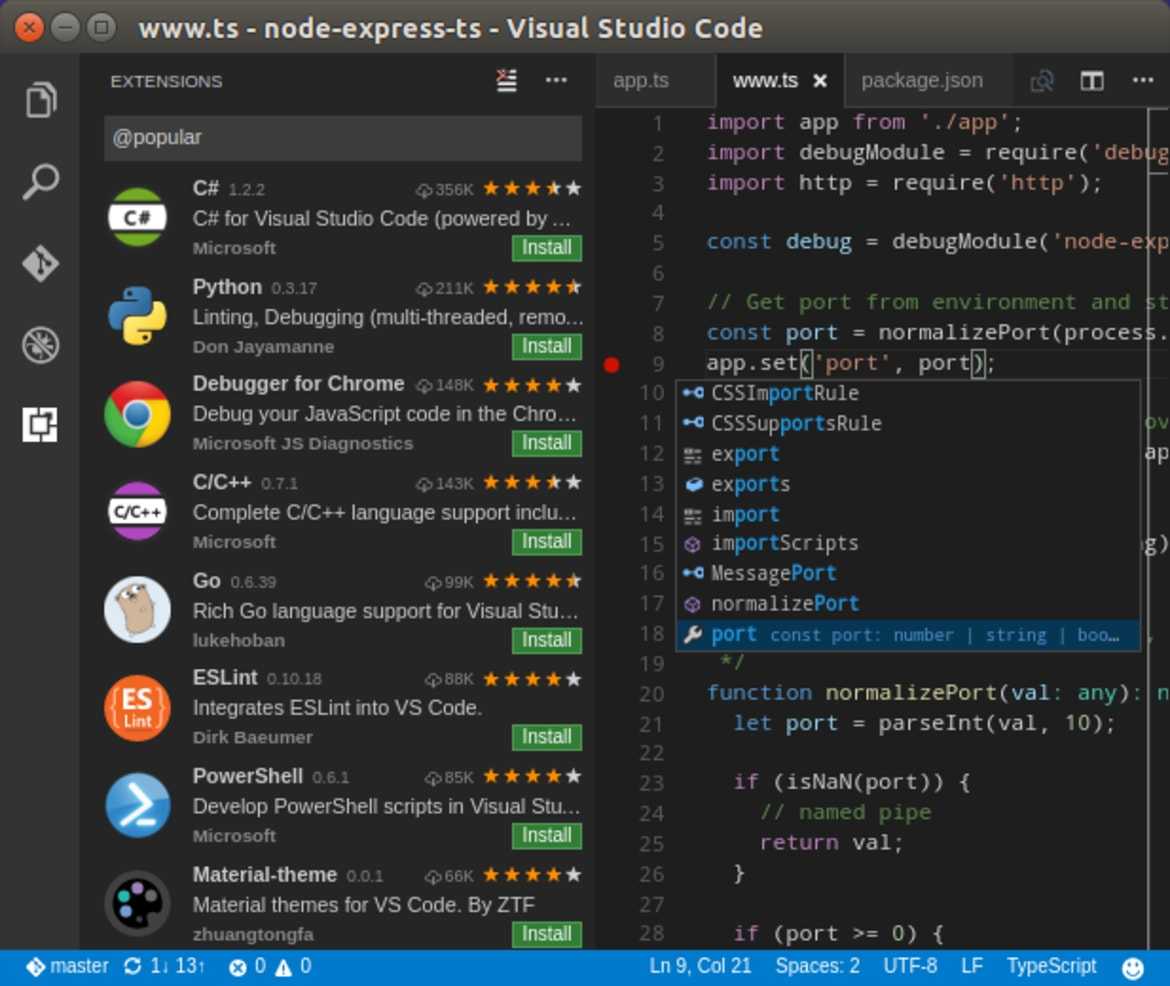
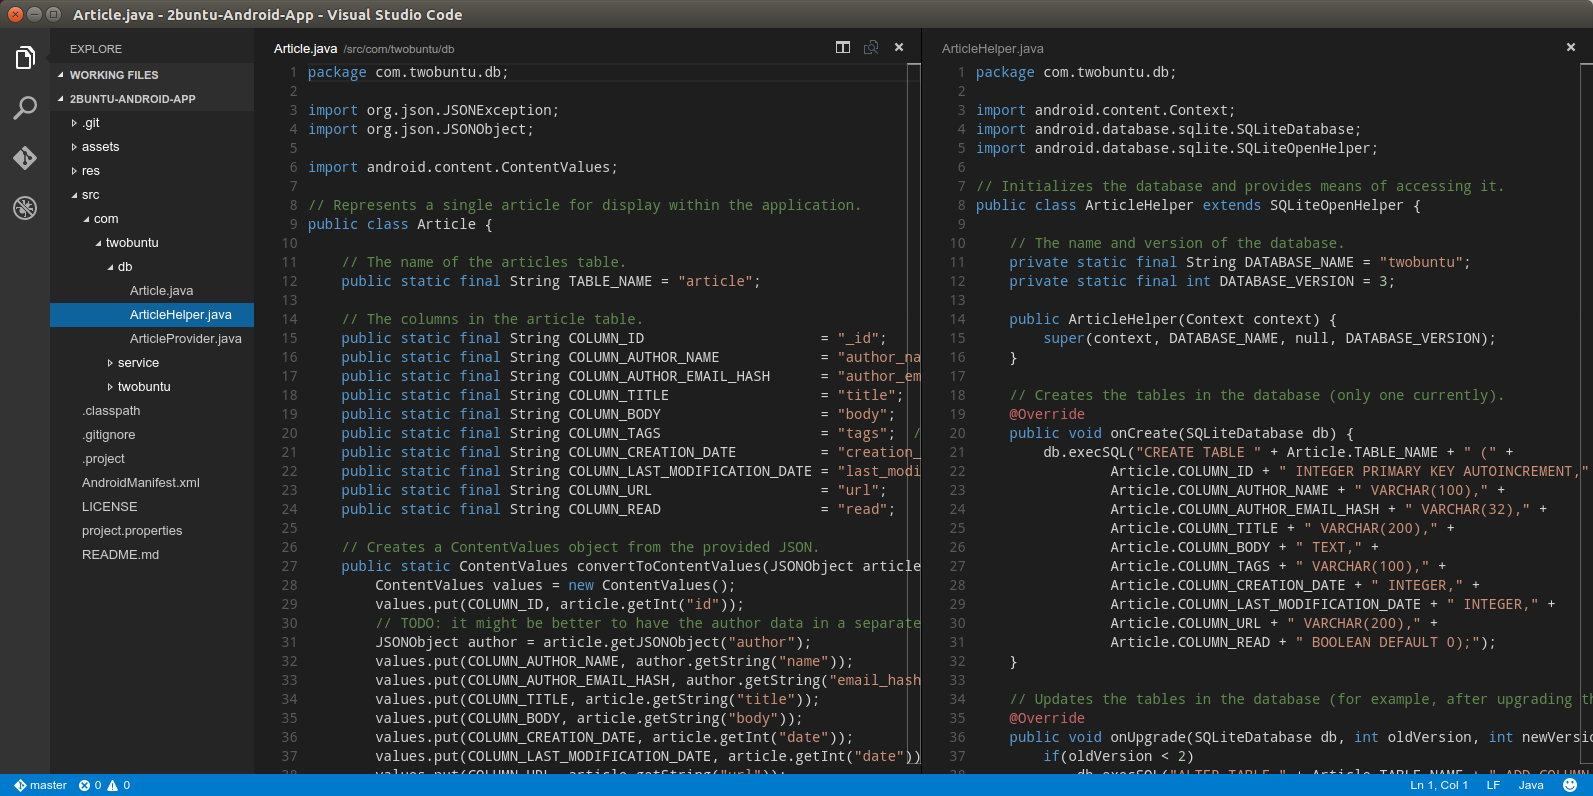
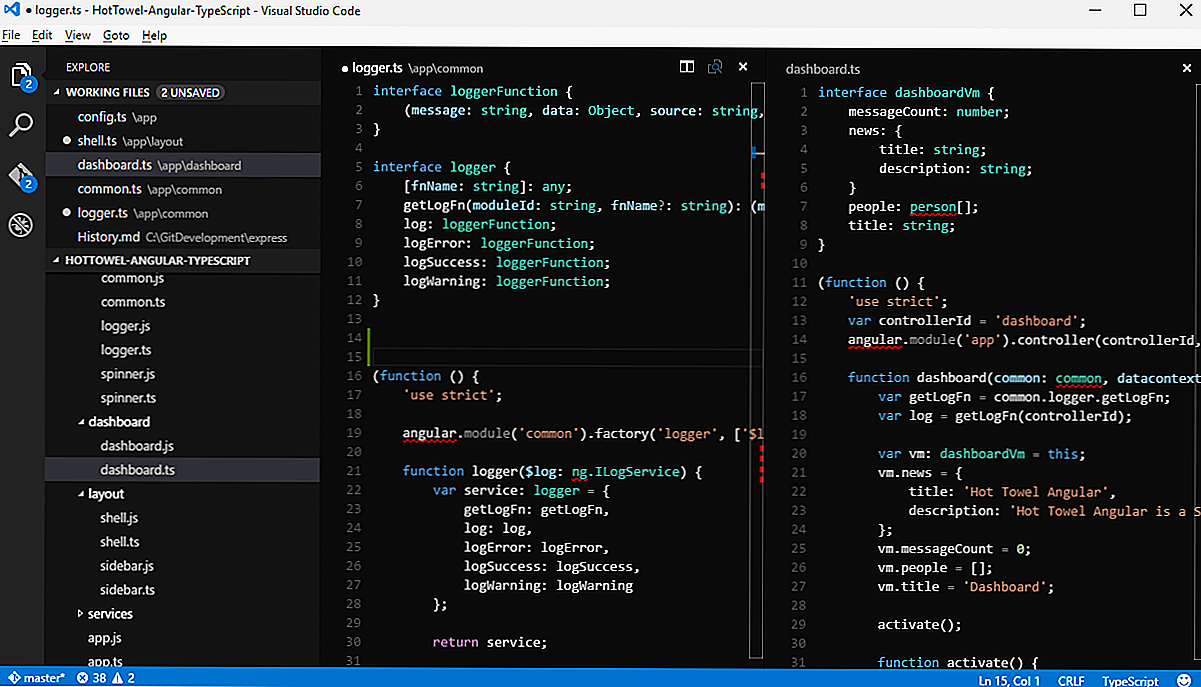
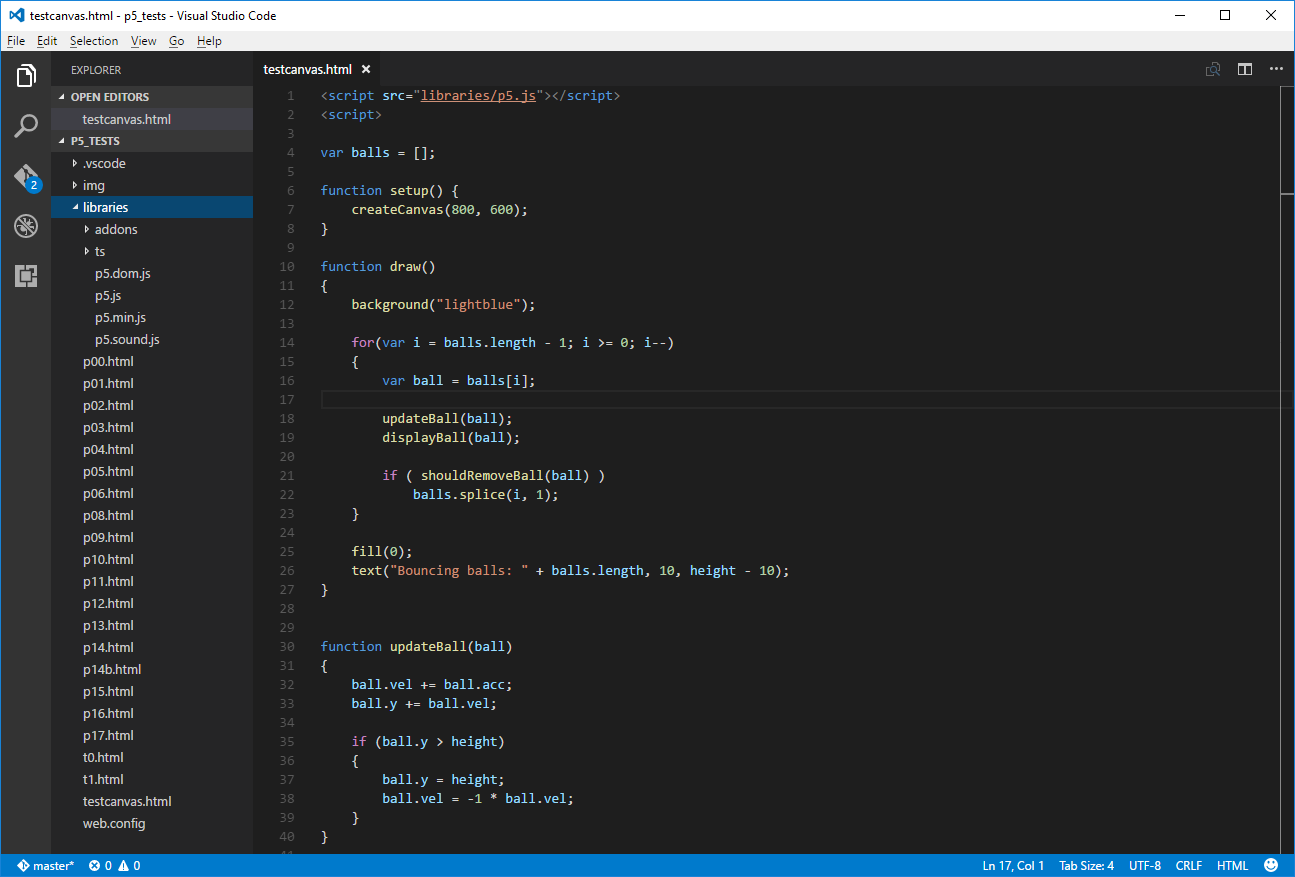
The Command Palette provides access to Visual Studio Code’s entire functionality including keyboard shortcuts for common operations. If you install an extension, any manually triggered actions will be listed here. However, for extensions such as Prettier and Beautify, they’ll use the same Format command. Visual Studio Code also has its own built-in formatter plugin. To specify which plugin should execute the action, you need to go to the Settings editor and change the Default Formatter configuration. Here’s an example of how I’ve set it in mine:
You can also specify a different formatter for a specific language mode. Here are several more keyboard shortcuts you need to memorize:
- Ctrl + P will let you navigate to any file or symbol by typing its name
- Ctrl + Tab will cycle you through the last set of files opened
- Ctrl + Shift + O will let you navigate to a specific symbol in a file
- Ctrl + G will let you navigate to a specific line in a file
Here are my favorite commands I use often while writing code:
- Ctrl + D: press multiple times to select identical keywords. When you start typing, it renames all the selected keywords
- Ctrl + Shift + Up/Down: Add Cursor above or below in order to edit multiple lines at once
- Alt + Shift + Click: Add Cursor at multiple locations in order to edit in different sections of code simultaneously
- Ctrl + J: Add 2 or more lines into one. Works perfectly if you’ve a formatter active as you edit code
- Ctrl + F: Search for a keyword in current file
- Ctrl + H: Search and replace in current file
- Ctrl + Shift + F: Search in all files
If you visit the Menu options, you’ll find shortcut keys for most commands. Personally, I’ve never gotten used to some of the default shortcut keys that come with Visual Studio Code due to using editors such as Atom for a long time. The solution I found was simply to install the Atom Keymap. This allows me to use the shortcut key Ctrl + \ to toggle the Side Bar. If you’d like to edit the keyboard bindings yourself, simply go to the menu under File > Preferences > Keyboard Shortcuts. (Code > Preferences > Keyboard Shortcuts on macOS).
Как создать новый проект C # в VS Code
Чтобы создать новый проект C # (приложение .NET), вам сначала потребуются соответствующие требования для настройки шаблонов для проекта, а затем используйте VS Code, чтобы создать для него новые папки. Вот что вам нужно сделать:
- Скачать A. Расширение C # и установите его на VS Code.
- Загрузите и установите .NET SDK 5.0 или новее. При выборе файла для загрузки используйте соответствующую систему.
- Запустите VS Code.
- Выберите Файл> Открыть папку (или Файл> Открыть в macOS) в главном меню VS Code.
- В диалоговом окне выбора создайте новую папку, переименуйте ее соответствующим образом, затем нажмите «Выбрать папку» (Открыть в macOS).
- Откройте терминал VS Code (командная строка), выбрав «Просмотр», затем нажмите «Терминал».
- Введите следующую команду: dotnet new console. Этот шаблон создаст простое приложение с тем же именем, что и папка, в которой оно находится.
- VS Code откроет простую программу, которая использует пространство имен по вашему выбору. Затем вы можете продолжить добавлять в свою программу дополнительные функции.
- Перед запуском программы вам необходимо сохранить изменения в VS Code. Изменения файлов не сохраняются при запуске программы.
- Используйте команду dotnet run для запуска программы после ее сохранения.
Вот и все. С расширением C # вы можете создавать новые папки и создавать в них новые проекты через командную строку.
Горячие клавиши
Горячие клавиши — это помощник программиста и инструмент для быстрого выполнения рутинных задач. Предположим, нам нужно создать новый HTML-файл и написать его структуру. Без горячих клавиш этот процесс выглядит так:
- Переходим в меню и открываем вкладку «Файл».
- Выбираем команду «Новый файл».
- Возвращаемся в меню и повторно открываем вкладку «Файл».
- Находим команду «Сохранить как».
- Пишем название файла, выбираем место хранение, указываем расширение (HTML) и нажимаем кнопку «Сохранить».
- Вручную прописываем скелет HTML-документа или тратим время, чтобы найти и скопировать структуру из интернета.
Мы превратили простую задачу в многоэтапный процесс, где нужно постоянно отрывать руки от клавиатуры, хвататься за мышку и искать нужные команды в выпадающем списке. Теперь посмотрим, как это же действие можно выполнить с помощью горячих клавиш. Для примера мы используем Mac OS — в других системах горячие клавиши будут немного отличаться, но сути это не меняет:
- Command + N — создаём новый файл.
- Shift + Command + S — включаем команду «Сохранить как».
- Пишем название файла, выбираем место хранения, указываем расширение (HTML) и нажимаем кнопку «Сохранить».
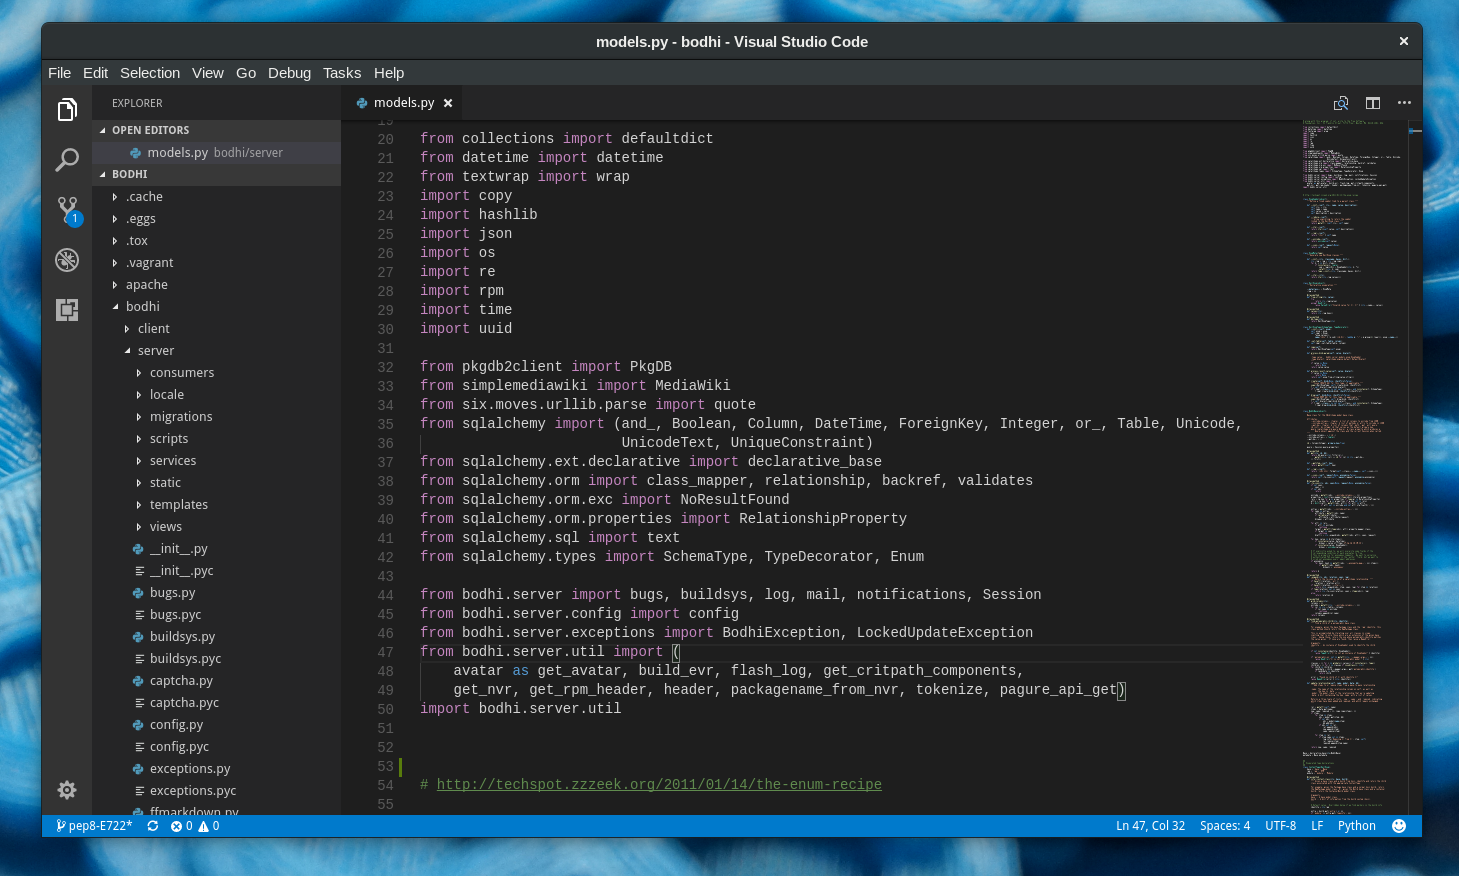
- ! + tab — создаём структуру HTML-документа и можем работать.
С горячими клавишами мы сократили количество рутинных действий и быстро выполнили простую задачу — создали HTML-файл и написали структуру. В случае с объёмными проектами горячие клавиши помогают сэкономить часы работы.
В VS Code под горячие клавиши запрограммированы все команды. За один раз их не выучить, да и не нужно — понаблюдайте за своим рабочим процессом и выберите одну команду, которую вы выполняете чаще остальных. Посмотрите, какие горячие клавиши помогают автоматизировать процесс — выпишите эти клавиши и попробуйте применить. Когда привыкнете — выберите другую команду, и так до тех пор, пока не научитесь выполнять большинство действий без мышки и меню.
Для просмотра всех горячих клавиш нажмите в боковой панели на шестерёнку и выберите раздел «Сочетания клавиш». Или воспользуйтесь горячими клавишами и нажмите Command + K + Command + S. Перед вами появится длинный список с названием команд и комбинацией кнопок, которые установлены по умолчанию — любую команду можно перепрограммировать или найти с помощью поисковика.
Конфигурация нового проекта
После создания нового проекта в Visual Studio Code 2022, вам может понадобиться настроить его конфигурацию для удобной и эффективной работы. В этом разделе мы рассмотрим основные варианты конфигурации нового проекта.
Настройка расширений:
Visual Studio Code предлагает широкий спектр расширений, которые помогут вам улучшить и приспособить пользовательский интерфейс, автоматизировать задачи, добавить поддержку различных языков программирования и многое другое. Чтобы настроить расширения, перейдите во вкладку «Extensions» (Расширения) в левой панели и введите название расширения, которое вас интересует, в поле поиска. После установки расширение будет готово к использованию.
Настройка корневой папки:
При создании нового проекта в Visual Studio Code, убедитесь, что вы выбрали правильную корневую папку для своего проекта. Корневая папка будет показана в структуре файлов в левой панели. Если вы не выбрали корневую папку при создании проекта, вы можете добавить ее позже, щелкнув правой кнопкой мыши на нужной папке и выбрав «Add Folder to Workspace» (Добавить папку в рабочее пространство).
Настройка файла настроек:
Visual Studio Code позволяет настроить ряд параметров через файл настроек. Чтобы открыть файл настроек, выберите вкладку «File» (Файл) в верхней панели, затем выберите «Preferences» (Настройки). В файле настроек вы можете изменить различные параметры, такие как тема оформления, шрифт, автосохранение файла и другие.
Настройка сниппетов:
Сниппеты позволяют вам быстро вставлять часто используемый код или шаблоны в ваш проект. Visual Studio Code предлагает встроенные сниппеты для различных языков программирования, но вы также можете создать свои собственные сниппеты. Чтобы настроить сниппеты, выберите вкладку «Preferences» (Настройки) в верхней панели, затем выберите «User Snippets» (Сниппеты пользователя). Здесь вы можете добавить новые сниппеты или изменить существующие по своему усмотрению.
Настройка сборки и отладки:
Visual Studio Code обеспечивает поддержку сборки и отладки проектов на различных языках программирования. Для каждой конкретной платформы или языка вам может потребоваться установка соответствующих расширений или установок. Прежде чем начать сборку и отладку, ознакомьтесь с документацией и ресурсами для вашей конкретной платформы или языка программирования.
Вот основные способы настройки нового проекта в Visual Studio Code 2022. Не стесняйтесь экспериментировать с различными настройками и функциями, чтобы найти наиболее подходящий для вас рабочий процесс.
Работа с файлами
Visual Studio Code предоставляет удобные инструменты для работы с файлами в рамках проекта. В этом разделе мы рассмотрим основные операции, которые вы можете выполнять с файлами в среде разработки.
Открытие файла
Для открытия файла в Visual Studio Code вы можете использовать команду «Открыть файл» в меню «Файл» или сочетание клавиш «Ctrl+O». После выбора файла он будет открыт в редакторе, готовый к редактированию.
Создание нового файла
Чтобы создать новый файл в проекте, вы можете воспользоваться командой «Создать файл» в меню «Файл» или сочетание клавиш «Ctrl+N». В появившемся окне введите имя файла и его расширение, после чего файл будет создан в директории проекта.
Сохранение файла
После внесения изменений в файл вы можете сохранить его с помощью команды «Сохранить» в меню «Файл» или сочетанием клавиш «Ctrl+S»
Обратите внимание, что Visual Studio Code автоматически сохраняет изменения во время работы, поэтому в большинстве случаев вам не придется вручную сохранять файл
Переименование файла
Если вам необходимо переименовать файл, вы можете кликнуть правой кнопкой мыши по его имени в боковой панели или нажать сочетание клавиш «F2». Введите новое имя файла и нажмите «Enter», чтобы завершить операцию.


Удаление файла
Чтобы удалить файл из проекта, вы можете кликнуть правой кнопкой мыши по его имени в боковой панели и выбрать «Удалить» или нажать сочетание клавиш «Shift+Delete». Подтвердите операцию удаления, если будет необходимо.
Копирование и перемещение файлов
Visual Studio Code позволяет копировать и перемещать файлы с помощью команд «Копировать» и «Вырезать» в контекстном меню или сочетаний клавиш «Ctrl+C» и «Ctrl+X» соответственно. Затем вы можете вставить файлы в нужные директории, используя команду «Вставить» или сочетание клавиш «Ctrl+V».
Работа с файлами в Visual Studio Code предельно проста и удобна. Используйте эти инструменты, чтобы эффективно организовать и управлять файлами своего проекта.
Visual Studio
Microsoft’s IDE, Visual Studio, is produced for the community of C# and .NET developers, and for years now it has served that user base well. Although other stacks can make use of the IDE, the proprietary stack options of Microsoft are more heavily concentrated on this platform. Amongst the many traditional features of an IDE, Visual Studio also offers a bevy of options specific to the Microsoft ecosystem by its selection of Azure specific plugins. The ability to build and maintain .NET framework (not .NET Core) is another major selling point to Visual Studio, as there is very little competition for the vast coverage that Visual Studio offers. Visual Studio comes available to Windows and Mac users, however Mac users are more limited in their capabilities with the product. Check out these Visual Studio plugins!
Pricing: Community (Free), Business ($45/month), Enterprise ($250/month)
Features include:
- Build Environment and Output
- Debugging Tools and Break Points
- Project Builder for C# and .NET apps
- Azure Cloud integrations
- Project Explorer
- Test Development Integrations
- And much more
Оптимизация нового рабочего пространства VS Code
Благодаря встроенной поддержке различных языков программирования, включая TypeScript, Javascript и Node JS, Workspace является идеальным инструментом для разработчиков. Эти советы сделают платформу более эффективной и удобной для навигации.
Терминалы
Возможно, вы используете терминал по умолчанию, предоставляемый вашей операционной системой. С VS Code платформа хотела сделать так, чтобы вам не приходилось полагаться на функцию ОС. VS Code поставляется со встроенным терминалом, в котором собраны все ваши требования. Это отличный способ следить за своими проектами разработки и обеспечивать их бесперебойную работу. Благодаря возможности переименовать или изменить цвет значка также проще различать различные терминалы для вашего проекта.
Обернуть вкладки
Эта функция удобна для разработчиков, которые работают над большими проектами, в которых используется несколько компонентов. При переходе от одного компонента к другому может быть сложно отслеживать все файлы. В VS Code вкладки появляются в браузере, и вам придется прокручивать от одной к другой, когда вы хотите просмотреть, что находится внутри них.
Более эффективным методом было бы обернуть эти вкладки, нажав Cmd + и выполнив поиск «Перенести вкладки». Эта функция упростит просмотр того, что находится на разных вкладках.
Закрепить вкладки
Как разработчик, желательно, чтобы ваше рабочее пространство было как можно более организованным. Вы можете сделать это, прикрепив вкладки, которые вы часто используете, к передней части экрана. Вы также можете настроить внешний вид этих вкладок, нажав кнопки Cmd + или Ctrl + и выполнив поиск «Закрепить вкладку».
Пользовательский интерфейс
Интерфейс вашего терминала настроен так, что он имеет различные опции, такие как проводник, поиск, менеджер проектов и вывод. Он также имеет раздел, похожий на нижний колонтитул, где вы можете легко найти и изменить несколько деталей. В VS Code эти вкладки можно перетаскивать, переставляя их по своему вкусу. Вы можете поместить наиболее часто используемые параметры ближе к началу или настроить их так, чтобы сделать их более доступными. Персонализация пользовательского интерфейса упрощает навигацию по рабочему пространству.
Язык
При создании новой страницы в Visual Studio Code файл не имеет названия, и вам придется заполнить эти данные самостоятельно. Затем вам нужно будет перейти к имени файла и ввести расширение. Процесс может быть утомительным, особенно при работе с большим количеством файлов.
Вы можете оптимизировать процесс, разрешив среде IDE просматривать файлы. Затем он будет использовать предыдущую систему именования для присвоения имен новым файлам, которые вы создаете.
Предварительный просмотр
У VS Code есть некоторые разочаровывающие особенности. Например, если вы откроете файл в режиме предварительного просмотра, а затем сразу же откроете другой, не внося изменений в первый, программа закроет первый файл. Если вы хотите изменить это и оставить оба файла открытыми в режиме предварительного просмотра, перейдите в «Настройки» и найдите «Включить предварительный просмотр». Установите флажок, чтобы внести необходимые изменения.
Настройка нового ПК
Возможно, вы настроили и персонализировали свое рабочее пространство VS Code по своему вкусу только для того, чтобы получить новый компьютер. Хотя новая машина — это здорово, необходимость перенастраивать рабочее пространство может раздражать.
Настройка синхронизации позволяет сохранить все ваши конфигурации в одном месте. Когда вы получите другое устройство, оно автоматически применит настройки старого устройства к новому рабочему пространству VS Code. Таким образом, вам не нужно перенастраивать Workspace на новом ПК.
Открыть повтор
Начало работы с отладкой веб-приложения в рабочей среде может быть сложным и трудоемким. С помощью OpenReplay вы можете отслеживать и воспроизводить все, что делают ваши пользователи, что позволяет вам видеть, как ведет себя приложение, и обнаруживать любые проблемы, которые могут возникнуть. OpenReplay — отличный вариант, поскольку это бесплатная альтернатива с открытым исходным кодом другим приложениям для отладки, таким как LogRocket и FullStory. Использование программы отладки экономит много времени при использовании Workspace.
Гитхаб
VS Code поставляется со встроенной интеграцией с GitHub. Это позволяет быстро отправлять файлы на GitHub. Подключение к GitHub из VS Code означает, что вам не нужно тратить время на написание команд git. Интеграция с VS Code упрощает обслуживание ваших файлов.
Код Visual Studio против Atom: Сообщество
И Visual Studio Code, и Atom в настоящее время имеют большие сообщества и пользовательские базы. Хотя Visual Studio в настоящее время кажется наиболее популярной из этих двух, у Atom все еще есть специальное сообщество пользователей и разработчиков. Если Microsoft решит отказаться от поддержки любого редактора, это может измениться, но не похоже, что это произойдет в ближайшее время.
Похоже, что сообщество разработчиков ПО с открытым исходным кодом больше поддерживает Atom, чем Visual Studio Code, из-за того, что Microsoft принадлежит к последнему. Однако сообщество пытается создать бесплатную копию Visual Studio Code от Microsoft. Оба редактора имеют открытый исходный код, но некоторым пользователям не нравится сбор данных, используемый обоими приложениями.
Introduction
Contents
How To Create New Project In Visual Studio Code : Welcome to the exciting world of Visual Studio Code (VS Code), one of the most popular and versatile code editors available today! Whether you are a seasoned developer or just starting your programming journey, creating a new project in VS Code is a fundamental step that sets the stage for your coding adventures. In this guide, we’ll walk you through the process of creating a new project in VS Code, equipping you with the essential knowledge to embark on your coding endeavors with confidence.

Ensure you have VS Code installed on your system. It is available for Windows, macOS, and Linux, and you can download it from the official website. Once you have VS Code up and running, the next step is to launch the editor. Upon opening VS Code, you’ll be welcomed by a clean and minimalist interface, providing you with a distraction-free coding environment. To create a new project, you have two main approaches: working with an existing project folder or initializing a new project from scratch.
For existing projects, simply navigate to the File menu and select “Open Folder.” Locate the folder containing your project files, and upon selection, VS Code will load the project for you to start coding right away.
Шаг 6: Запуск и отладка проекта в VS Code
После успешного создания проекта в VS Code, настало время запустить его и убедиться, что он работает корректно. Для запуска проекта в VS Code можно использовать несколько способов: через команду встроенного терминала, через плагин или нажатием специальной кнопки на панели.


Один из простых способов запустить проект — это использовать встроенный терминал в VS Code. Для этого откройте терминал, если он не открыт, и перейдите в папку вашего проекта с помощью команды cd путь_к_папке. Затем, чтобы запустить проект, введите команду, связанную с его запуском, например:
Если в вашем проекте используется другой инструмент для запуска, то команда может отличаться, поэтому ознакомьтесь с документацией проекта для получения точной команды.
Если вы предпочитаете использовать плагин для запуска проекта, то вам придется установить соответствующий плагин из маркетплейса VS Code. После установки плагина, пройдите по следующим шагам:
- Откройте панель с расширениями (нажмите на иконку с квадратиками справа вверху).
- Найдите установленный плагин и нажмите на кнопку «Настроить» или «Настроить плагин».
- В зависимости от плагина, вам может потребоваться указать путь к файлу, который нужно запустить, либо выбрать определенные настройки запуска.
- После настройки плагина вы сможете запустить проект нажатием на кнопку «Запуск» или аналогичную.
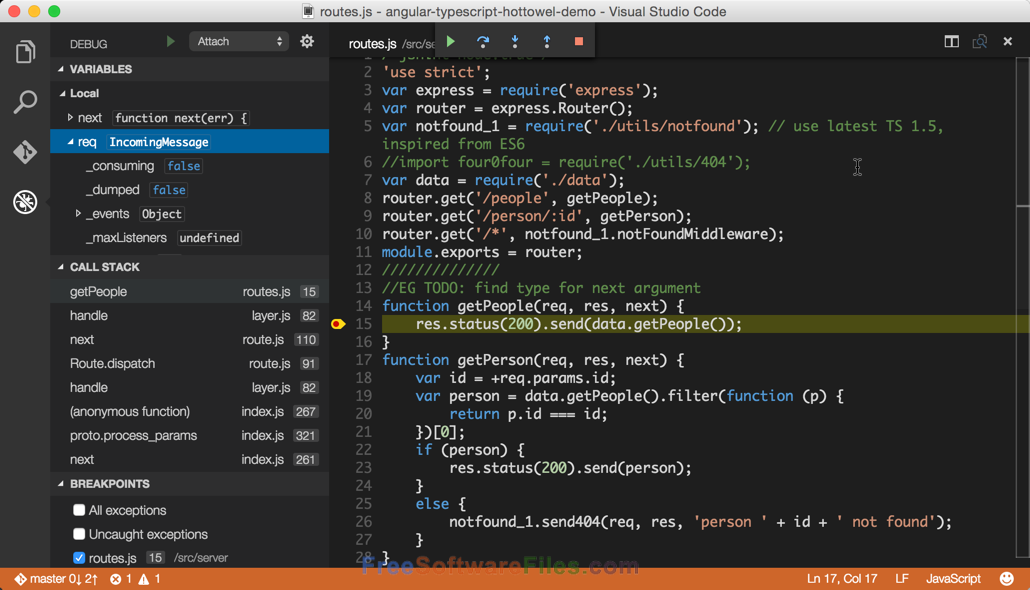
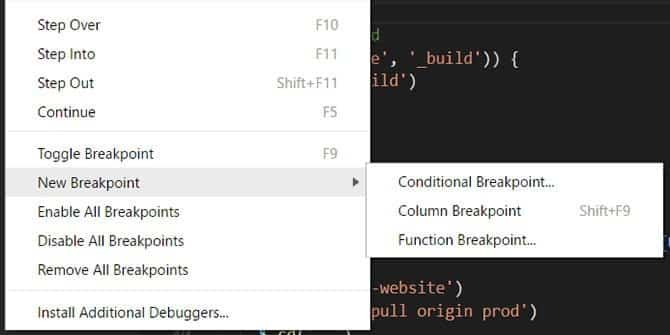
Если вам необходимо отлаживать проект, VS Code также предоставляет инструменты для отладки. Для того чтобы настроить и запустить отладку, вам потребуется воспользоваться следующими шагами:
- Откройте панель отладки (нажмите на значок с шестеренкой слева вверху).
- Нажмите на кнопку «Настроить и запустить отладку» (выглядит как шестеренка с зеленой стрелкой).
- Выберите нужную конфигурацию отладки (например, «Node.js» или «Chrome») и, при необходимости, внесите необходимые изменения в файл конфигурации.
- После настройки вы сможете запустить отладку, нажатием на кнопку «Запустить отладку» или аналогичную.
После запуска проекта или отладки вы сможете увидеть результат своей работы и провести необходимые проверки. Вы также сможете наблюдать за выполнением кода и исправлять ошибки при необходимости, используя другие инструменты для отладки.
How to Create a New Python Project in VS Code
Python is one of the more popular programming languages, and VS Code has extensions that make programming in Python easy. Here’s what you need to do:
- Install the official Python extension.
- Use a Python interpreter based on your OS. Windows users should use python.org, macOS users will need to use Homebrew and use the command “brew install python3,” while Linux users already have integrated Python and need only to use to obtain more functions.
- Use a terminal to determine if Python has been properly installed. The command line “python3 –version” will work on macOS/Linux, while Windows needs the line “py -3 –version” instead.
- Create an empty folder with the name of your project.
- Use VS Code to open the folder via “File > Open Folder” from the main menu.
- Configure the Python interpreter via the “Python: Select Interpreter” command in VS Code.
- On the file explorer toolbar (once you’ve opened the folder with VS Code), create a new file (use the “New File” button) with the same name as the folder and an extension “.py” (this will let VS Code know it’s a Python file).
- Edit your source code as needed, and save the result.
- Use the “Run” command on the top side of the editor to run the program.
Prerequisites
In order to follow this guide, you need to be proficient in at least one programming language and framework. You also need to be conversant with versioning your project code with git. You’ll also need to have an account with a remote repository platform such as GitHub. I recommend you setup SSH Keys to connect with your remote repo.
We’ll use a minimal Next.js project to demonstrate VS Code features. If you’re new to this, don’t worry — the focus of the guide isn’t the framework or language used. You can transfer the skills we’ll teach to any language and framework you work with in Visual Studio Code.
Why would you use Visual Studio over VS Code?
Well, there are a few reasons.
To most developers and teams, these factors are insignificant, but for the minority these are important and will tip the scale in Visual Studio’s favor.
1. Large, out-of-the-box feature set
Visual Studio has much more functionality than VS Code out-of-the-box. In certain cases, it may perfectly fit your project/workflow requirements without any additional configuration / extensions. In other words, whenever you need an extension in VS Code, Visual Studio probably already has the feature baked-in. The comprehensive feature set may outweigh the poor load times.
This may be attractive for companies who want to standardize the tooling and workflows for all of their developers to avoid confusion.
2. Team collaboration features
Team collaboration on development and debugging is treated as a first-class-citizen in Visual Studio. If your team’s workflow is heavily integrated with the collaboration features of Visual Studio, you’re more than likely going to be using it.
3. Analysis, Profiling, Debugging
For things like heavy code analysis, performance profiling, and snapshot debugging, Visual Studio is also very well-suited.
4. Game Development
Visual Studio is also extremely common in the game development industry. If you’re a game developer who wants to assimilate with experienced game development teams, Visual Studio is probably the right choice.
What is Visual Studio Code?
Visual Studio Code (also called VS Code) is like the mini version of Visual Studio. It is an open-source and lightweight text editor available on Windows, Mac, and Linux. There’s also the web version available at .
VS Code comes with built-in support for JavaScript, TypeScript and Node JS, but you can use it to code in any language you want. All you need to do is download the relevant extensions.
Some of the extensions are made by Microsoft, but a lot of others are third-party extensions.
Unlike Visual Studio, you don’t need much space to download VS Code. You might not need more than 200 MB of disk space to download it.
Since it supports JavaScript, TypeScript, and Node JS by default, you get a debugger and intellisence, too. But to get intellisence, a compiler, and debuggers for other languages, you have to download relevant extensions.
Now you know that Visual Studio is an IDE and Visual Studio Code is a text editor. So let’s summarize their main differences next.
Installing Visual Studio Code
This section will cover how to install VS Code on macOS step by step. Let’s get started.
NOTE
Due to the essential differences between Windows and macOS, the Windows users need to do minor modifications to install VS Code. However, installing VS Code on Windows is straightforward and similar to installing other Windows applications.
- First, download Visual Studio Code for macOS or Windows from its official website. The download page detects your operating system automatically and displays a big button for downloading the latest version of the Python installer on your computer. If it doesn’t, click the arrow down button and choose the stable VS Code release that matches the operating system installed on your computer:
- Double-click the downloaded file to extract the archived contents:
- Move the Visual Studio Code application to the Application folder to make it available in the macOS launchpad:
- Launch Visual Studio Code, and then open a folder where your Python scripts exist or create a new one. For example, create a new folder on your Desktop, and name it , then try to open the folder on VS Code. Usually, VS Code needs your permission to access files in your Desktop folder; click OK: Also, you may need to declare that you trust the authors of the files stored in your Desktop folder:
- Create a new file with a extension. For example, create a new file and name it . VS Code detects the extension and wants to install a Python extension: To work with Python inside VS Code, we need to use the Python extension, which brings many useful features, such as code completion with IntelliSense, debugging, unit testing support, etc: Click on Install: We can also install the Python extension by browsing extensions. Click on the Extensions icon on the left side of VS Code:
This will show you a list of the most popular VS Code extensions on the VS Code Marketplace. Now, we can select the Python extension and install it:
- Once the extension is installed, you have to select a Python interpreter. Click on Select Python Interpreter: Then select the recommended Python interpreter on the list: If you have multiple Python versions installed on your Mac, choose the latest version: You can also select a Python interpreter using the Python: Select Interpreter command from the Command Palette. To do so, press CMD + SHIFT + P, type Python, and choose Select Interpreter.
Python Interactive Window
The good news is that Visual Studio Code supports working with Jupyter Notebooks. To run the current file in an interactive window, right-click on the file name in the explorer pane, and select the Run Current File in Interactive Window option from the context menu, as follows: 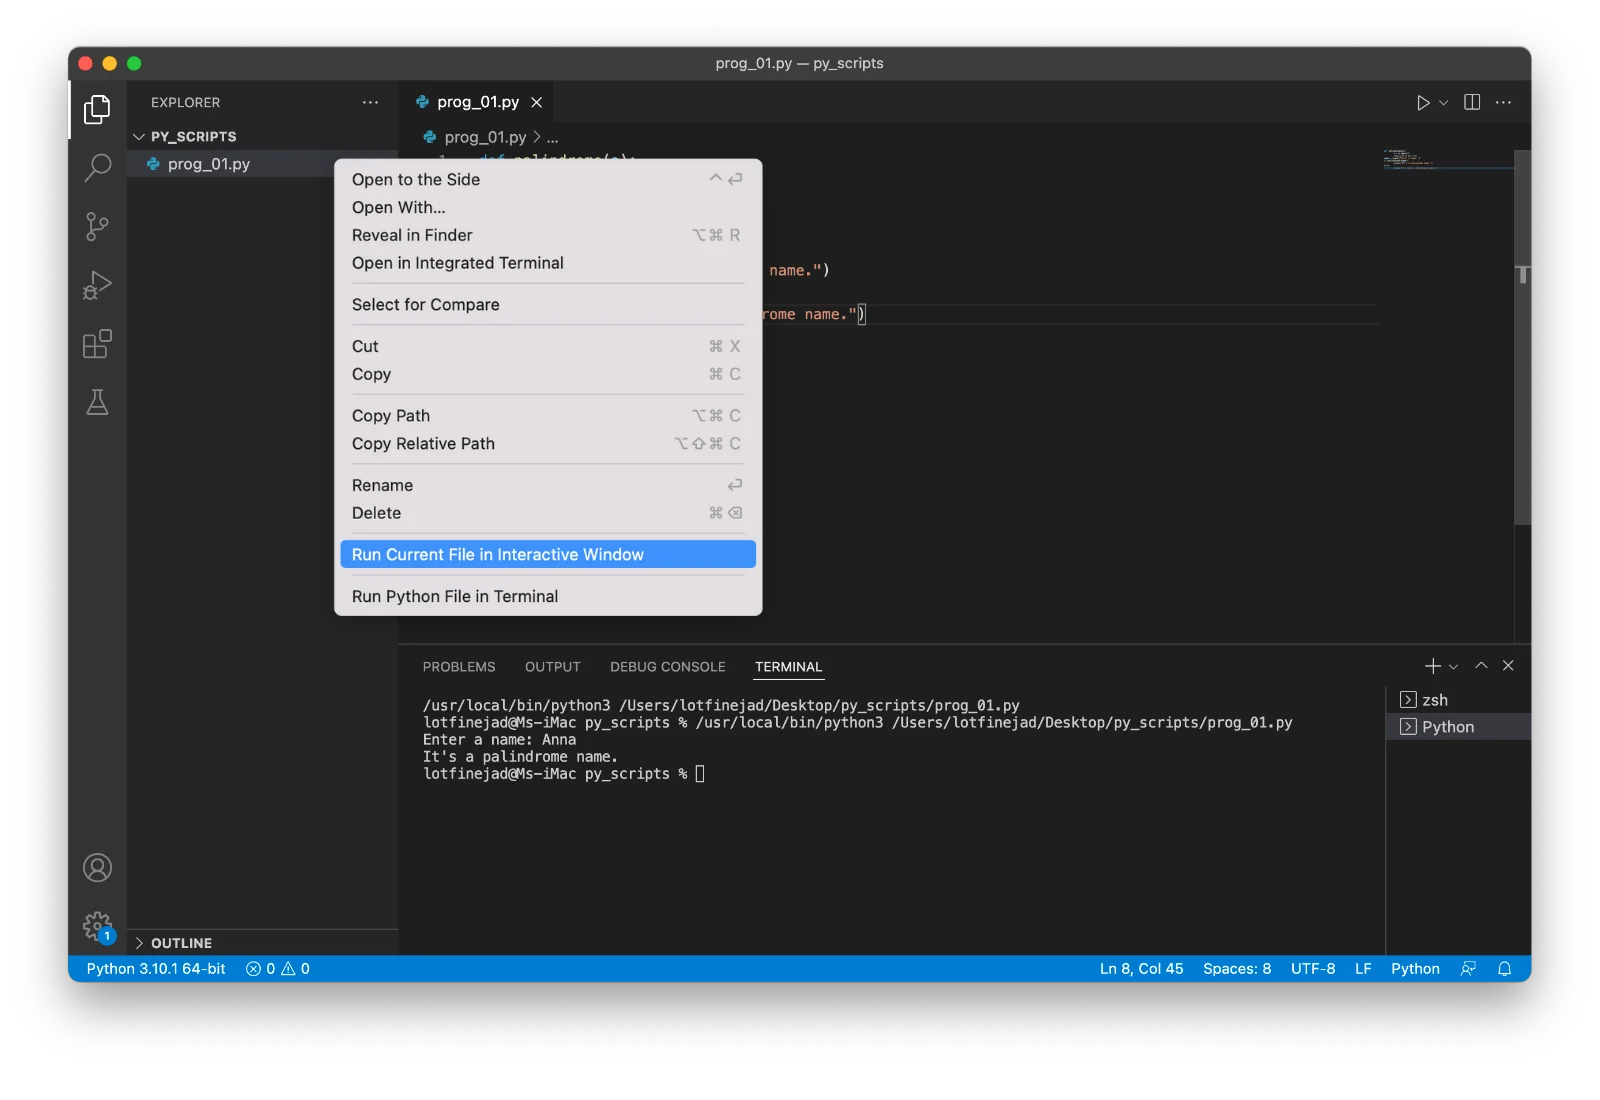 If the Jupyter package hasn’t been installed yet, it displays a dialog box and asks you to install it: After the installation, an interactive window will appear, and in this case, you need to enter a name to check if it is palindrome or not: Finally, you can see the result in the interactive window, as follows: Moreover, to create a new Jupyter Notebook in VS Code, open up the Command Palette, and select Jupyter: Create New Jupyter Notebook, as follows: It will create a new Jupyter Notebook, and you can simply create markdown and code cells in VS Code:
Difference Between Visual Studio vs Visual Studio Code
Visual Studio:
- Visual Studio is extensively used on .NET projects. The community version is free, but it is not free if you wish to make the most of it.
- As the name intimates, it is an integrated development environment (IDE), and it includes all the characteristics needed for project development. Like code debugger, auto-completion, database integration, configurations, server setup, and so on.
- Visual Studio is a perfect solution frequently used by and for .NET developers. It includes everything from source control to bug tracker to deployment tools, etc. It has everything required to develop.
- In the most advanced version of VS, you can develop a cross-platform application without departing the IDE. And Visual Studio takes disk space of more than 8 GB.
- Visual Studio is intended to be the world’s best-integrated development environment, which gives full-stack development toolsets. One of them is an important code completion component named IntelliSense, a debugger that can debug both machine code and source code, everything about ASP.NET development and SQL development.
- Visual Studio is the latest development environment, and it’s considerably heavy.
Visual Studio Code:
- As a lightweight source code editor, it is used to view, edit, run, and debug source code for applications.
- Visual Studio does not have any scaffolding support.
- It is largely oriented around files, not projects.
- Developers mainly use it on a Mac that deals with client-side technologies (HTML, JS, and CSS)
- Visual Studio is an emulator of Sublime Text or Atom on Electron.
- It is based on the Electron framework, which is used to build web technologies and cross-platform desktop apps.
- Visual Studio doesn’t have support for the version control system Microsoft Team Foundation Server.
- It has defined IntelliSense for Microsoft file types and similar characteristics.
User and Workspace Settings
To access VS Code preference settings, use the shortcut key Ctrl + ,. You can also access it via the menu command like this:
- On Windows/Linux – File > Preferences > Settings
- On macOS – Code > Preferences > Settings
By default, a Settings editor graphical interface should appear. It helps users make changes to preferences easily, as there are thousands of editable settings that are available. The Settings editor provides user friendly names and description for what each setting does. In addition, related settings have been grouped together and there’s a search bar for locating a specific setting.
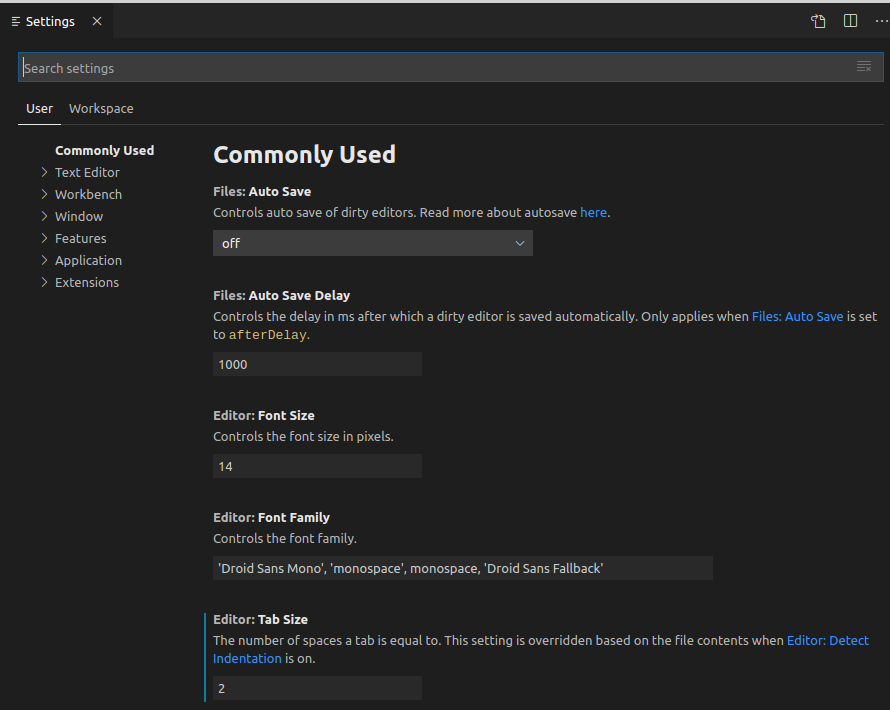
When changing settings using the editor, pay attention to the active scope at the top. Take note that not all settings can be configured via the graphical interface. For that, you have to edit the file directly. As you scroll down the Settings editor, you’ll come across a shortcut that will take you to this file.

There are two different scopes that Visual Studio Code settings are classified under:
- User Settings: Settings are stored under user account. They will take effect on all projects your work on.
- Workspace: Settings are stored within project or workspace folder. They will apply only in that specific project.
Depending on your platform, you can locate VS Code’s user setting in the following locations:
- Windows:
- macOS:
- Linux:
For Workspace, simply create a folder at the root of your project. Then create the file inside this folder. If working with the Settings editor panel, it will do this for you automatically when you change settings under the Workspace scope. Here’s a subset of the global settings I prefer to work with:
I tend to work with multiple projects simultaneously, hence the setting allows me to open new project folders without closing (replacing) the active one. For , I’ve set it to Prettier, which is an extension I have installed. We’ll discuss this in a later section shortly. Next, let’s look at language associations.
Which should you Choose between “Visual Studio” and “Visual Studio Code”?
There has been a long-running debate about which is better and which to choose between Visual Studio and Visual Studio Code. Well, it depends on what you are doing.
If you’re developing exclusively with a language supported by Visual Studio such as C#, C, C++, Python, and others, Visual Studio or other relevant IDEs are likely the best option for you.
But even if you’re developing in those languages but you require a React, Vue, or Angular frontend, VS code might be the best option for you.
If you’re working in a team, they might provide you with the enterprise version of Visual Studio, or any other IDE that correlates with the language you are working with. For example, PyCharm for Python and IntelliJ Idea for Java.
If you’re using Linux, you have to choose Visual Studio Code or some other IDE apart from Visual Studio. That’s because Visual Studio does not run on Linux.
If you’re the kind of person that likes to customize your editor to your taste, just go for VS Code because it’s highly customizable. You also should probably choose VS Code if you are mixing technologies.
Where is project File in Visual Studio?
When you create a new project, Visual Studio saves it to its default location, %USERPROFILE%\source\repos. To change this location, go to Tools > Options > Projects and Solutions > Locations. For more information, see Options dialog box: Projects and Solutions > Locations.
In Visual Studio, the project file, also known as the solution file, is a crucial component of a software project. It serves as a centralized configuration file that defines the structure, references, and settings for the project. The project file has the extension “.sln” (for solution) and is typically located in the root directory of the project.
When you create a new project in Visual Studio, the solution file is automatically generated and includes references to all the project files within the solution. These project files have extensions specific to the type of project you are working on (e.g., “.csproj” for C# projects, “.vbproj” for Visual Basic projects).
The solution file allows you to manage multiple projects within a single solution, facilitating organization, compilation, and deployment of the entire project. It also maintains information about project dependencies, build configurations, and debugging settings.