It allows you to control surround sound, Dolby, and DTS sound systems on your computer:
If you own a PC with a Dolby or DTS sound system, you’ll likely need to download the Realtek HD Audio Manager. This software is usually included with the latest version of Windows and can be found in the Sound, Video, and Game Controllers folder of your computer’s Device Manager. Alternatively, you can download the driver from the developers’ website or the Windows Catalog. In either case, you’ll need to follow the installation instructions on the screen.
To install Realtek HD Audio Manager, open the System Tray and locate the icon. Click on the Realtek HD Audio Manager icon to access it. If it’s not already there, click on the “Settings” button. Then, select the Sound category. Select the Realtek HD Audio Manager, and you’ll see a list of your audio output devices. Click on the ‘Add device’ button to pair a new output device.
If the Quality of Audio is low, check the audio input volume and format, and the bit depth. If your audio isn’t as high as you’d like, try reducing the sensitivity of your Mic, or removing it from the speakers. If the sound is still poor, try disabling enhanced audio, which can affect the quality of sound.
3. The Ultimate Solution
I want to ignore the solutions that I have mentioned below and focus on the ultimate solution. I will show you how to download the Windows 11 compatible audio drivers from the official site, uninstall the existing audio drivers from the machine then reinstall them.
Step #1: Download Audio Drivers from the Official Site
Your laptop drivers are available on the manufacturer’s site. Pre-build desktops have the drivers on the seller page or manufacturer page. I have an assembled Windows gaming machine and you can download the latest drivers from the motherboard manufacturer site. Let me show you the way and save Windows-compatible drivers.
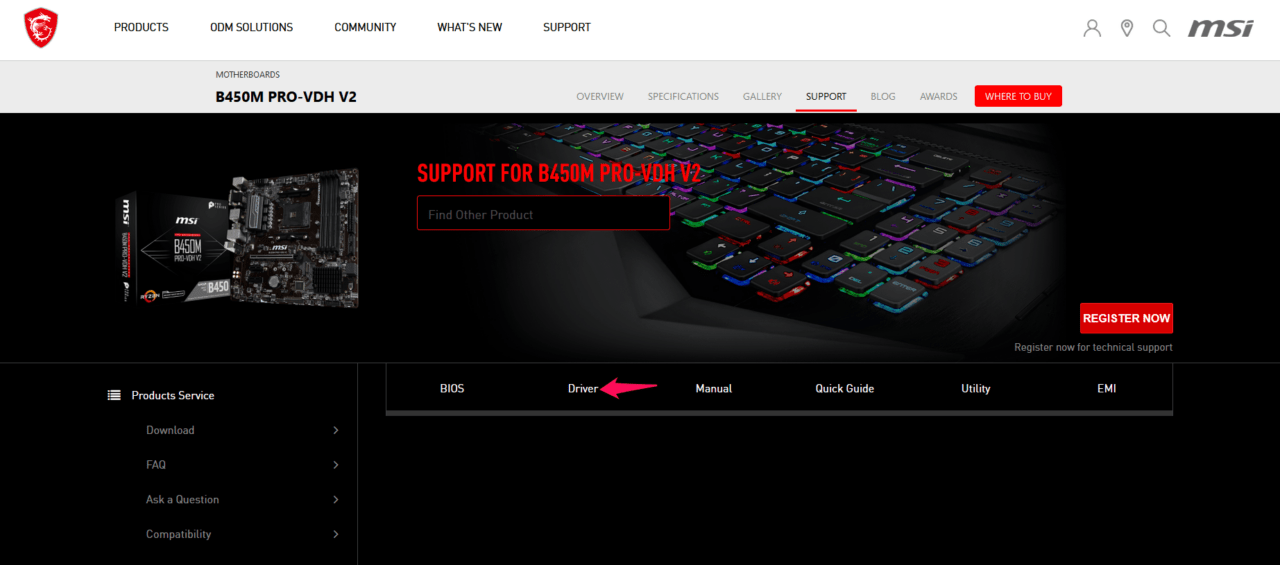
- Open the browser and search for the motherboard page.
- Type the motherboard/laptop model number/pre-build desktop model number and open the official site page.
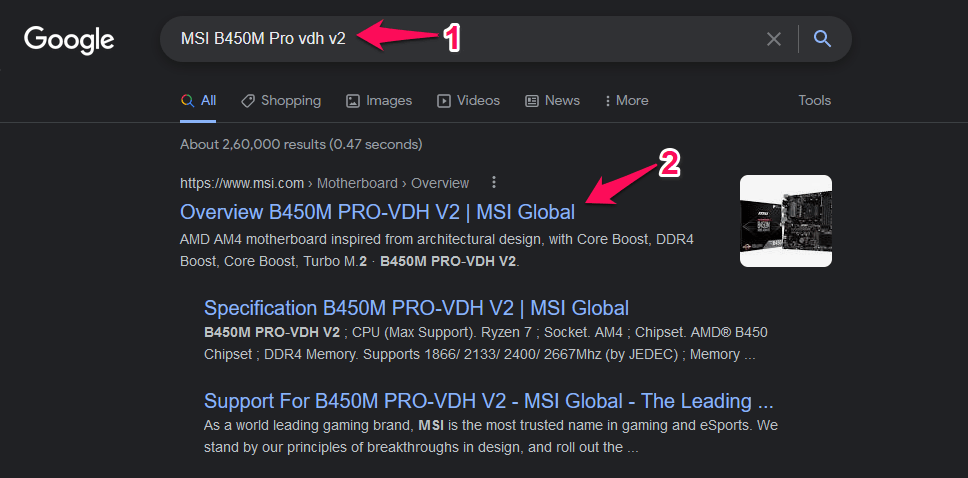
Example: “MSI B450M Pro VDH V2”.
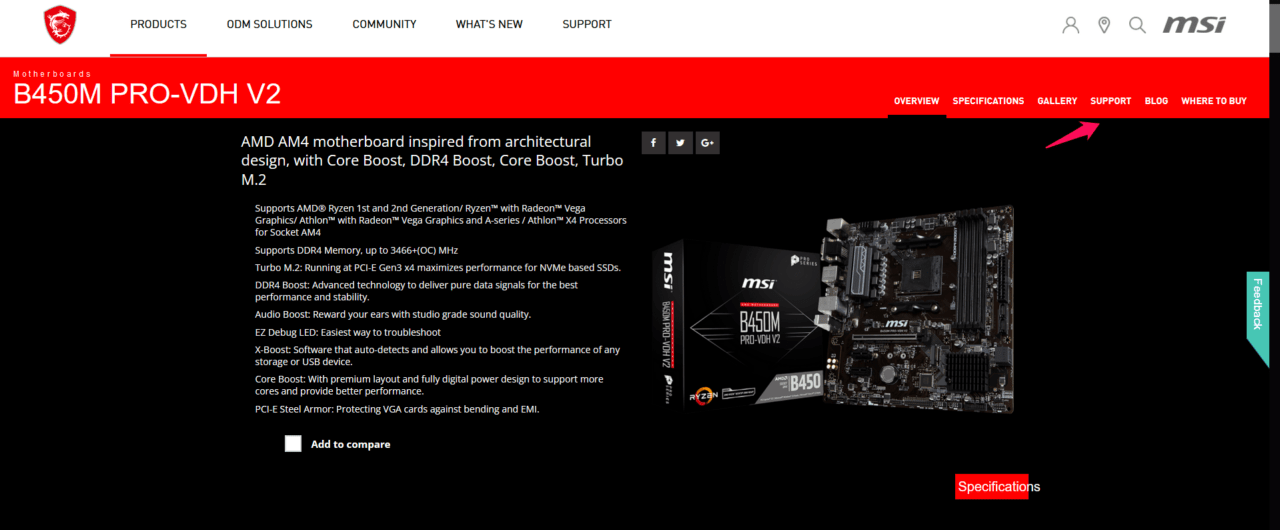
Click on “Support” located in the main menu.
Click “Drivers” from the menu.
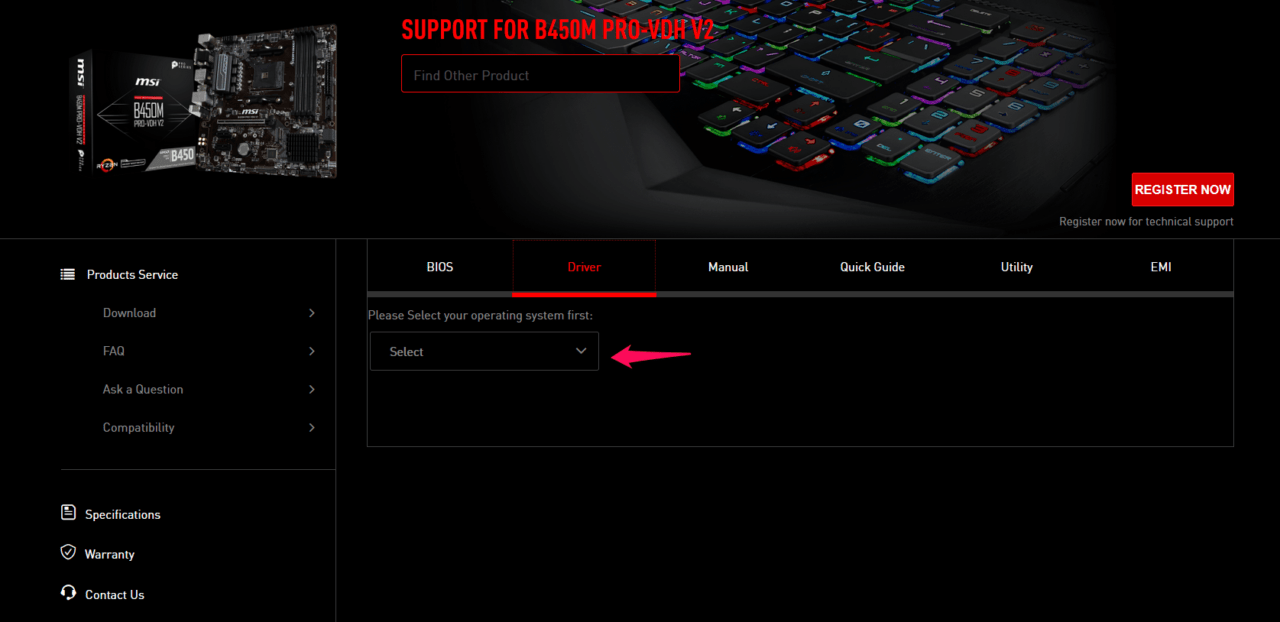
Select Windows 10 or Windows 11 from the drop-down menu.
Click on “Onboard Audio Drivers“.
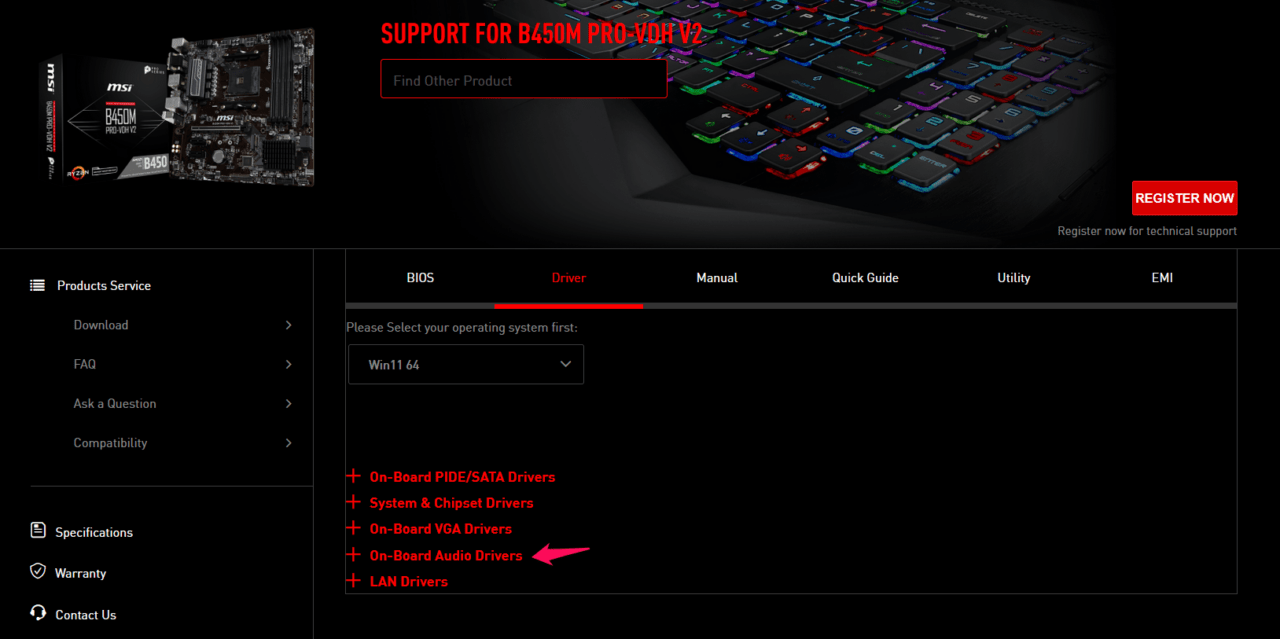
Download “Realtek HD Universal Driver” to save the executable file.
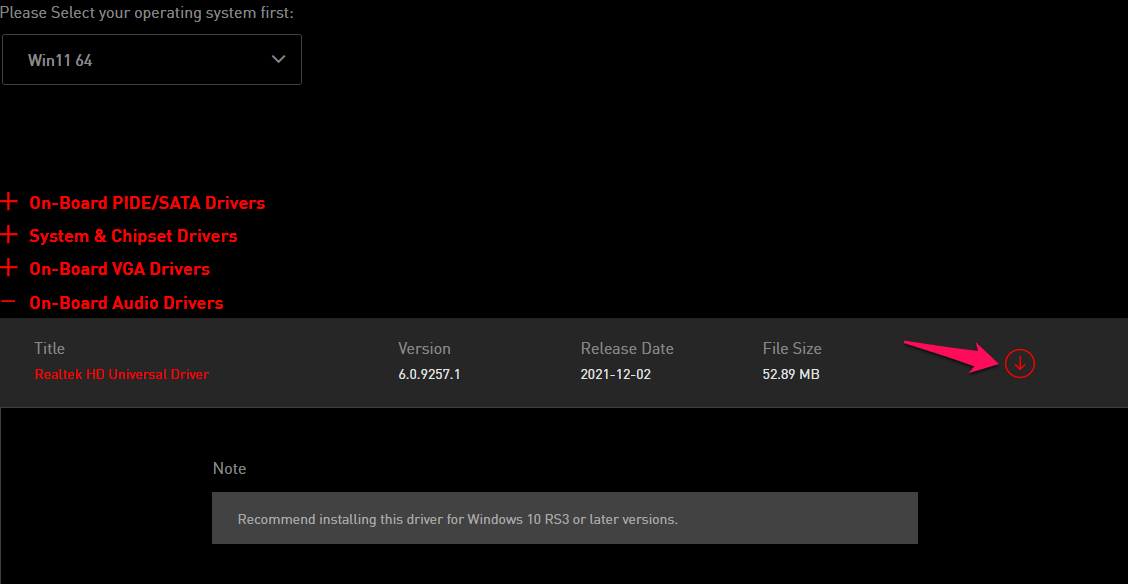
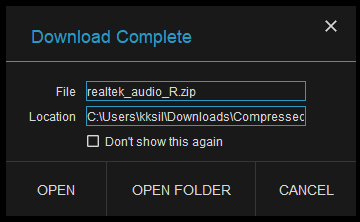
Now, you have saved the audio driver and extracted it in the desktop or downloads folder.
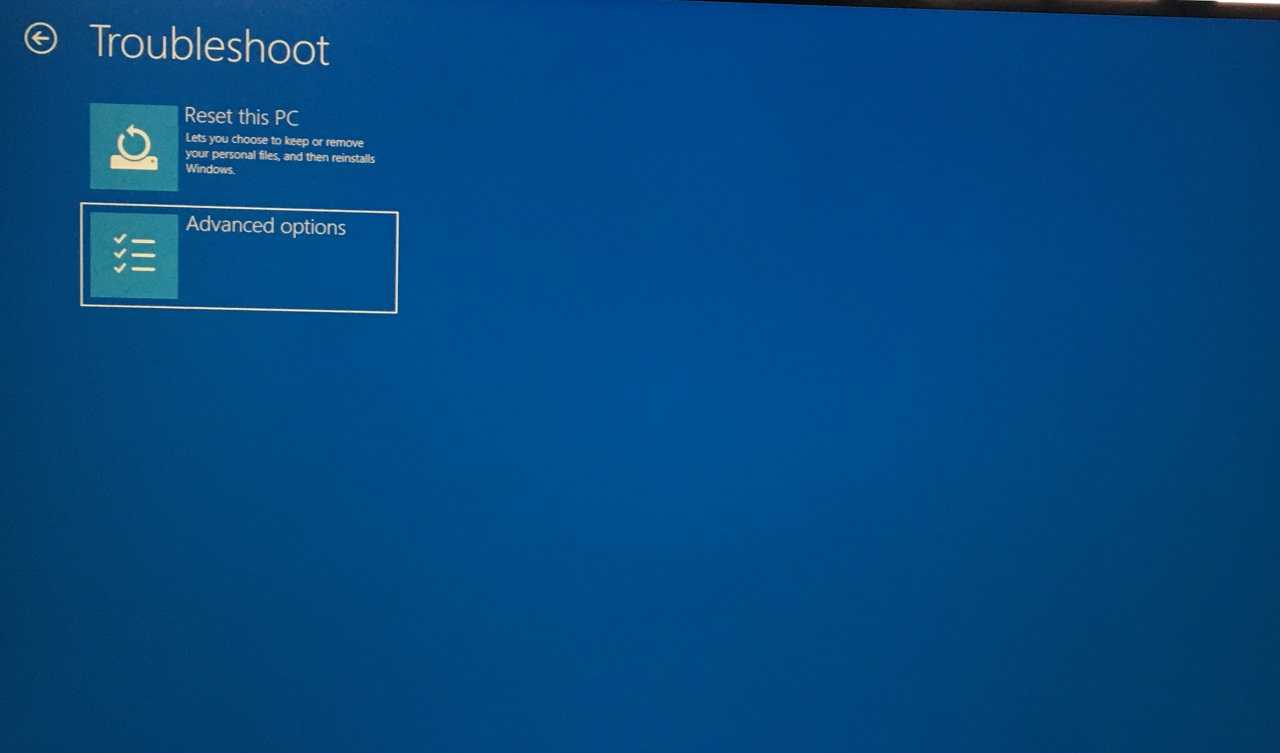
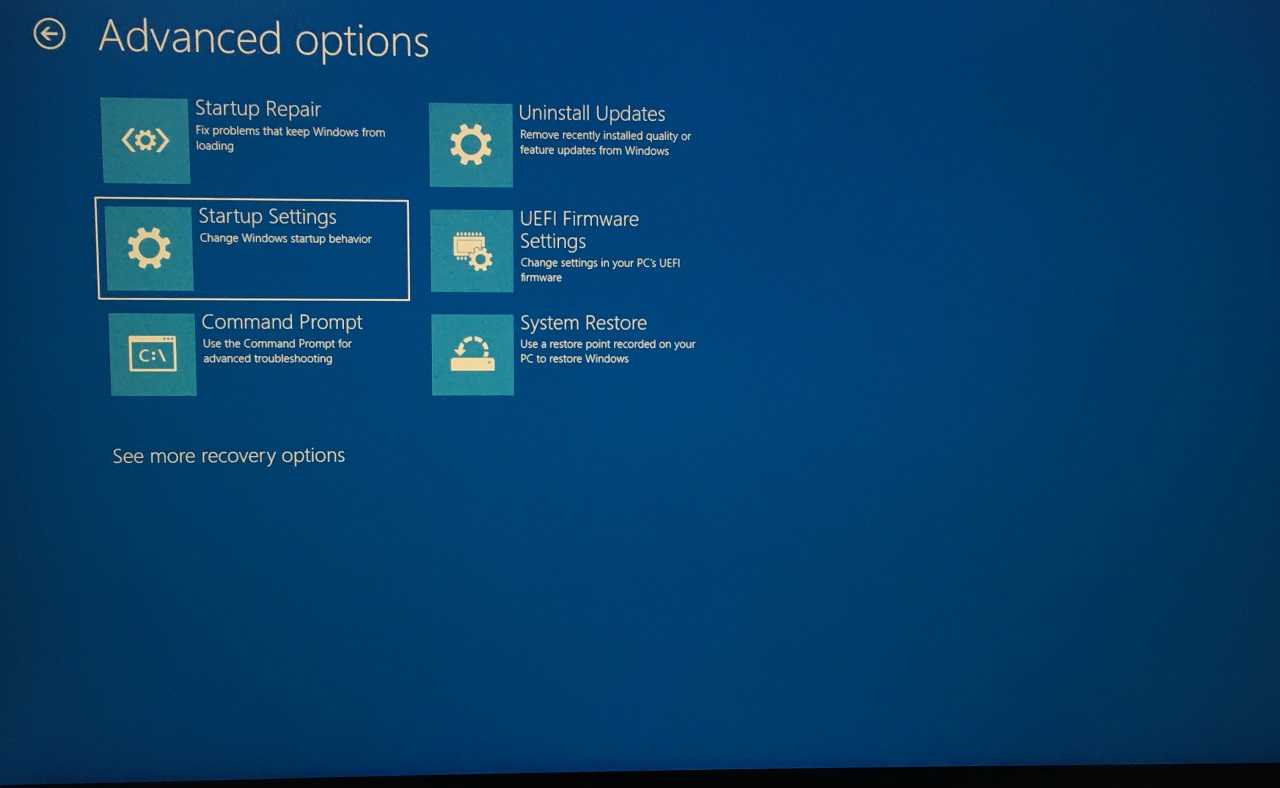
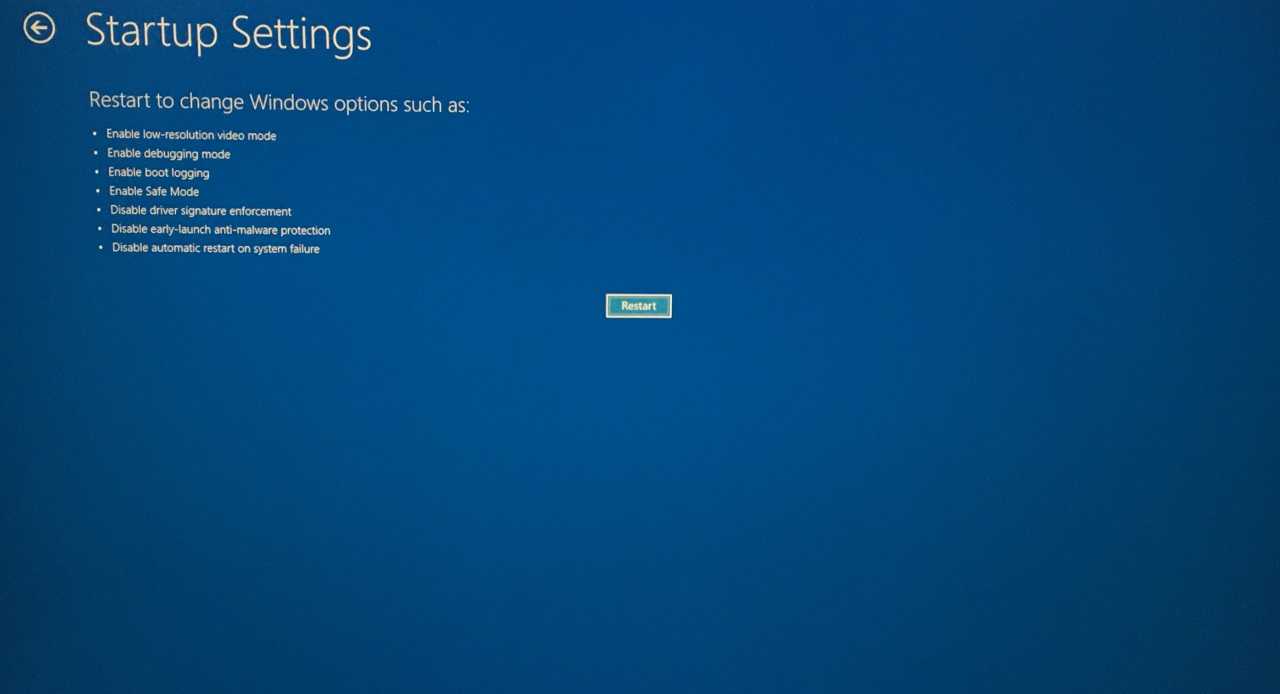
Step #2: Boot in Safe Mode
Your PC should be in safe mode to uninstall the audio drivers and download DDU from the official site. Also, download Display Driver Uninstaller from the official site. You have to scroll down on the DDU download page and click on a country server to download it.
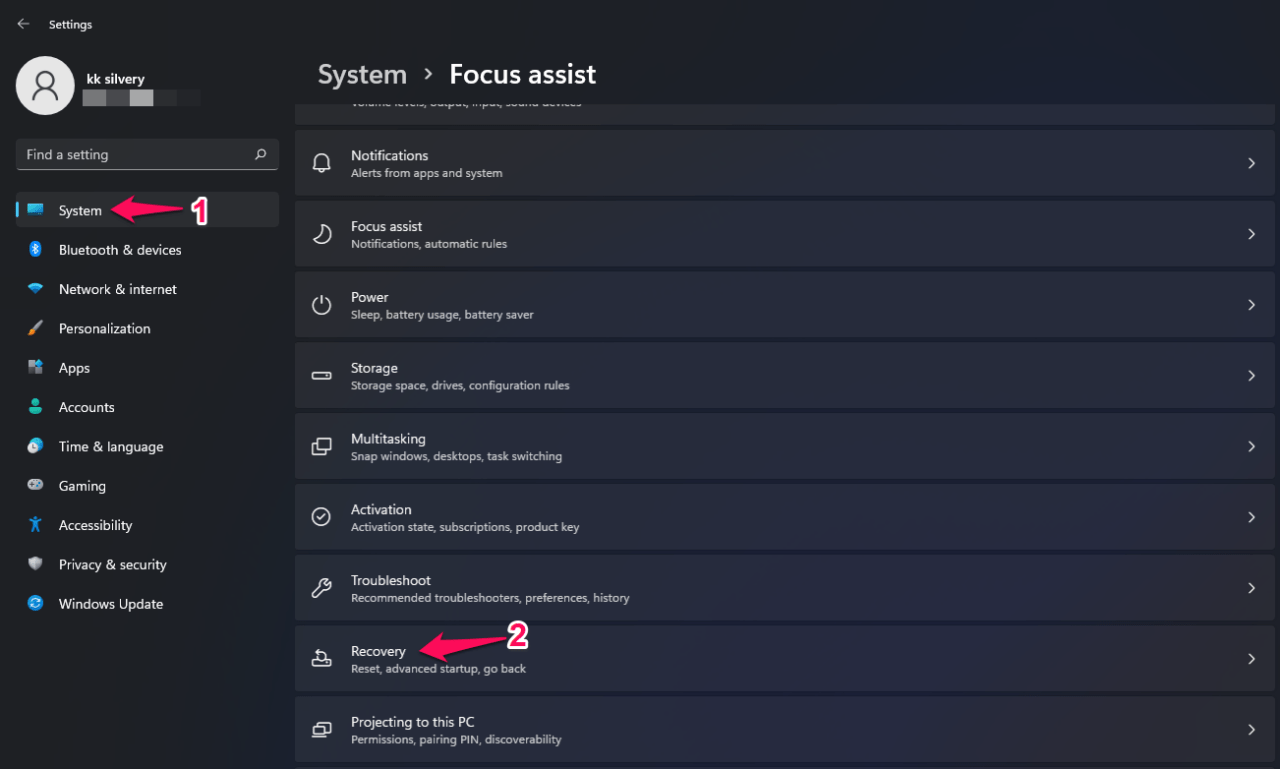
- Open “Settings” in Windows 11.
- Choose “Recovery” under the “System” option.
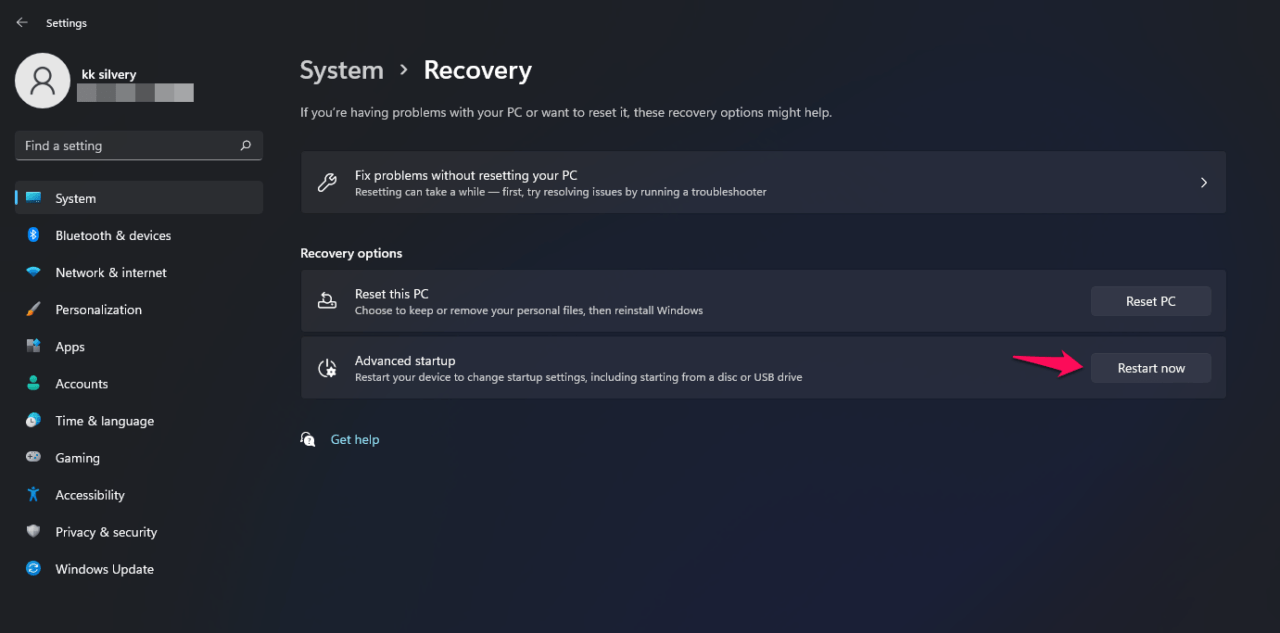
The PC prompts confirmation from you and select the “Restart now” button.
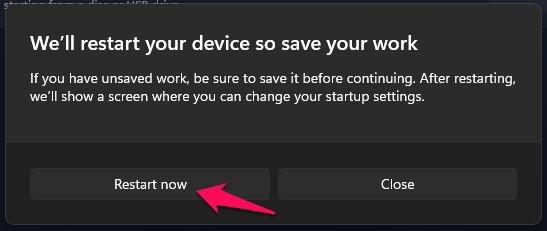
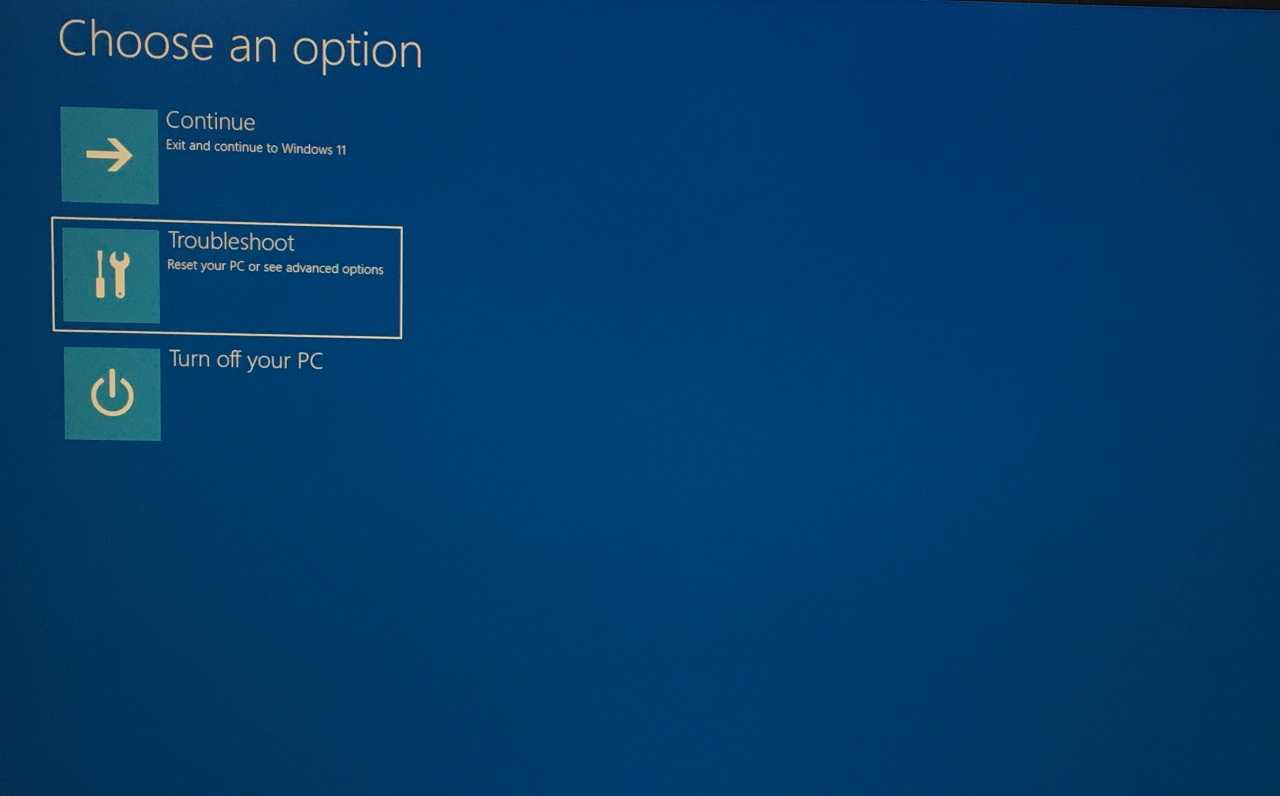
Click on the “Restart now” button.
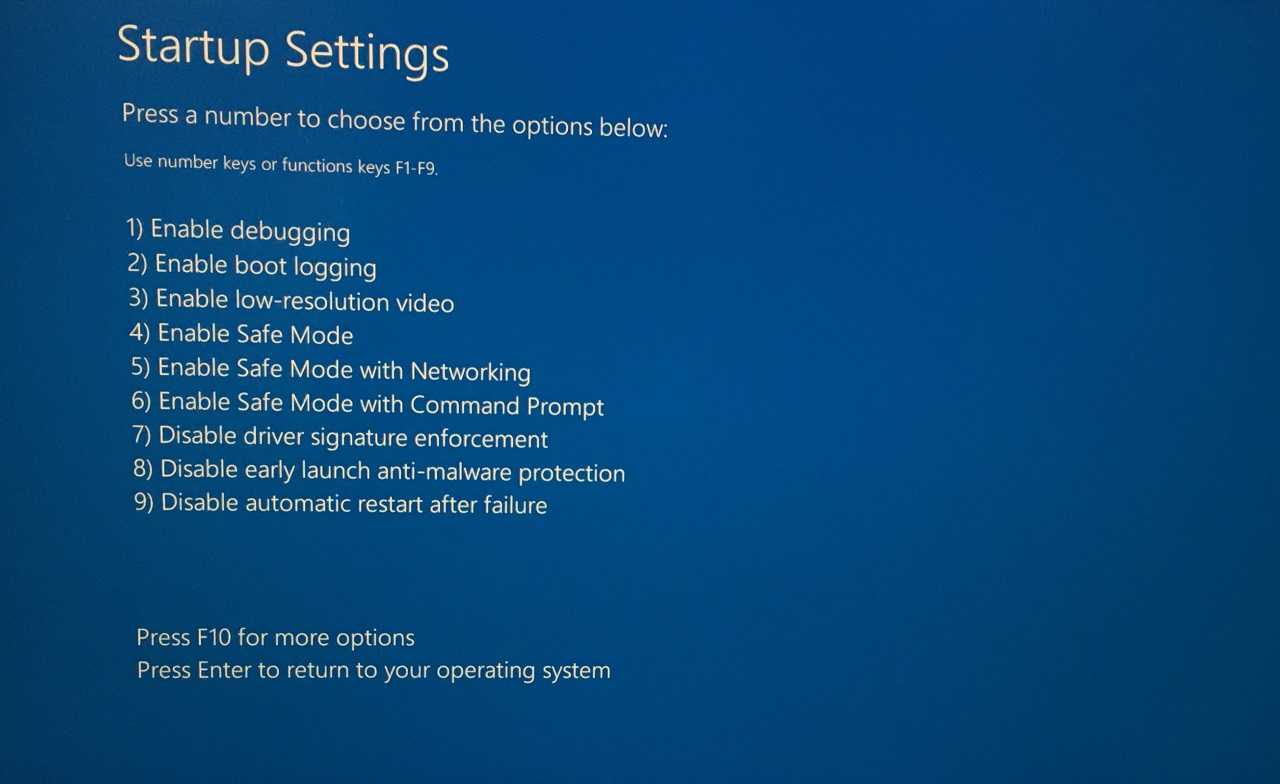
Enter the Lock Screen password or PIN to login into the desktop.
Step #3: Uninstall Audio Drivers
The time has come to uninstall the audio drivers from the system. Go to the DDU file and extract it. You can use the default ZIP archiver in the system.
Open Display Driver Uninstaller as administrator.
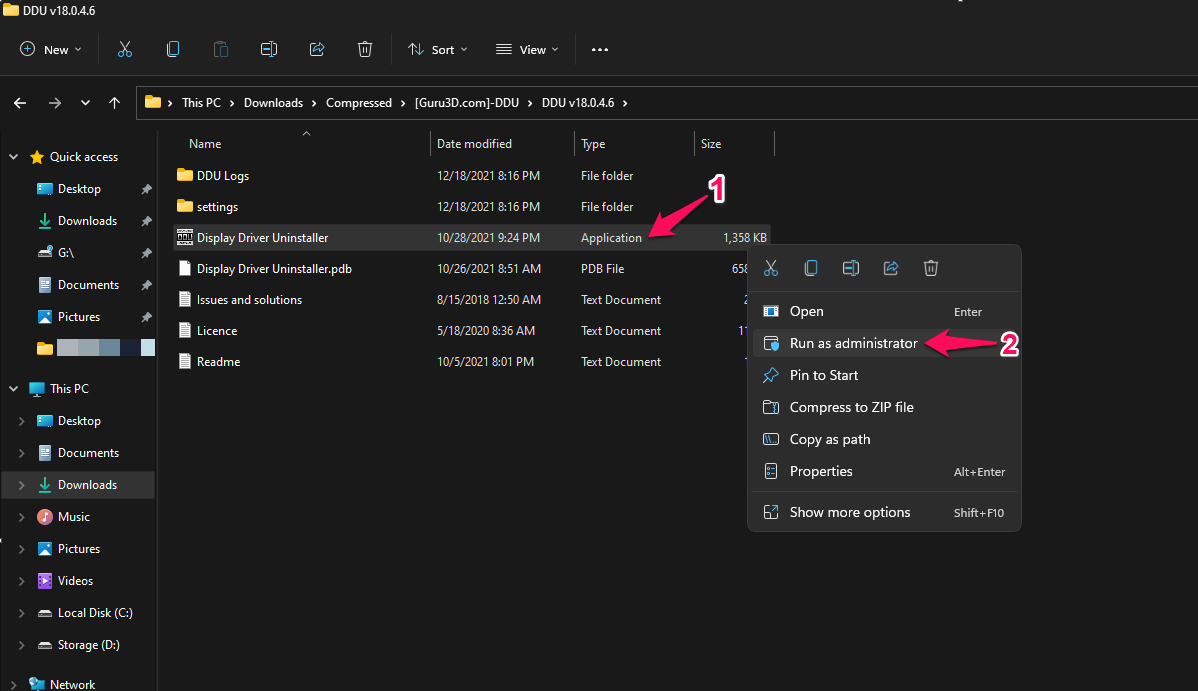
Choose the device type and select “Audio” from the drop-down menu.
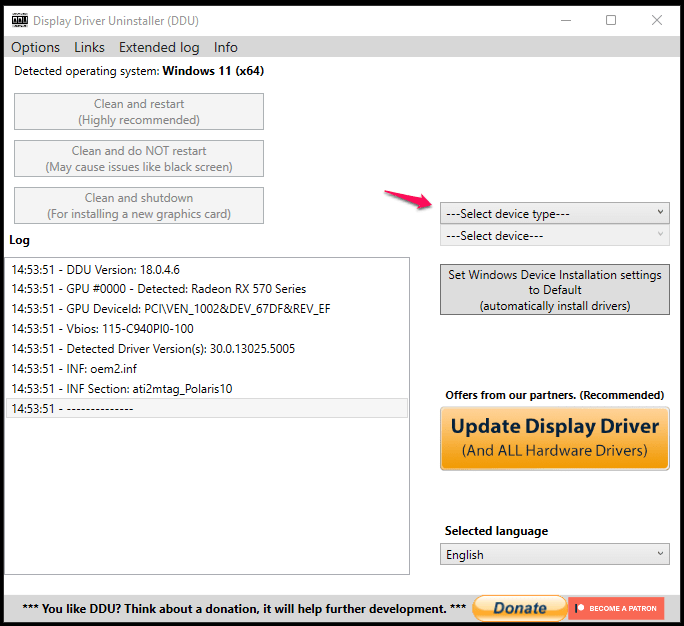
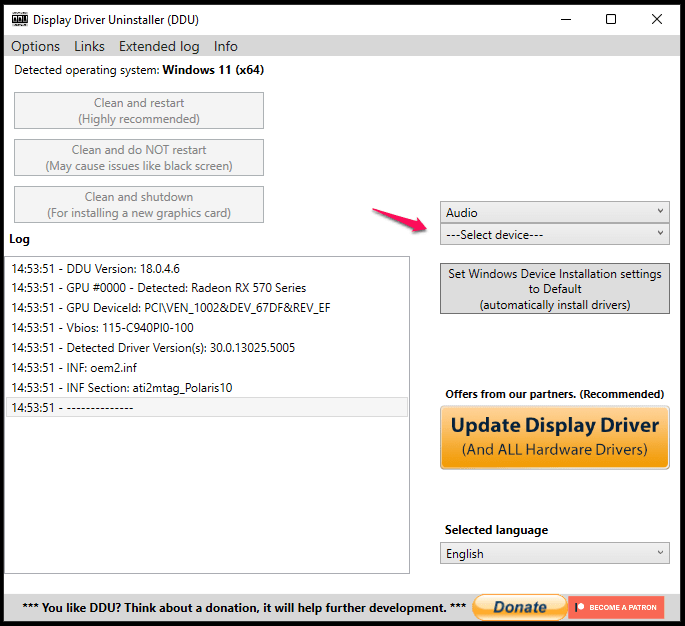
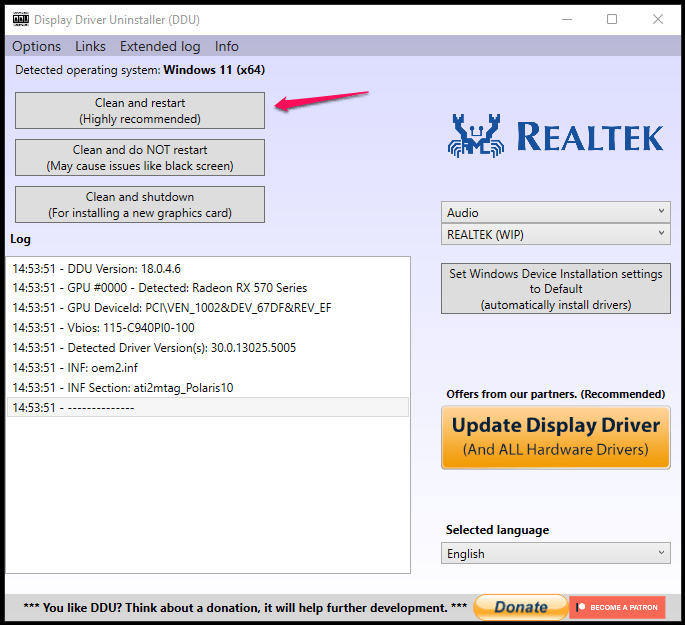
Sit back and relax while DDU is uninstalling the audio drivers.
Your PC boots back into the Windows 10/11 machine, so you don’t have to get out of safe mode manually.
Step #4: Reinstall Audio Drivers
Almost all drivers are bundled in a ZIP archive and extracted the files in the local storage. Make sure to switch to an administrator account because Windows requires admin access to install drivers in the system.
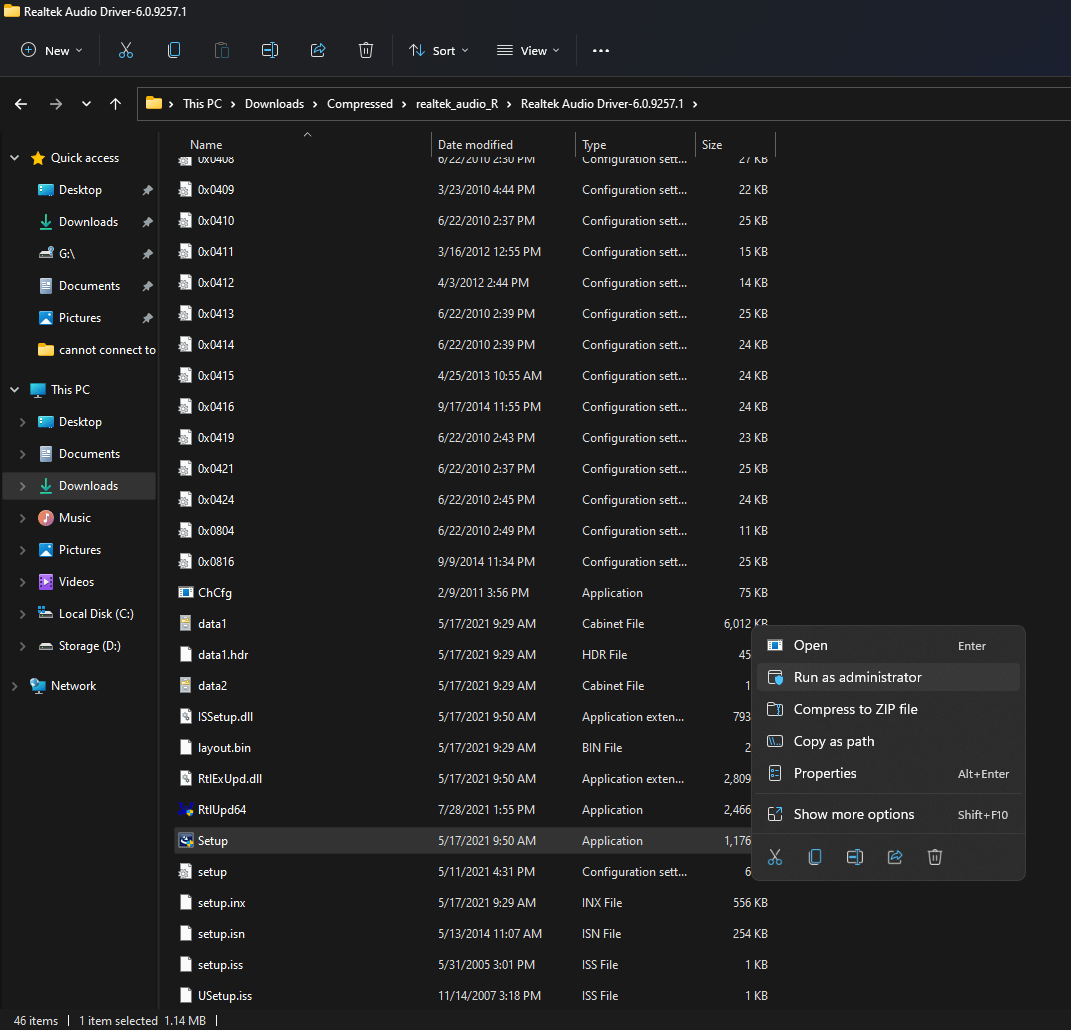
Open the extracted folder and run “Setup.exe” as administrator.
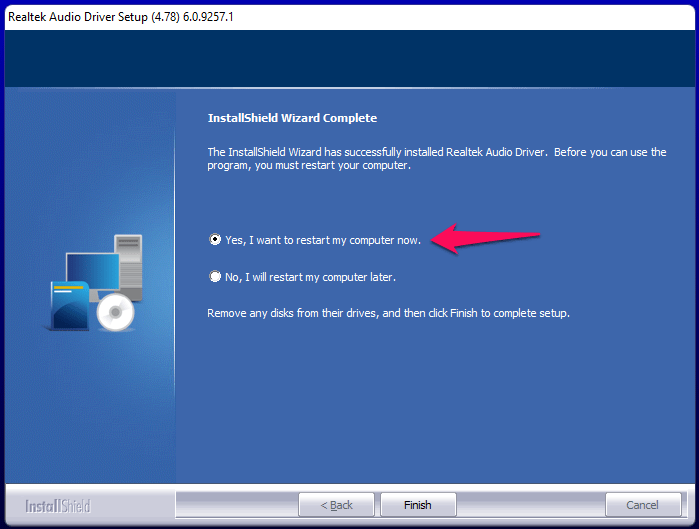
Your Windows PC restarts and it will load the compatible audio drivers in the next session. The “can not connect RPC service” error won’t show up when you launch Realtek Audio Console.
It automatically downloads and installs out-of-date or missing drivers:
To download the latest driver for your Realtek HD audio, click Start > Settings > Control Panel. Click the “Device Manager” button in the Control Panel and expand the Sound, video, and game controllers. Select the Realtek HD audio driver and click “Update Driver Software” on the drop-down menu. Select “Search automatically for updated driver software” to start the process of updating your driver automatically. You should also try Bit Driver Updater to download and install the latest Realtek HD audio driver for your PC.
After scanning for hardware changes, you can either manually update the driver or install the latest version from the official developers’ website. The trial version allows you to update the driver one at a time, but you can choose to upgrade to the Pro version if you’d prefer to update all drivers at once. Driver Easy offers a money-back guarantee if you don’t get satisfactory results. You may also encounter problems when your Realtek audio doesn’t work.
![[fixed] reinstall realtek hd audio manager on windows 10/11](https://jsk-oren.ru/wp-content/uploads/8/1/d/81dcc04b20271a5b5c0876c6c32d2088.png)
If the Realtek HD Audio Manager executable is missing from the Windows system files, you can reset the BIOS to fix the issue. Resetting the BIOS will fix the problem and Realtek HD Audio Manager will work as expected. In the meantime, you can use the Realtek HD Audio Manager without any hassle. If you’ve found it difficult to install the Realtek HD Audio Manager, you can try the following methods:
Realtek Audio Console — что это за программа и нужна ли она? (rtkuwp.exe)
Приветствую друзья! Мы продолжаем изучать фирменный софт, который присутствует почти на каждом ПК или ноутбуке. Сегодня — речь о софте компании Realtek, которая известна своим терпимым звуком и стабильными сетевыми картами (кстати беспроводные тоже делает).
Realtek Audio Console — что это такое?
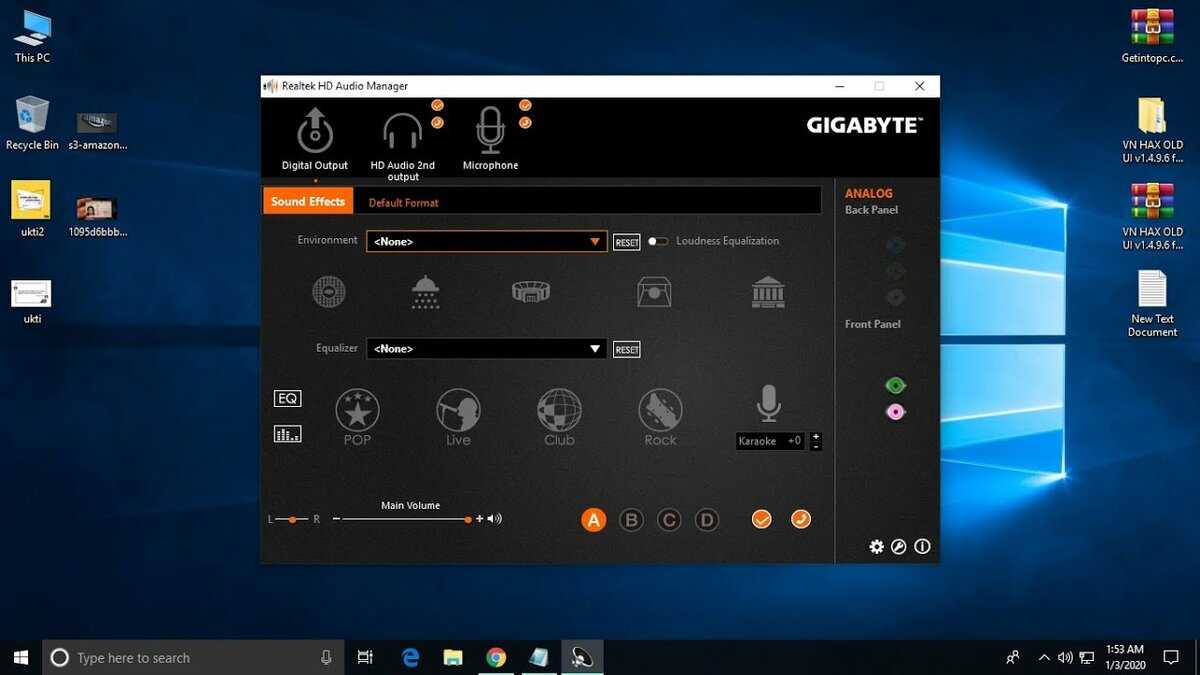
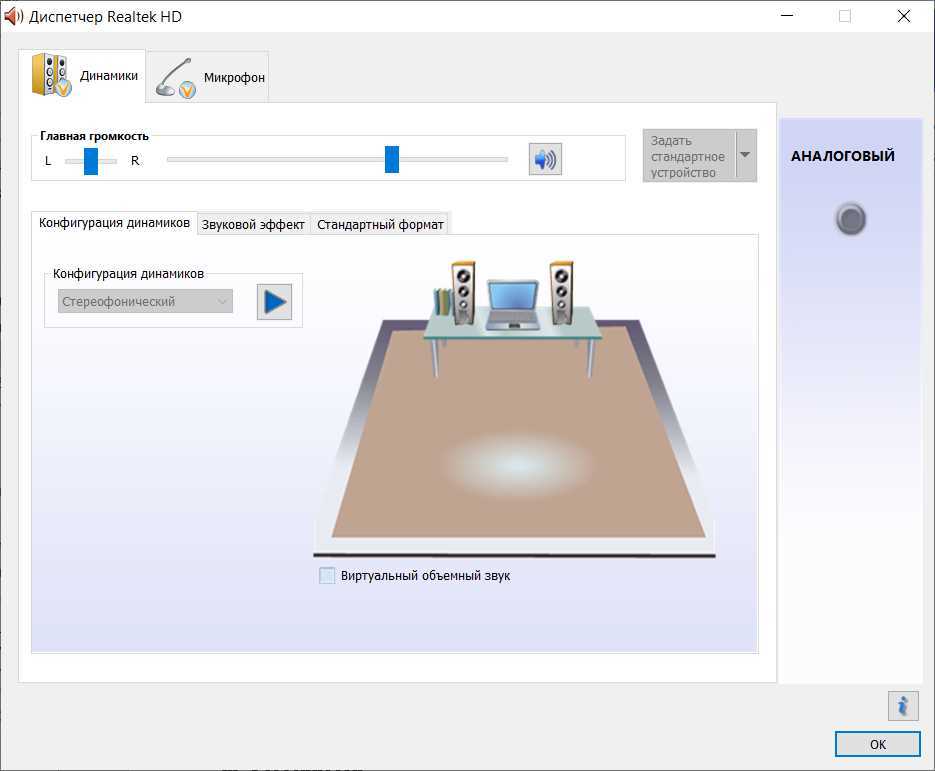
Приложение для настройки аудио Realtek — звука, микрофона. Приложение может быть UWP, простыми словами — метро-формат, устанавливается автоматом виндой при обновлении. Работает под процессом rtkuwp.exe, внешний вид примерно такой:
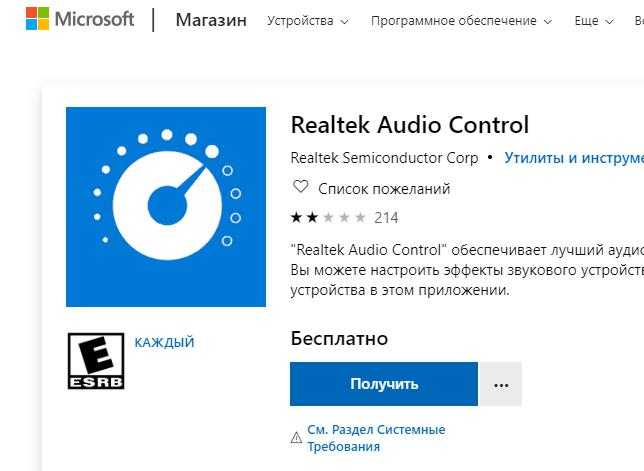
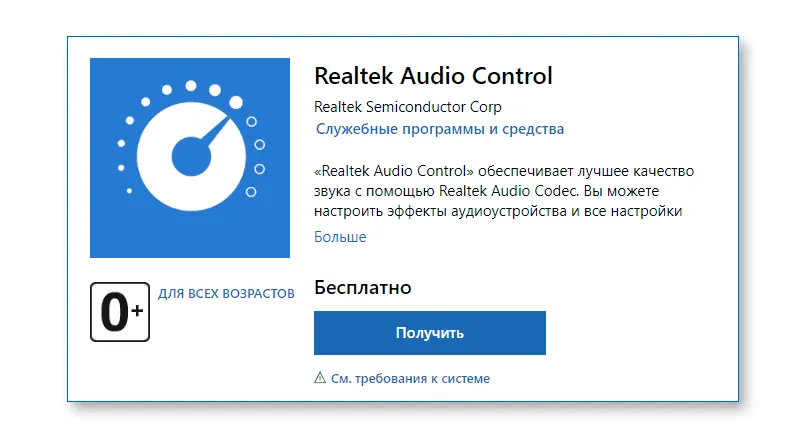
Также можно вручную скачать из магазина Microsoft Store:
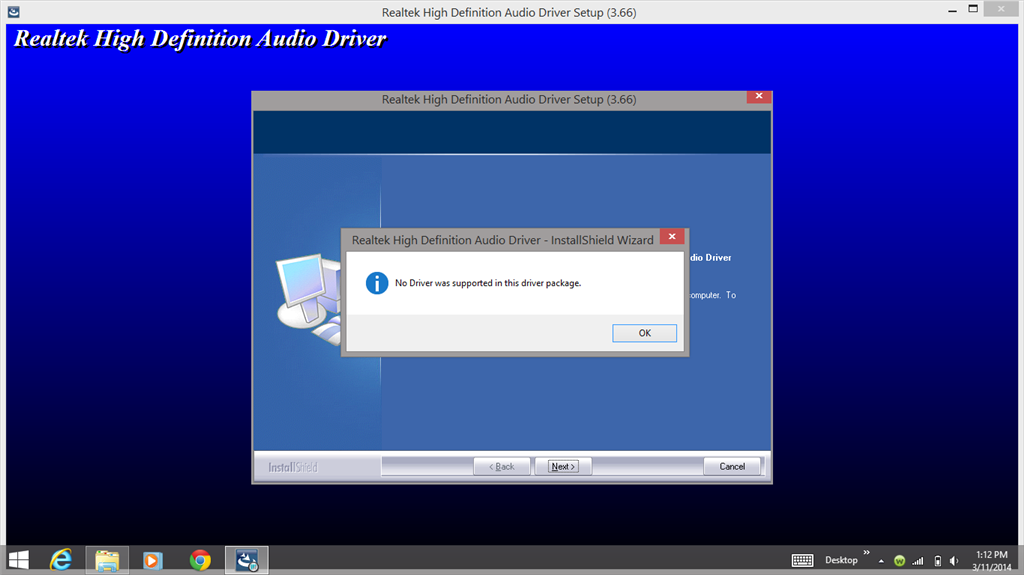
При запуске Realtek Audio Console может быть ошибка типа:
Can not connect to RPC service
Причина — не запущена служба Realtek HD Audio Universal Service, ее нужно включить, можно например так:
- Зажать Win + R, написать команду services.msc, нажать ОК.
- Откроется окно со списком служб. Находим нужную, нажимаем два раза по ней.
- Откроется окошко свойств, здесь в Тип запуска выбираем Автоматически, после — нажимаем кнопку Запустить.
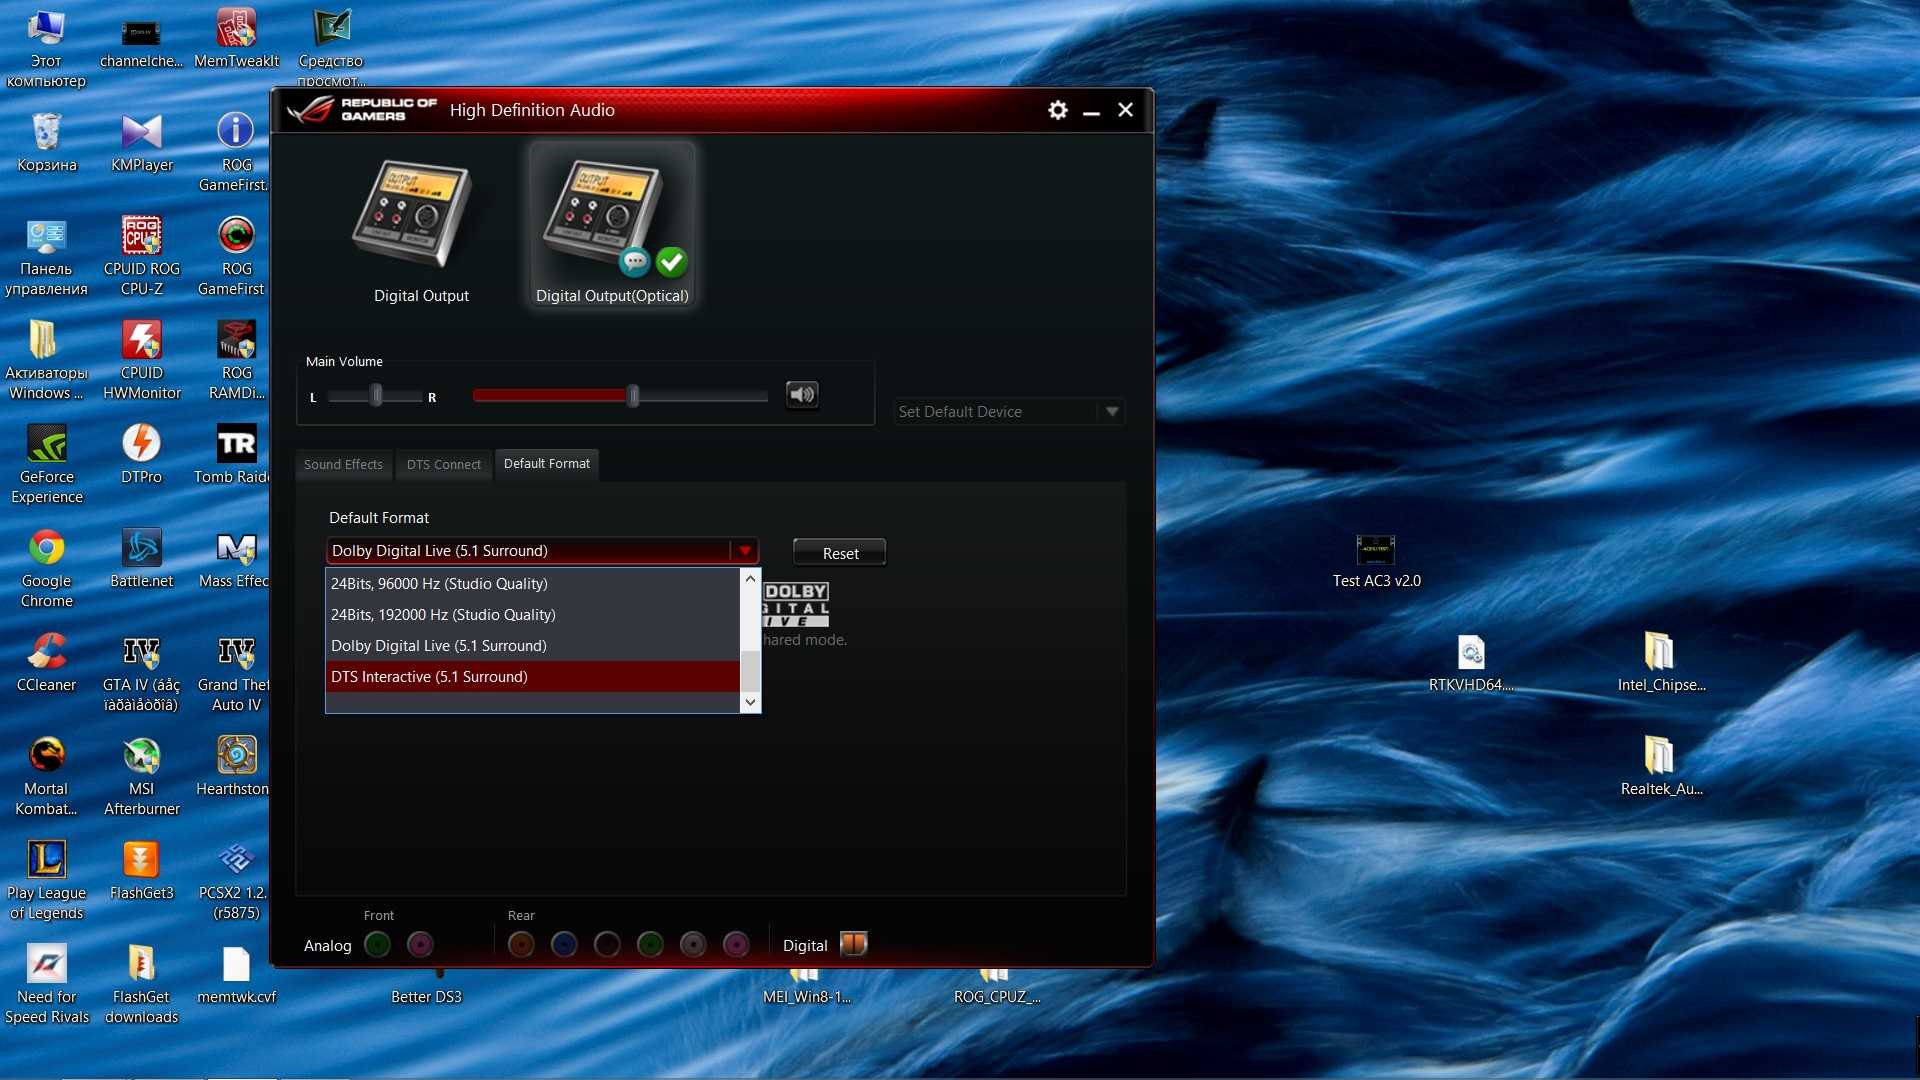
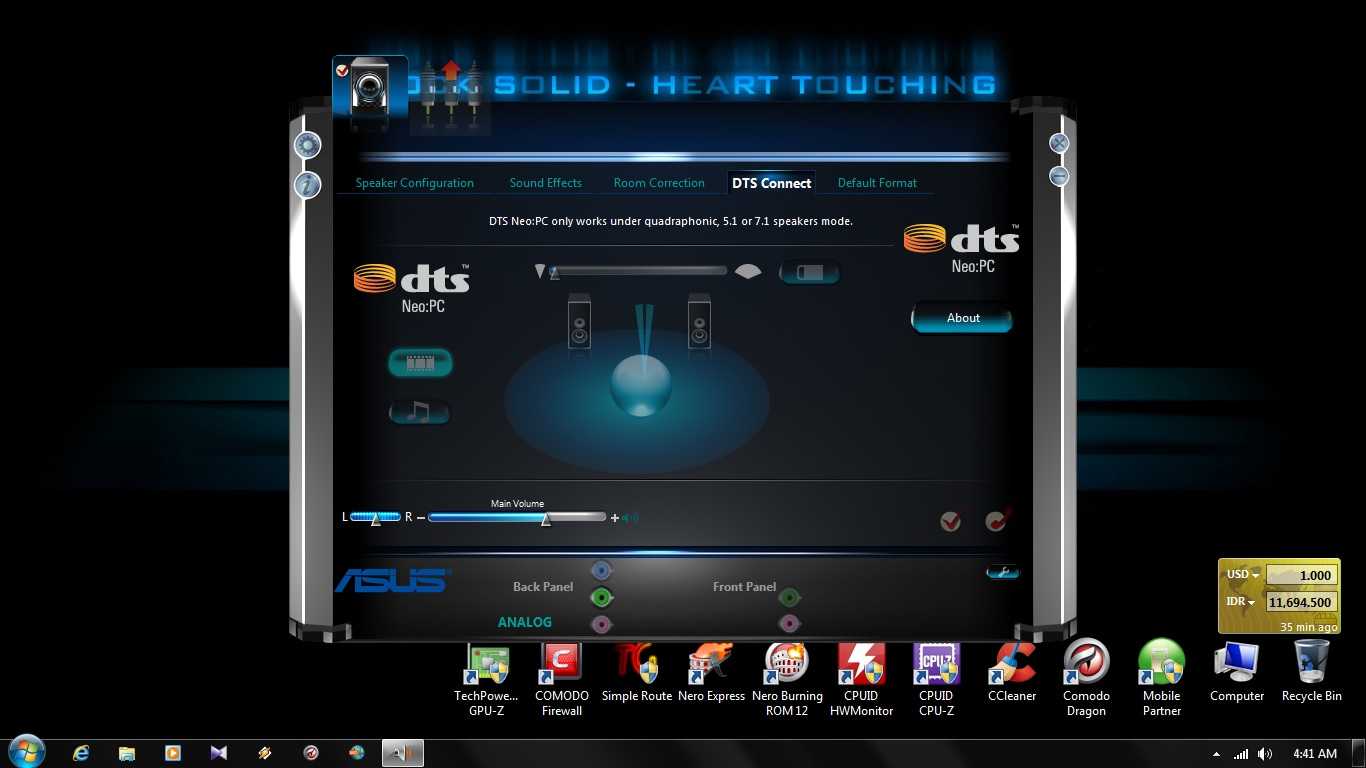
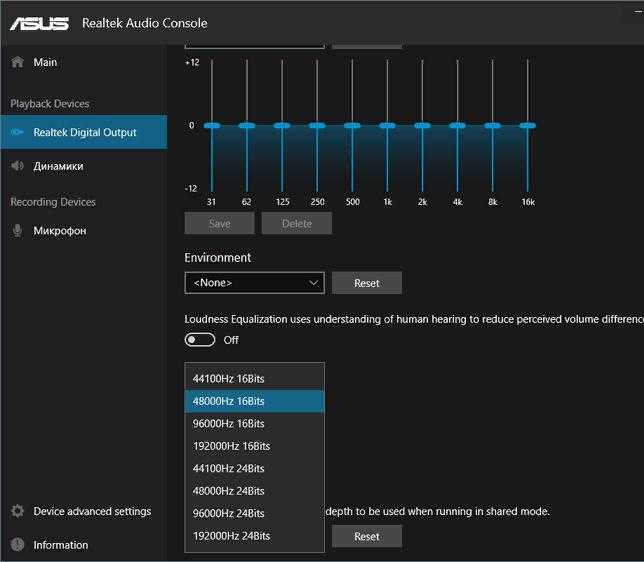
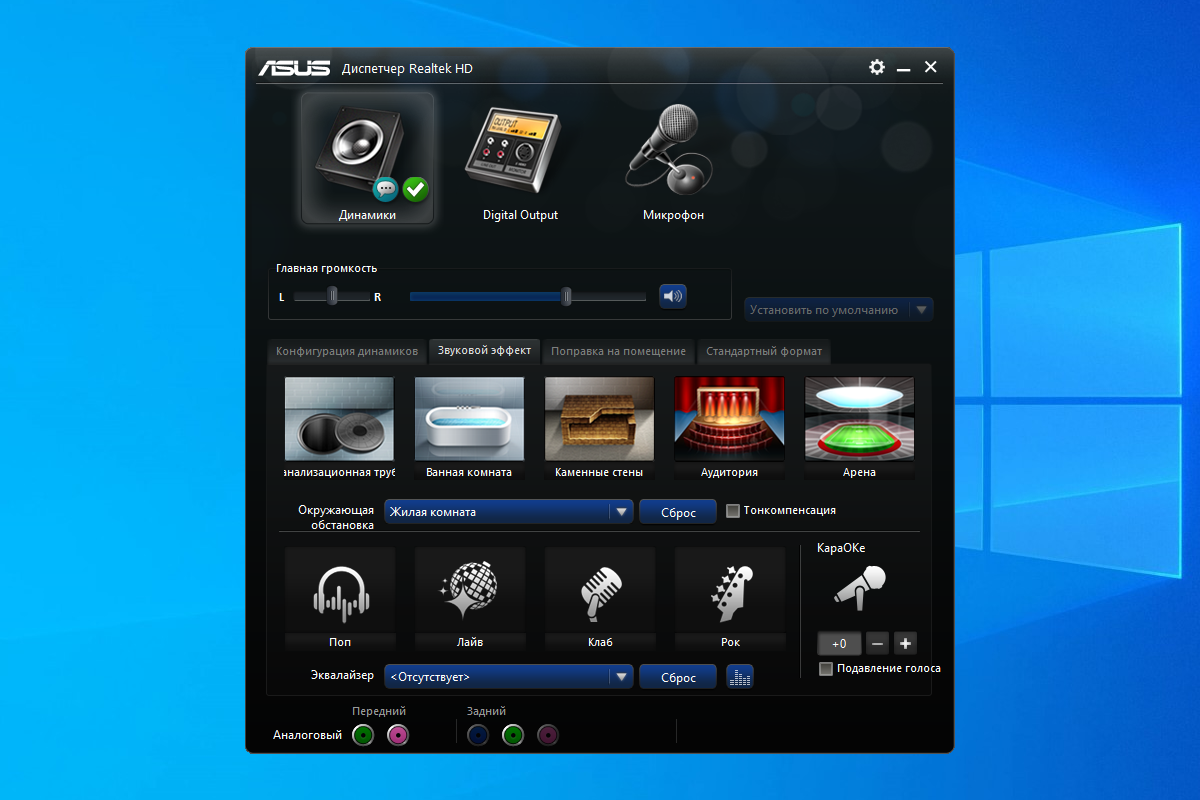
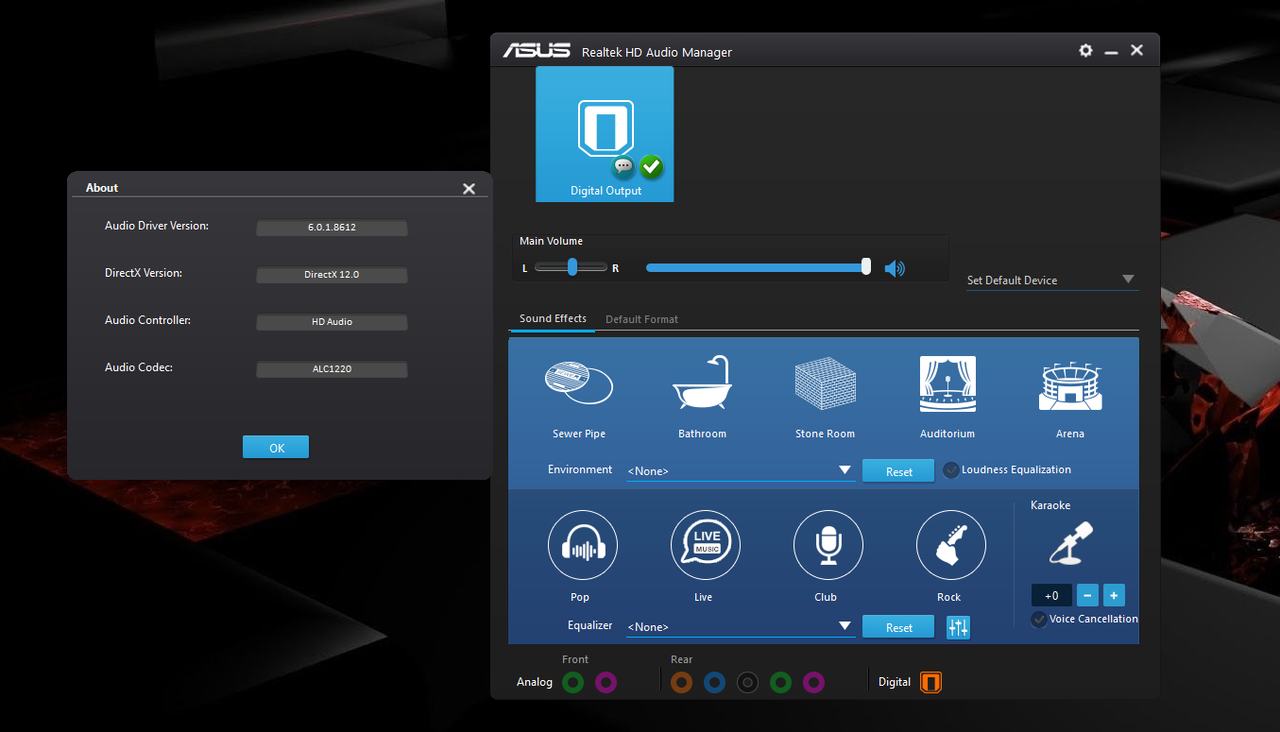
Однако, покопавшись еще в интернете, понял — прога может быть и в другом оформлении, фирменном, и кажется это даже не UWP-тип программы, а обычный, пример от Асуса:
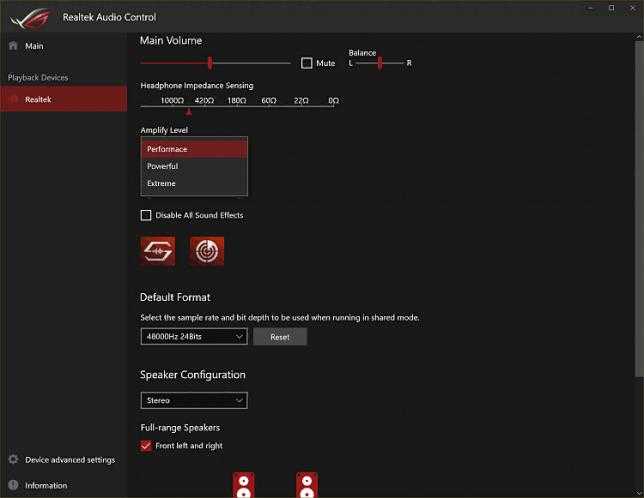
Второй вариант — также Асус, но уже оформление в игровом стиле ROG:
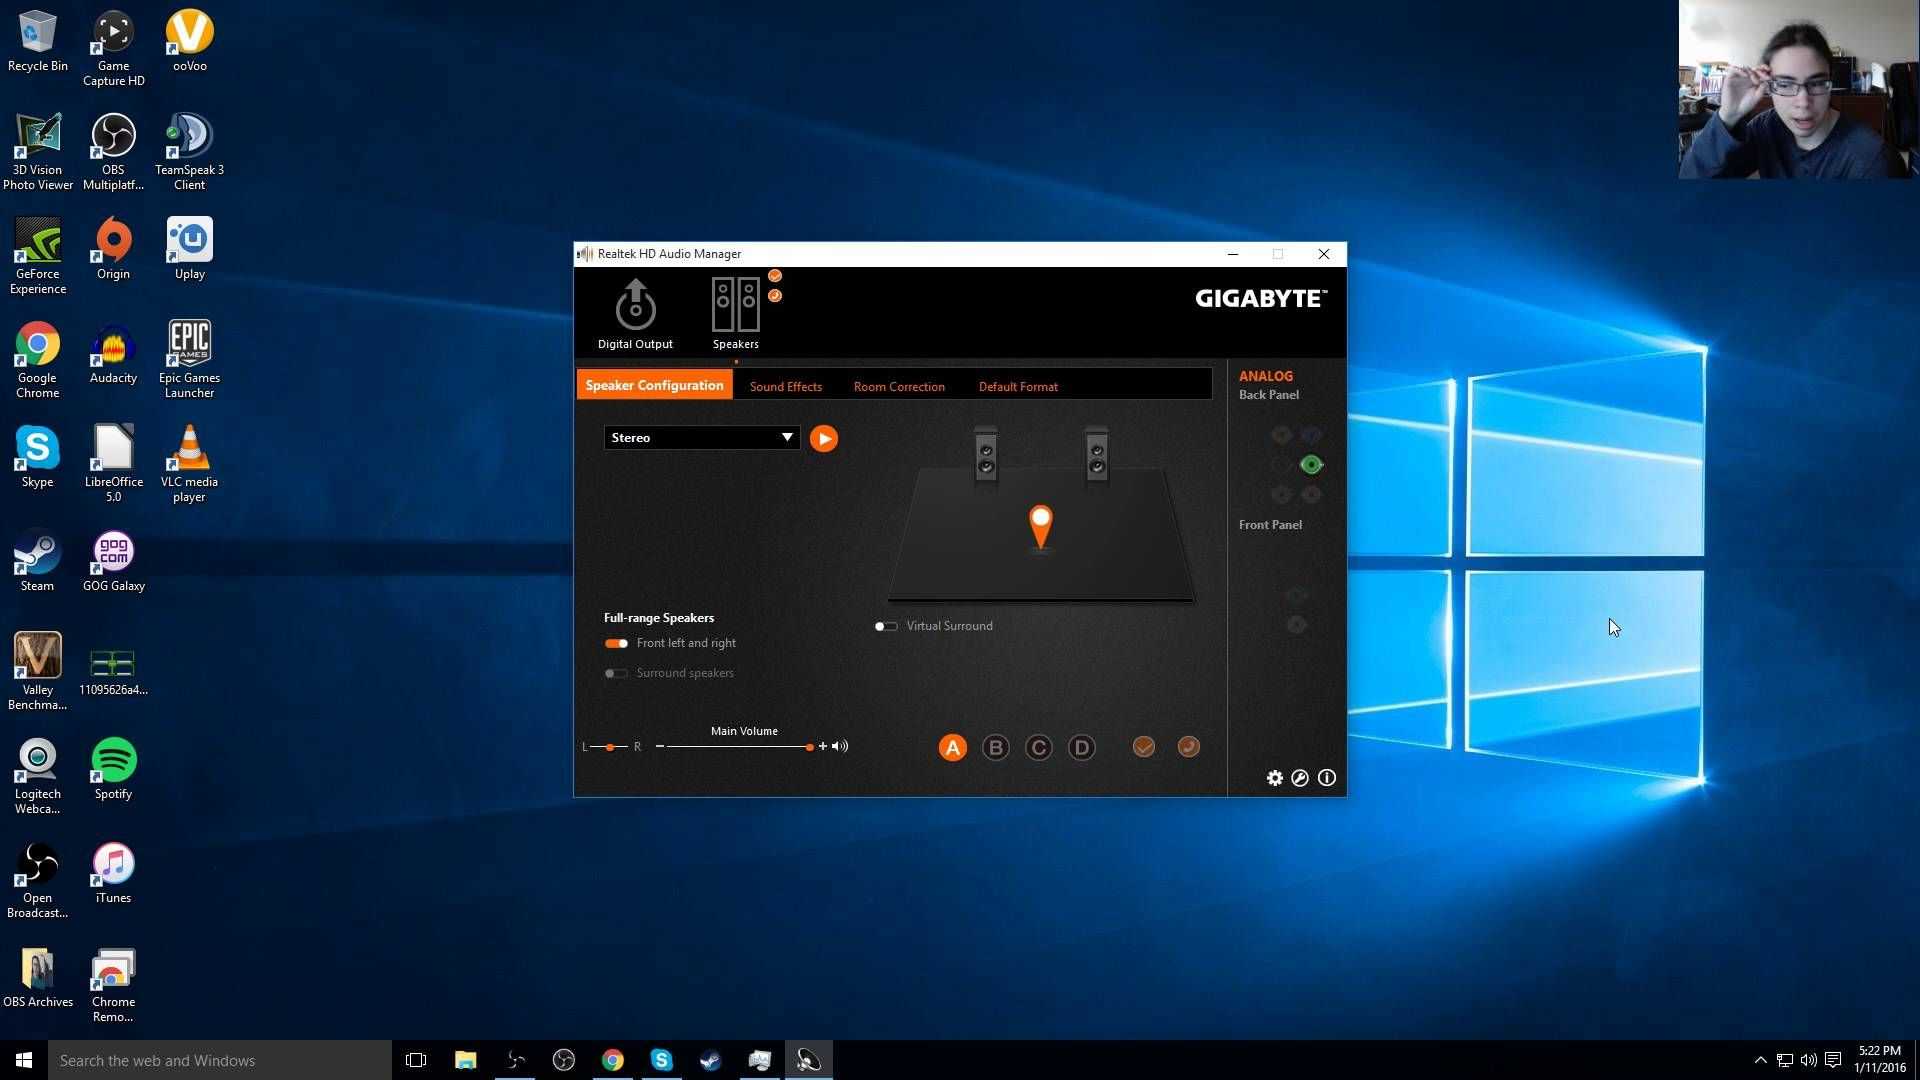
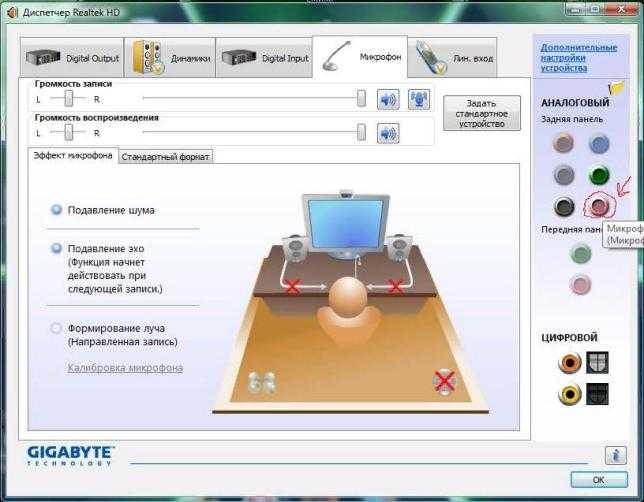
Другими словами, можно сказать Realtek Audio Console — замена старого диспетчера (он был наверно еще во времена Windows XP):
Функционал подобных программ примерно одинаков:
- Можно регулировать громкость правого/левого канала.
- Некие эффекты звука, например концерт, сцена, арена, ангар, пещера и другие.
- Настройки микрофона.
- Настройки переключения работы гнезда — то для микрофона, то для колонок. Сама регулировка может отсутствовать, но без установленной проги — могут быть проблемы с автоматическим переключением.
- Настройки записи.
- Эквалайзер.
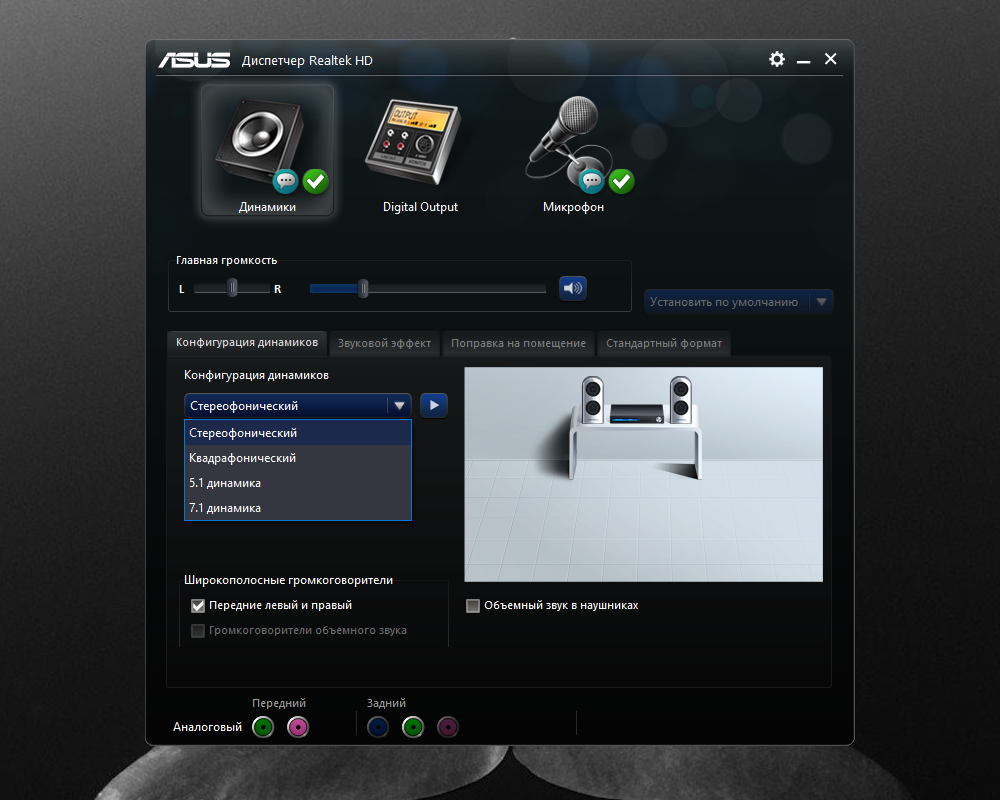
- Настройки работы колонок, то есть переключение из 2.0 в систему 5.1 или другую. Кстати помню в данной проге еще можно было регулировать громкость не только левого и правого канала, но и например сабвуфера.
Это примерный набор функций, их количество может отличаться, например на ноуте могут отсутствовать некоторые функции, которые будут только на ПК.
Качество функций так себе, ибо сам звуковой чип Realtek можно отнести к бытовому качеству звучания. Ни о каком воспроизведении HD не идет речь, слушать FLAC на данном чипе тоже нет смысла — разницу с MP3 вы вряд ли заметите.
Как скачать Realtek Audio Console для Windows 11 и Windows 10
Среди частых вопросов пользователей последних версий Windows — загрузка и установка приложения Realtek Audio Console (или Realtek Audio Control), а также решение проблем с его работой, если оно было установлено.
В этой инструкции подробно о способах скачать и установить Realtek Audio Console, а также о причинах, по которым при установке приложения могут возникнуть проблемы.
Информация про Realtek Audio Console и необходимые условия для работы приложения
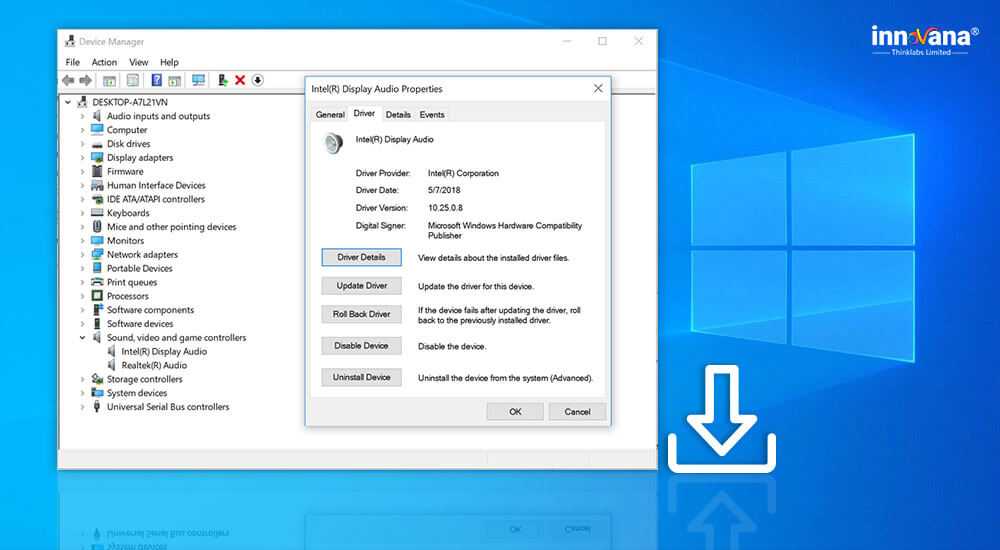
Прежде чем устанавливать Realtek Audio Console необходимо учесть важный нюанс: это приложение предназначено для звуковых карт Realtek, работающих с новыми драйверами DCH или UAD (Universal Audio Driver). Определить версию текущего драйвера в Windows 11 и Windows 10 легко:
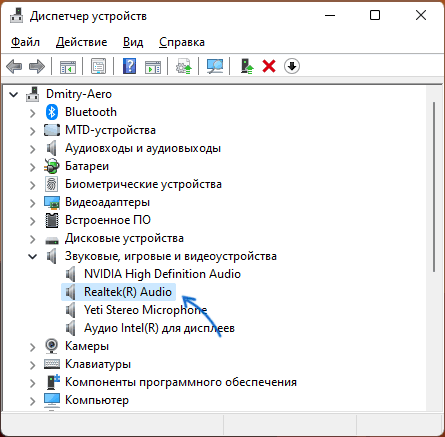
- Нажмите правой кнопкой мыши по кнопке пуск и выберите пункт «Диспетчер устройств» в контекстном меню.
- Посмотрите название вашей звуковой карты в разделе «Звуковые, игровые и видеоустройства».
- Если вы видите Realtek(R) Audio — это говорит о том, что у вас установлен драйвер DCH/UAD и Realtek Audio Console может использоваться.
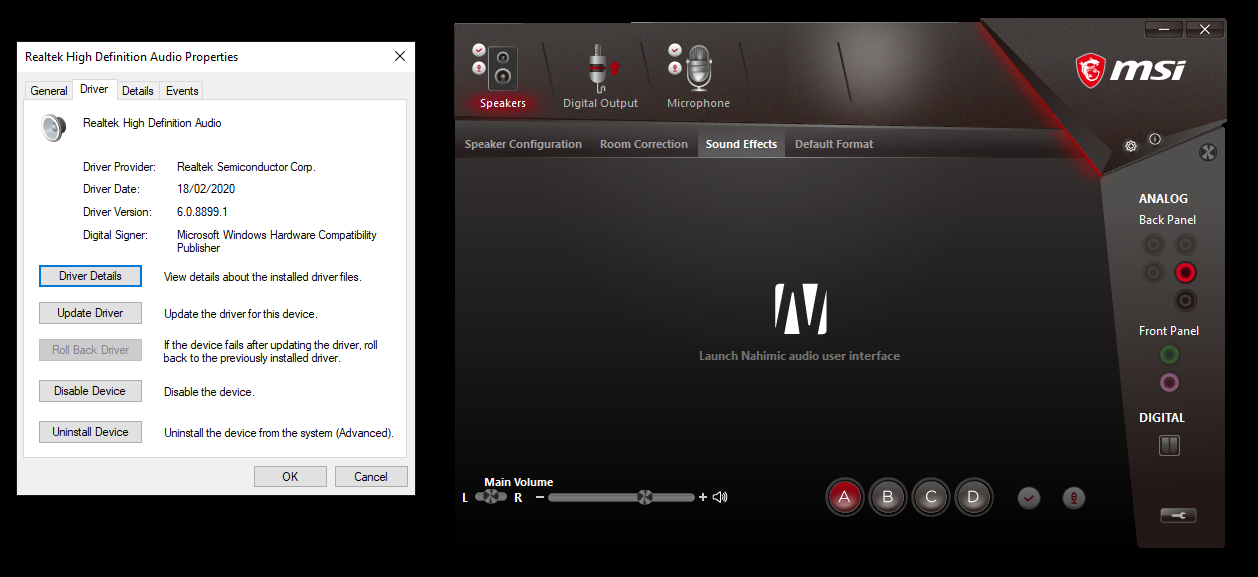
- Если указано: Realtek High Definition Audio — это говорит о том, что установлен старый драйвер и для управления должно использоваться приложение Realtek HD Audio Manager.
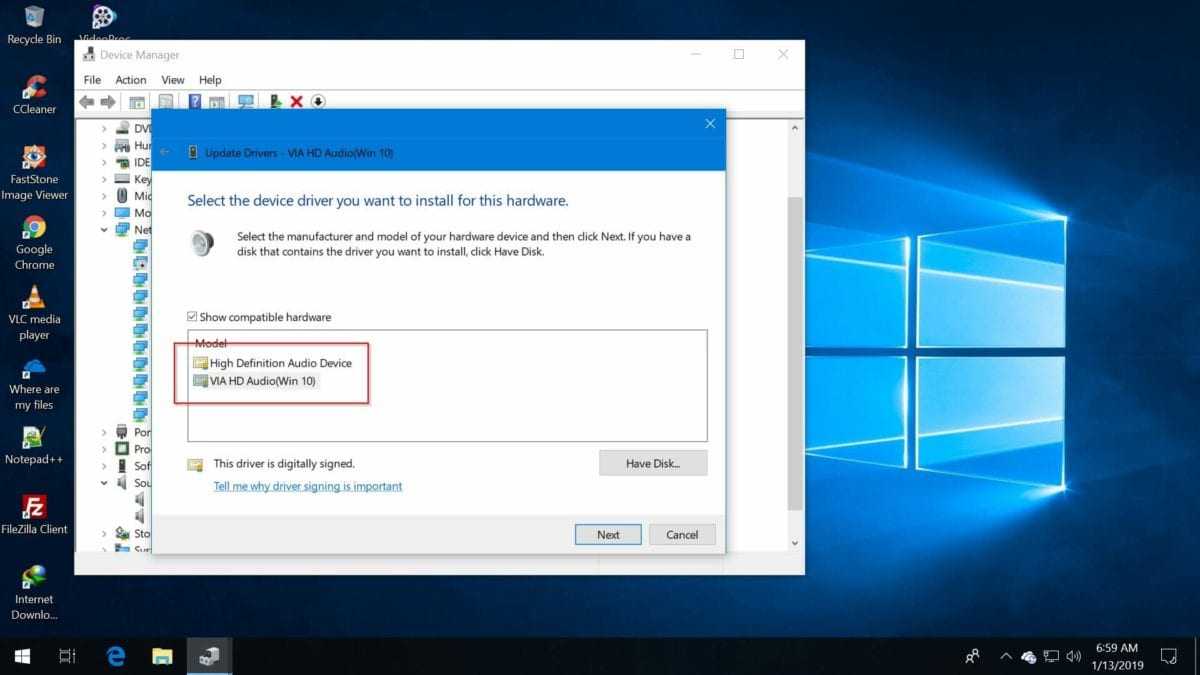
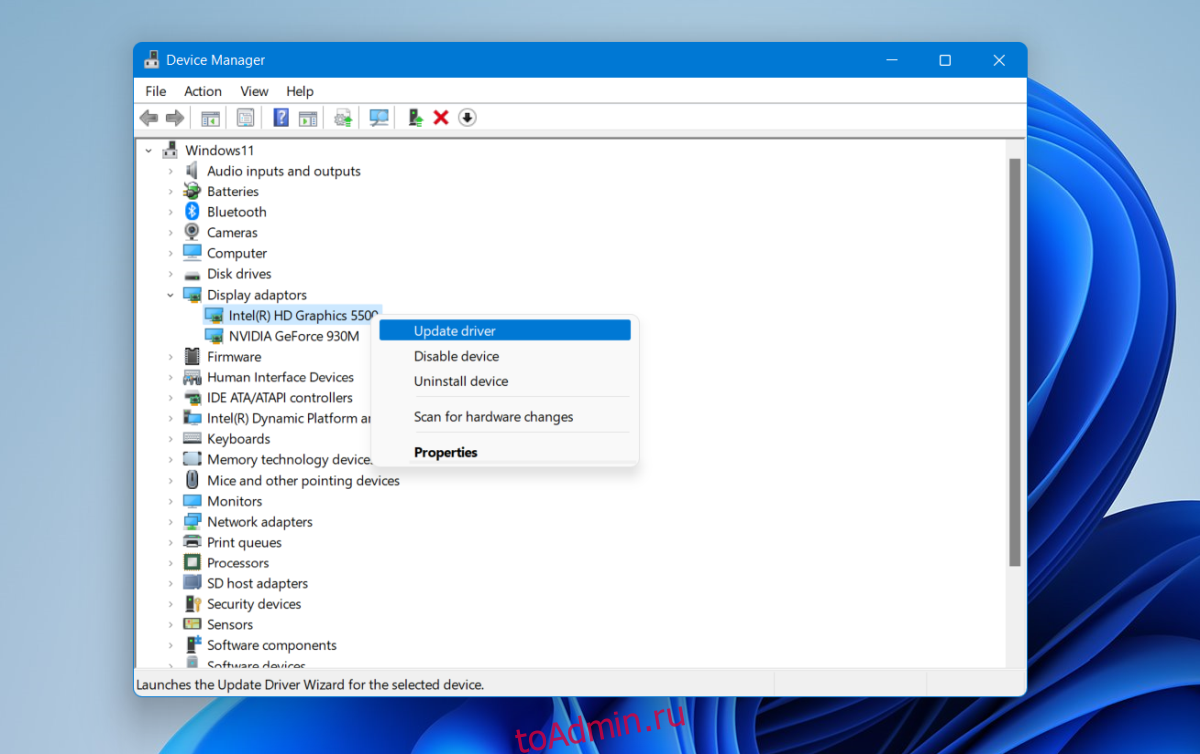
В случае, если у вас используется традиционный (старый) вариант драйвера, вы можете попробовать обновить драйвер прямо в диспетчере устройств: нажмите правой кнопкой мыши по Realtek High Definition Audio, выберите пункт «Обновить драйвер», затем — «Найти драйверы на этом компьютере» — «Выбрать драйвер из списка доступных драйверов на компьютере» и посмотрите, есть ли в списке совместимых устройств Realtek(R) Audio. При наличии — выберите и установите его.
И дополнительный нюанс: в случае если на компьютере установлен новый драйвер Realtek, как правило, установка Realtek Audio Console выполняется автоматически, и вы увидите его в списке установленных приложений. Если же этого не произошло, есть следующие варианты скачать и установить приложение.
Как скачать Realtek Audio Console из магазина Microsoft Store
Если выполнять поиск по приложениям в Microsoft Store, приложение, которое в магазине имеет название Realtek Audio Control, вы не найдёте. Однако можно воспользоваться прямой ссылкой:
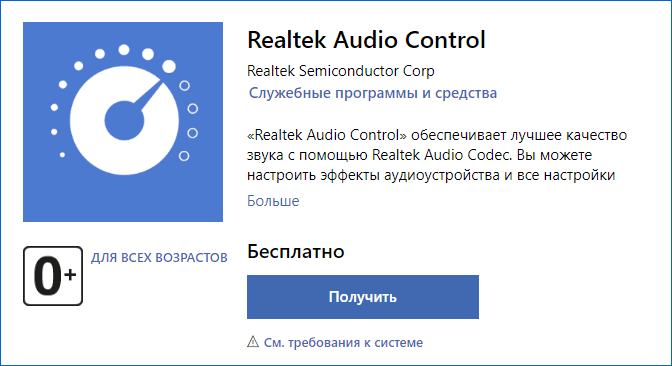
Напомню, что приложение будет работать лишь при наличии соответствующих драйверов Realtek.
Установка Realtek Audio Console вместе с драйверами звуковой карты
Если после установки или переустановки Windows 11 или Windows 10 вы не устанавливали драйверы вручную, при этом имеете не самый старый компьютер или ноутбук, загрузка и установка драйвера звука с официального сайта производителя может решить проблему:
- Найдите официальную страницу поддержки вашей материнской платы (если это ПК) или ноутбука.
- В разделе загрузок найдите драйвер Audio и скачайте его.
- После установки проверьте, появилось ли приложение Realtek Audio Console.
- В некоторых случаях оно появляется не сразу, а загружается из Интернета.
- В некоторых драйверах файлы приложения можно найти внутри архива. К примеру, если открыть архив с драйверами Audio некоторых материнских плат Asus (на примере — B560M), то в нём можно найти папку UWP, распаковать её и запустить файл appxbundle оттуда для установки Realtek Audio Console.
Неофициальный источник Realtek Audio Console и драйверов UAD (DCH)
На GitHub доступен проект, где выкладываются неофициальные сборки драйверов Realtek Universal Audio Driver и приложения Realtek Audio Console. Если другие методы установки для вас не работают, можно попробовать этот вариант:
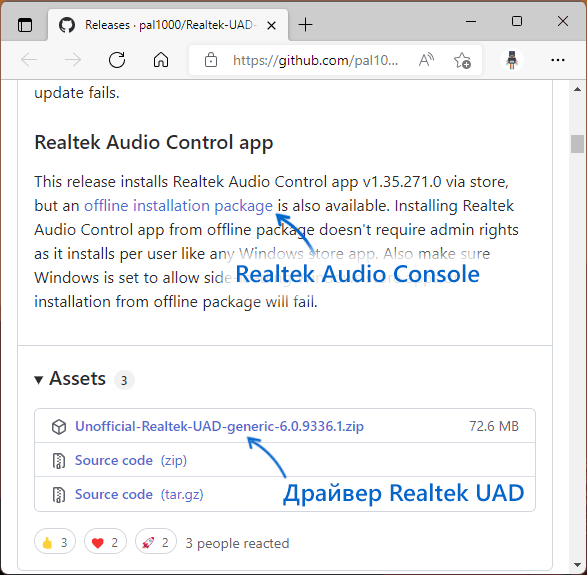
- Зайдите на страницу https://github.com/pal1000/Realtek-UAD-generic/releases
- Ссылка на установщик Realtek Audio Console находится в разделе Realtek Audio Control app, после распаковки потребуется запустить файл setup.cmd из папки с распакованным архивом.
- Ниже, в разделе Assets вы найдете архив с последней сборкой драйвера Realtek, необходимого для работы приложения. Учитывайте, что он может не работать для достаточно старых звуковых карт Realtek.
В случае, если Realtek Audio Console не запускается, хотя все условия для его работы выполняются, причинами могут быть:
- Отключенные элементы Realtek в автозагрузке.
- Отключенные службы Realtek в списке служб.
- Наличие и работа дополнительных приложений и служб улучшения звука от производителя.
Надеюсь, инструкция поможет или решить проблему и установить Realtek Audio Console или разобраться, почему это не удавалось сделать.
Fixes for Realtek Audio Not Working in Windows 11
Just as there are many causes for this issue, there are several fixes as well. Here are a couple of ways to resolve Realtek audio not working in Windows 11.
Update Your Audio Drivers
One way to fix this problem is to update your audio drivers. Outdated or corrupt audio drivers can cause problems with your sound card. You may update your drivers manually by visiting your sound card manufacturer’s website. Additionally, you can automatically update your audio driver as well. To do so follow these steps.
- Search for Device Manager from the search bar in the taskbar.
- Double click Audio input and outputs.
- Then, right-click on Speakers and select Update Driver.
- Click on Search automatically for drivers.
Adjust Your Audio Settings
Another way to fix the no audio problem is to adjust your audio settings. In some cases, the problem may be caused by incorrect audio settings. To adjust your audio settings, follow these steps.
- Press the Windows and R keys simultaneously.
- Type ‘control’ in the search bar and hit enter.
- Go to Hardware and Sound.
- Go to Sound.
- From here, you can change a number of settings, including your speakers and microphone.
Disable Enhancements
Another way to fix this problem is to disable audio enhancements. These enhancements can cause problems with your sound card, in a few cases. To disable enhancements, follow these steps.
- Press the Windows and R keys simultaneously to open Run.
- Type ‘control’ in the search bar and hit enter.
- Go to Hardware and Sound.
- Go to Sound. Under Playback, select your active speaker.
- Click on the Enhancements tab.
- From here, you can disable any enhancements that are causing problems.
Uninstalling and Reinstalling the Realtek Audio Drivers
If updating does not fix the issue, you can further try uninstalling and reinstalling the Realtek audio drivers. To uninstall the Realtek audio drivers, follow these steps.
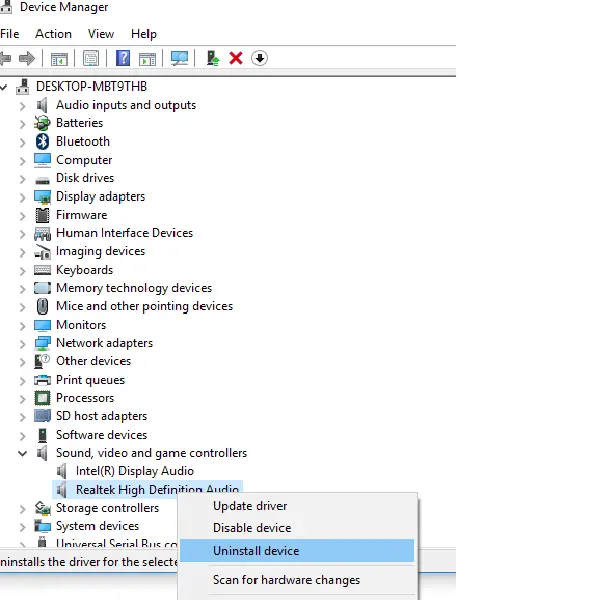
- Right-click on the Start menu.
- Go to Device Manager.
- Click on Sound, video, and game controllers.
- Right-click on Realtek High Definition Audio.
- Click on the Uninstall device option.
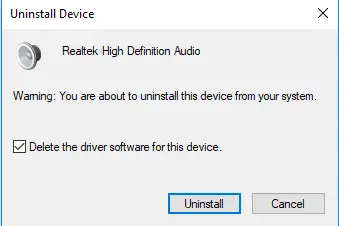
- Checkmark Delete the driver software for this device option.
- Click on Uninstall.
To reinstall the Realtek audio drivers, follow these steps.
- Visit product’s official website and Download.
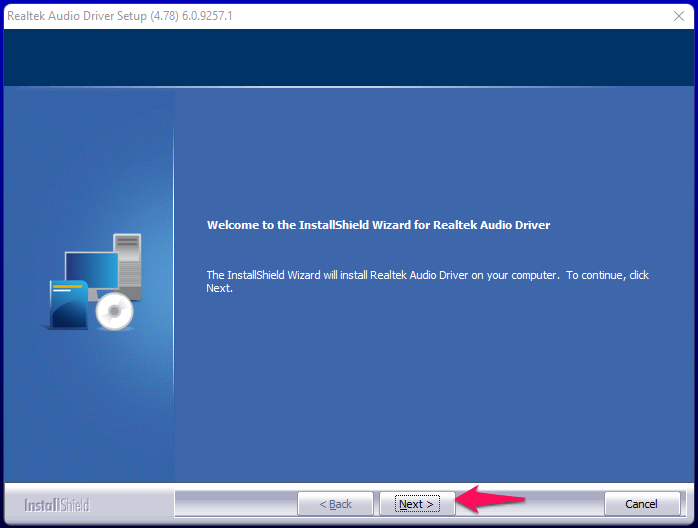
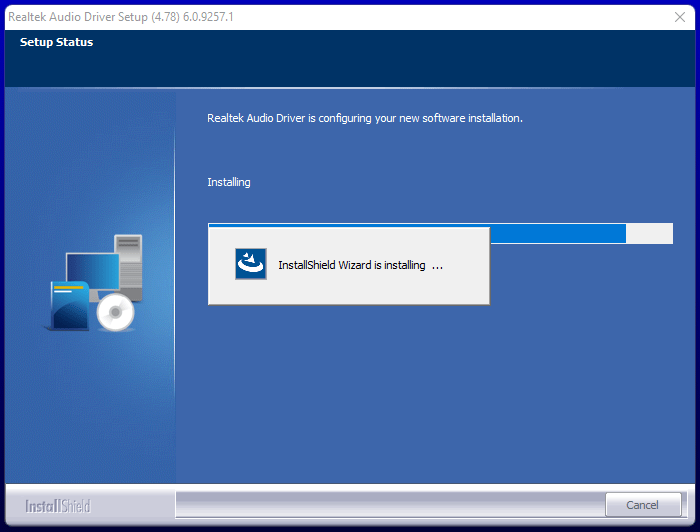
- After the setup file has been successfully downloaded, run the installation program.
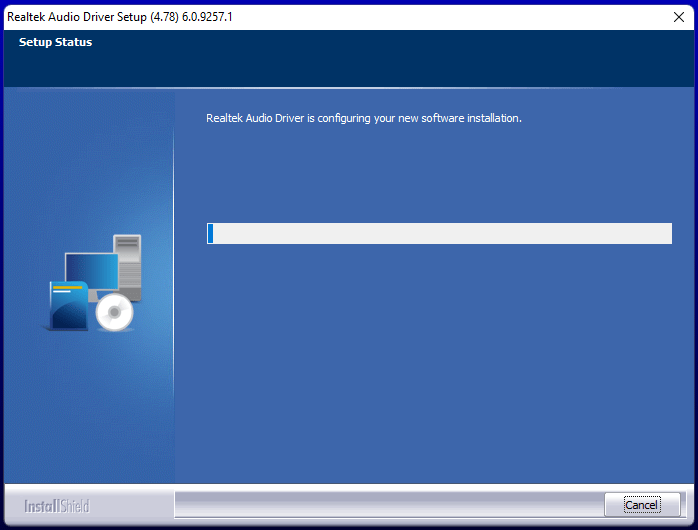
- Follow the instructions and wait for the driver to be installed.
Restart Windows Audio Service
Restarting Windows audio service is one of the easiest ways to fix audio not working in Windows 11. To restart Windows audio service, follow these steps.
- Launch the Run app by pressing the Windows + R hotkeys.
- Type in the Run app, and press the Enter hotkey.
- Locate the Windows Audio service in the list and double-click on it.
- Then, click on the Stop button to stop the Windows audio service.
- Close the Windows Audio Service Properties window and double-click on the Windows audio service again.
- Now, click on the Start button to start the Windows audio service.
- Click on the OK button to close the Windows audio service Properties window.
Checking and Resetting the Audio Device
Checking and resetting the audio device is also a way to fix Realtek audio not working in Windows 11. To check and reset the audio device, follow these steps:
- Launch the Device Manager program by pressing the Windows + R hotkeys.
- Type in the Run app, and press the Enter hotkey.
- Expand the Sound, video, and game controllers section in the Device Manager.
- Right-click on the audio device, select the Disable device option, and select the Enable device option after that.
- Close the Device Manager program.
Restart Your Computer
If all else fails, restarting your computer can sometimes fix this problem. In some cases, the problem may be caused by a temporary glitch. Restarting your computer will clear any temporary problems and allow your sound card to work properly.
Realtek Audio Control – программа для управления звуком и настройками аудио устройства
Realtek Audio Control – это программа для управления звуком колонок и микрофона, подключенных к компьютеру или ноутбуку с аудиочипом от Realtek. Также можно скачать Realtek Audio Console, которая является той же программой, но под другим названием.
Возможности программы
К особенностям софта относится:
- выбор частоты и битрейта звука;
- возможность регулировать громкость между левым и правым динамиком;
- настройка звучания исходя от помещения, где установлена акустическая система;
- эффекты для микрофона для улучшения распознавания речи и устранения эха.
Как установить ПО
- С помощью поисковой строки найдите и запустите Microsoft Store.
- В поисковую строку введите название программы и начните поиск. Когда софта нет в перечне доступного для загрузки – воспользуйтесь этой ссылкой. Щелкните по «Получить в приложении Store» напротив названия софта. Следом согласитесь открыть Microsoft Store.
- Откроется небольшое окошко, где нужно нажать по «Получить».
- После завершения установки жмите на «Открыть».
Системные требования
Открыв дополнительные сведения о Realtek Audio Console в магазине Windows, можно увидеть следующие системные требования:
- Совместимость: ПК, Surface Hub;
- ОС: Виндовс 10 версией не ниже 15063.0;
- Архитектура: x64.
Как пользоваться Realtek Audio Console
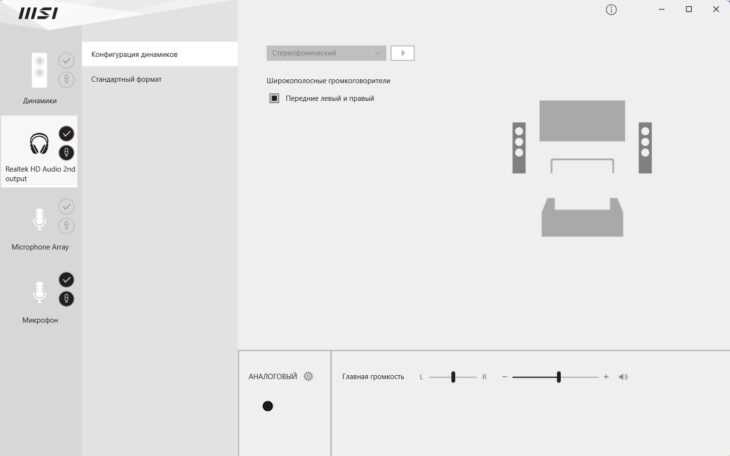
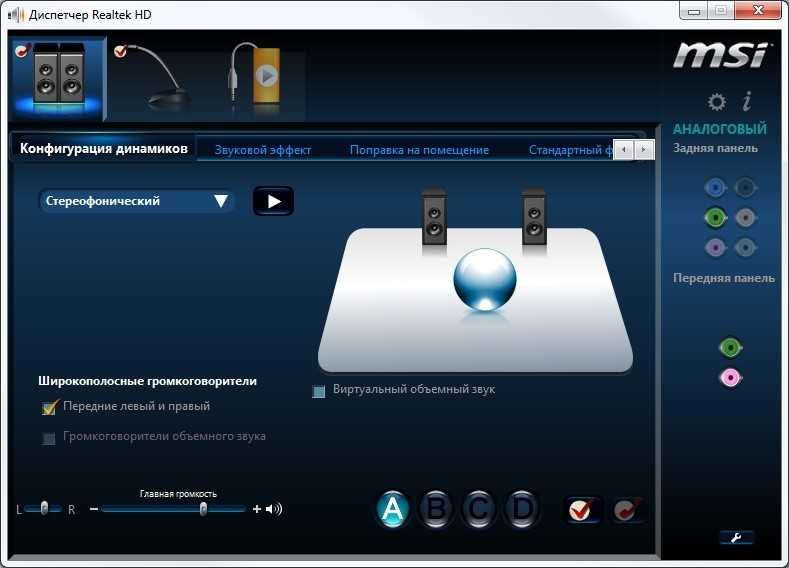
После установки, софт автоматически появится в меню «Пуск». После его запуска отроется главный экран. В меню слева находится список подключенных устройств, щелчком по каждому из них открывается перечень базовых настроек.
В конкретном примере на ноутбуке от MSI у колонок и наушников меняют:
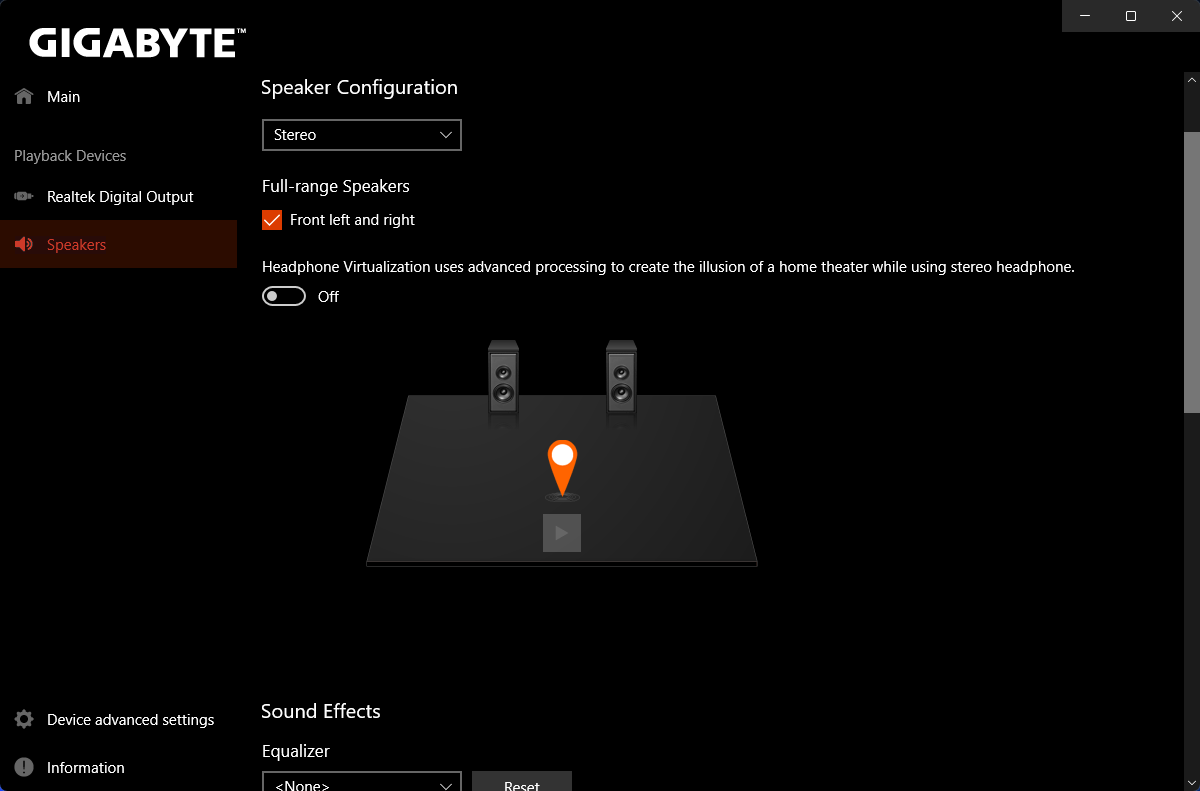
- «Конфигурацию динамиков» – смещают звучание левого и правого канала, общую громкость, включают/отключают широкополосные громкоговорители;
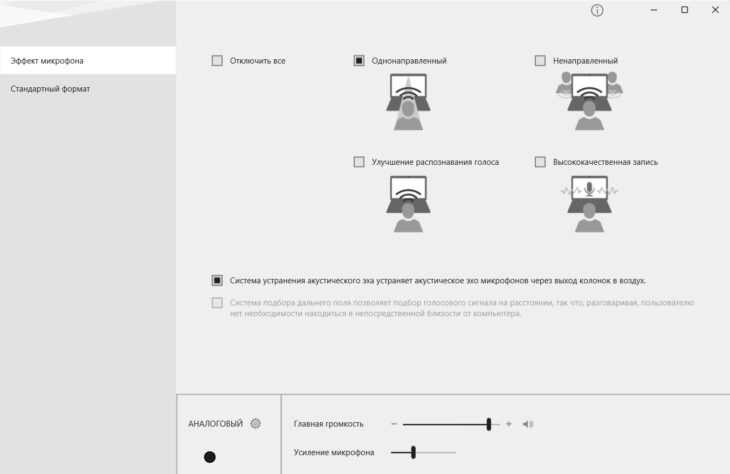
- «Стандартный формат» – тут меняют максимальную битность звука и его герцовку. alt=»Стандартный формат звучания» width=»730″ height=»98″ />

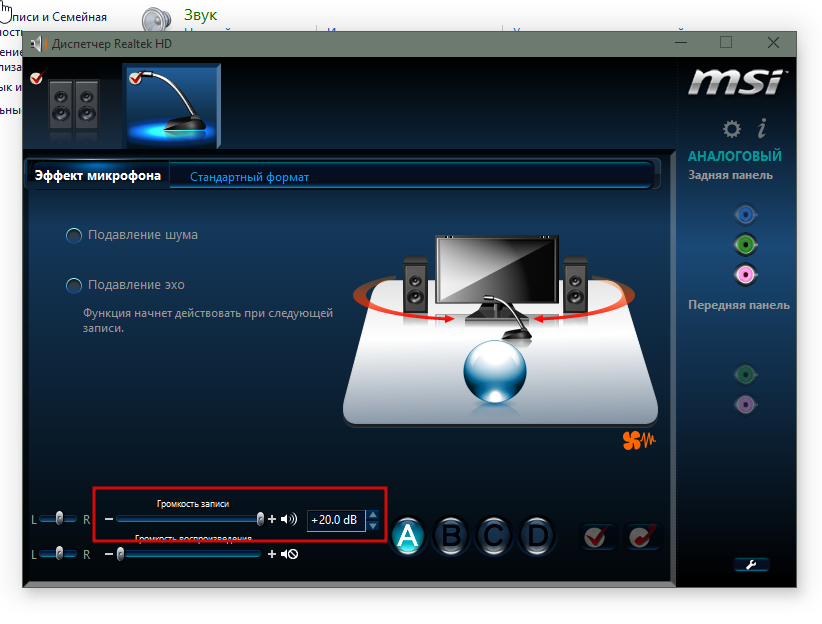
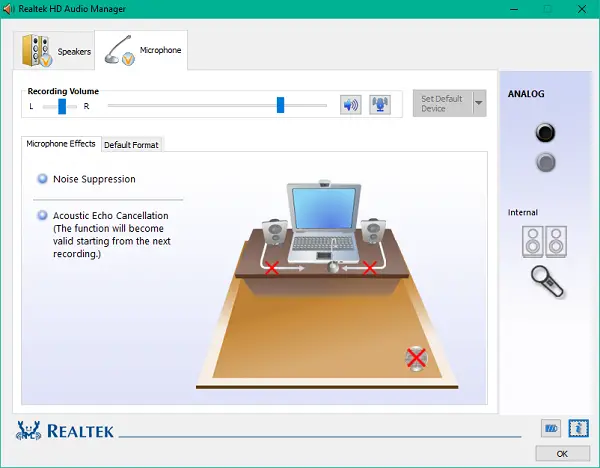
Настройка микрофона происходит подобным образом, но кроме стандартного формата, здесь есть «Эффект микрофона», где выбирают способ его работы и включают/отключают подавление шумов. Ниже разрешают усилить его звучание.
![[fixed] reinstall realtek hd audio manager on windows 10/11 - driver easy](https://jsk-oren.ru/wp-content/uploads/e/c/0/ec03edf33ebd4ebdd4740fc3aca68876.jpeg)
![Fix realtek audio console not opening windows 11 [steps] – techs & gizmos](https://jsk-oren.ru/wp-content/uploads/8/6/d/86dd3a609976253bf1c5eb89a612f114.png)
![Аудиоконсоль realtek для windows 10 и 11 [скачать]](https://jsk-oren.ru/wp-content/uploads/8/0/b/80bce80c39e3af4a5c9484001fafd36e.png)
Возможные проблемы в работе
Проблем с софтом масса, но пройдемся только по самым популярным запросам:
Утилита не скачивается, бесконечно загружается, возникает внутренняя проблема в магазине Microsoft Store
Подобное наблюдается на устройствах тех, у кого установлен аудиочип от других производителей. В таком случае, пытаться скачать программу или дождаться окончания ее загрузки будет бесполезно. Подробнее об установленном драйвере можно узнать в диспетчере устройств.
Софт не запускается, не открывается, не загружается и попросту не работает.
Возможно, Realtek Audio Console был вырезан в сборке конкретной ОС.
Можно ли скачать софт без магазина от Microsoft?
Практически нет. Все ссылки с официальных сайтов ведут непосредственно в Майкрософт Стор. Исключением выступают драйвера для конкретных моделей ноутбуков и материнских плат, в которые вшито решение от Realtek.
Относительно того, почему софт:
- не видит наушники;
- не дает сменить назначение разъемов;
- не определяет сопротивление наушников.
Повторимся, ведь все зависит от конкретной версии софта. Относительно проблем с добавлением внешних источников звука – проверьте линейный вход на устройстве и кабель подключения на наушниках или акустической системе.
Когда не удается открыть приложение, его проще удалить, но сделать это получится только на устройствах, где софт был установлен с магазина приложений. Если он был предустановлен, то избавиться от него простым способом не удастся. Учитывая этот момент, расскажем, где находится кнопка для удаления ПО, установленного из MS:
How can I download an audio driver on Windows 11?
1. Use Device Manager
- Begin by right-clicking on the Start icon then tap on Device Manager.
- Expand the Audio inputs and outputs section then right-click on the driver shown and click on Update driver.
- Choose Search automatically for drivers.
- Choose the Select for updated drivers on Windows Update option.
- Go to Advanced options followed by Optional updates where you will find the audio driver ready for download. Tick the box next to it and select the Download & install button.
2. Use your device manufacturer’s website
- Navigate to your motherboard manufacturer’s website. We will be using Lenovo as a showcase, thus if you also use Lenovo, head to Lenovo’s page and click on PC to find your computer model.
- Click on the Drivers & software section after you enter your device’s model.
- Type audio in the search bar and click on the result. Here you will be shown the audio driver that you need to download.
It is important that you only use the drivers offered by your manufacturer as the others won’t be compatible with your PC and will cause further problems.
3. Use a third-party software
Manually downloading a driver that your computer requires is not something that you have to get used to. There are third-party software tools intended to update, repair, and download any drivers from your PC.
Such is Outbyte Driver Updater. A lightweight software solution intended specifically for people who don’t want to waste time doing things like accessing the Device Manager or navigating to a manufacturer’s website and searching for every single driver needed.The software will maintain your PC in top operational shape and make sure that you don’t encounter any driver-related errors along the way.
Most common Windows errors and bugs can result from faulty or incompatible drivers. An outdated system can lead to lags, system issues, or even BSoDs.You can prevent these problems by using an automatic tool that will search and install the correct drivers on your computer with just a few clicks. That’s why we recommend you use Outbyte Driver Updater.
Here’s how to do it:
- Download and install the Outbyte Driver Updater app.
- Launch the software.
- Wait for the app to detect all incompatible drivers.
- Afterward, it will show you a list of the drivers found to select the ones to Update or Ignore.
- Click on Update & Apply Selected to download and install the newest versions.
- Restart your PC to ensure the applied changes.
Disclaimer: You may need to upgrade the app from the free version to perform specific actions.
If you have manually downloaded the audio driver on Windows 11 and now you face issues with it, take a look at our guide on how to fix Realtek HD Audio Driver issues. However, if you have used Outbyte Driver Updater for this, you won’t be needing any further assistance as it will take care of everything. Was this guide helpful for you? Leave us a comment in the section below and tell us what you think as well as whether you have more methods in mind.
Was this page helpful?
MyWOT
Trustpilot
Thank you!
Not enough details
Hard to understand
Other
x
Contact an Expert
Start a conversation
Альтернативные варианты для улучшения качества звука
Если Realtek Audio Console не поддерживает ваш компьютер под управлением Windows 11, не расстраивайтесь, у вас есть несколько альтернативных вариантов для улучшения качества звука.
1. Использование сторонних аудиоустройств:
Вы можете обратиться к сторонним аудиоустройствам, таким как внешние звуковые карты или USB-подключаемые аудиоинтерфейсы. Эти устройства обычно обеспечивают лучшую производительность и больше функциональности, по сравнению с встроенной звуковой картой на материнской плате.
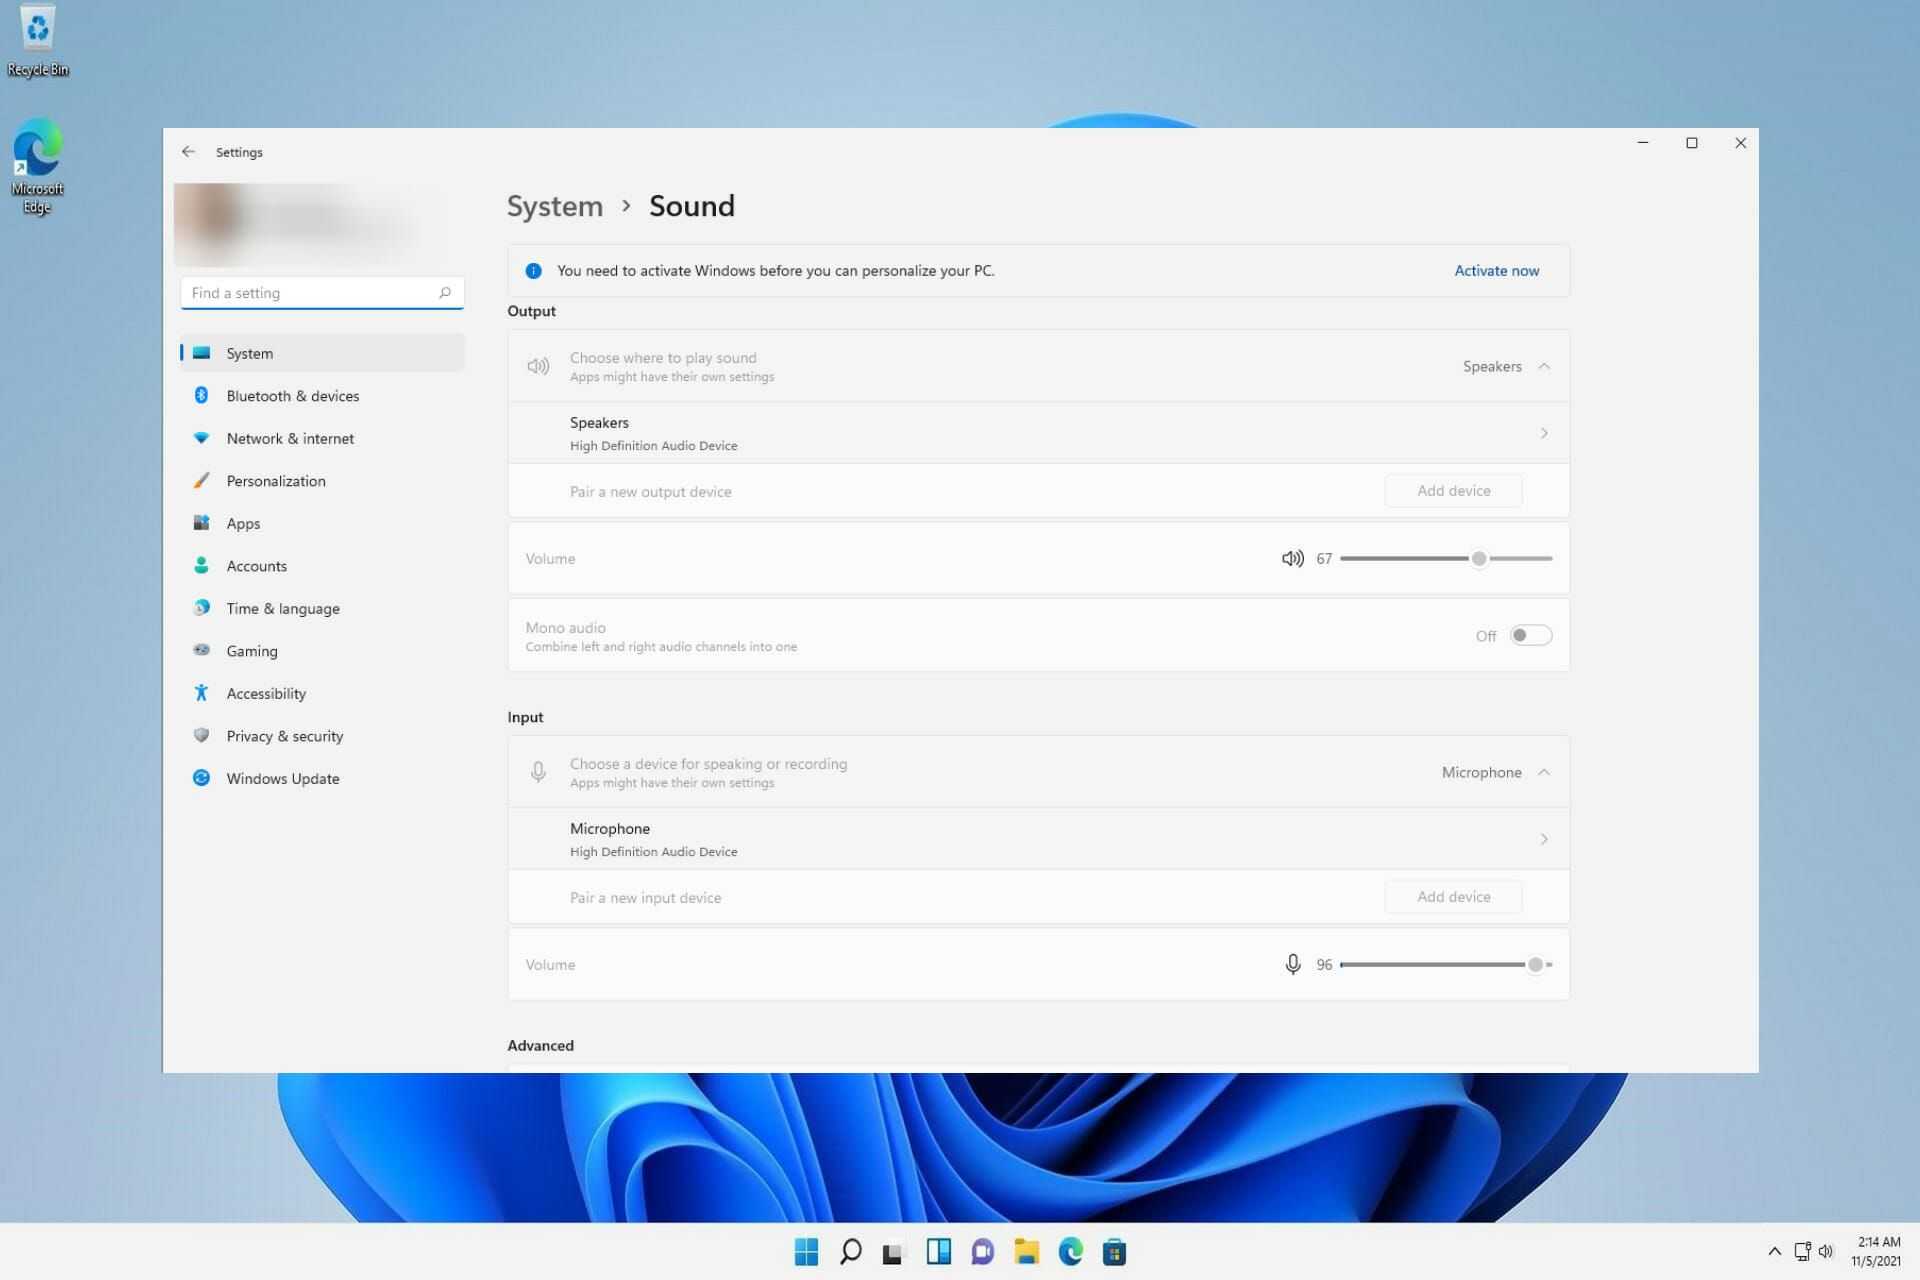
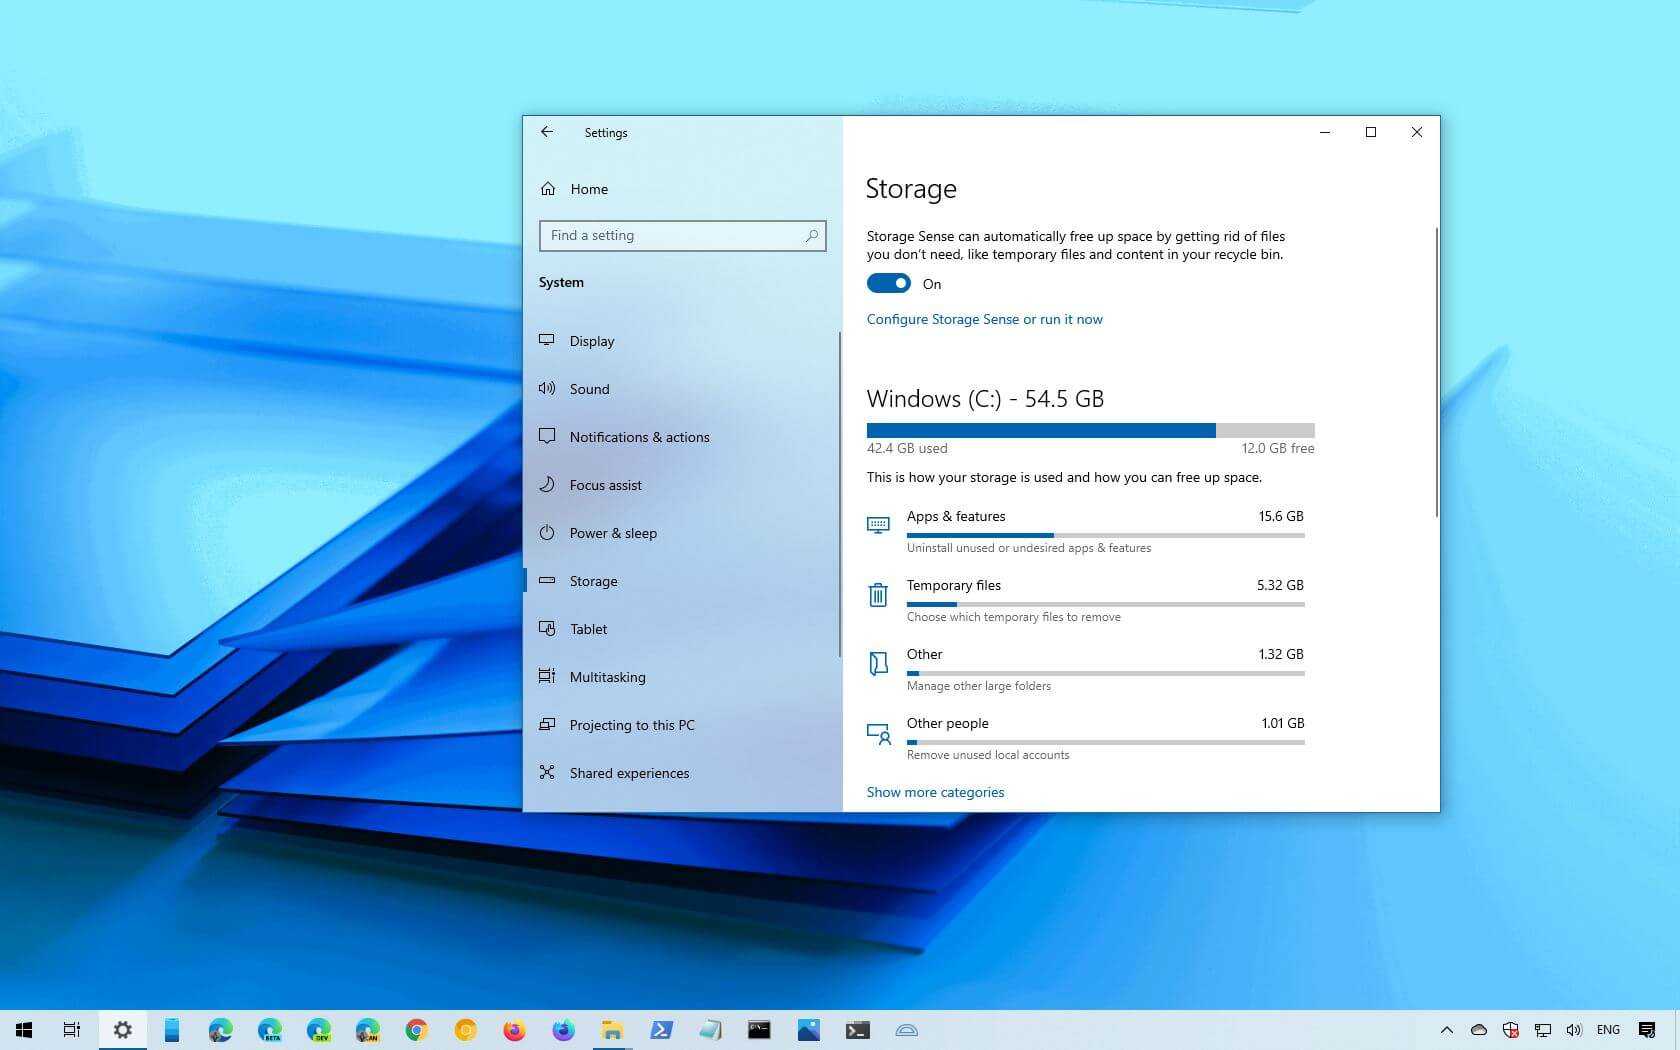
Windows 11 предоставляет встроенные возможности управления звуком. Вы можете настроить EQ-настройки, уровень громкости и другие параметры звука, используя встроенный звуковой панель управления. Откройте «Настройки» -> «Система» -> «Звук» и настройте параметры согласно вашим предпочтениям.
3. Использование сторонних программ:
Существуют множество сторонних программ для управления и настройки звука. Некоторые из них предлагают более широкие возможности, чем встроенные средства операционной системы. Некоторые из них, такие как Equalizer APO, Voicemeeter и FXSound, предоставляют расширенные функции эквалайзера, эффекты и другие возможности для улучшения звука.
4. Проверка наличия обновлений драйверов:
Проверьте, доступны ли обновления драйверов для вашей звуковой карты или аудиоинтерфейса. Регулярно обновляйте драйверы, чтобы получить лучшую совместимость и производительность.
Используйте эти альтернативные варианты для улучшения качества звука на вашем компьютере, если Realtek Audio Console не поддерживает Windows 11. Выберите вариант, который лучше всего подходит для ваших потребностей и предпочтений.
Ознакомление с Realtek Audio Console
Что такое Realtek Audio Console?
Realtek Audio Console — это программное обеспечение для управления аудио-настройками, обеспечивающее качественный звук на компьютере или ноутбуке. Оно предназначено для контроля и настройки звуковых драйверов и аудио-кодеков Realtek, которые устанавливаются на большинство устройств.
Как эффективно использовать Realtek Audio Console?
Realtek Audio Console предоставляет пользователю возможность настроить звук под свои потребности и пожелания. Используя различные функции и настройки, можно улучшить качество звука и настроить его под конкретные условия просмотра/слушания. Доступные функции включают улучшение качества звука, настройку уровня громкости, управление контроллерами звука и т.д.
Как скачать и установить Realtek Audio Console?
Realtek Audio Console доступно для скачивания на сайте производителя. Чтобы установить его на компьютер, нужно следовать простому процессу установки, предоставленному в бесплатной загрузке. После этого пользователь может начать работу с Realtek Audio Console и настраивать звук в соответствии с его потребностями.
How to Reinstall Realtek HD Audio Manager
To reinstall the Realtek HD audio manager, you need to update the Realtek HD audio driver. We’ve put together two methods below for you to download and update the Realtek HD audio driver. You can use them to update the Realtek HD audio driver.
– You’ll need some computer skills and patience to update your drivers this way because you’ll need to find exactly the right driver online, download it, and install it step-by-step.
OR
– This is the quickest and easiest option. You’re all done with just a couple of mouse clicks – easy even if you’re a computer newbie.
Option 1 – Download and install the driver manually
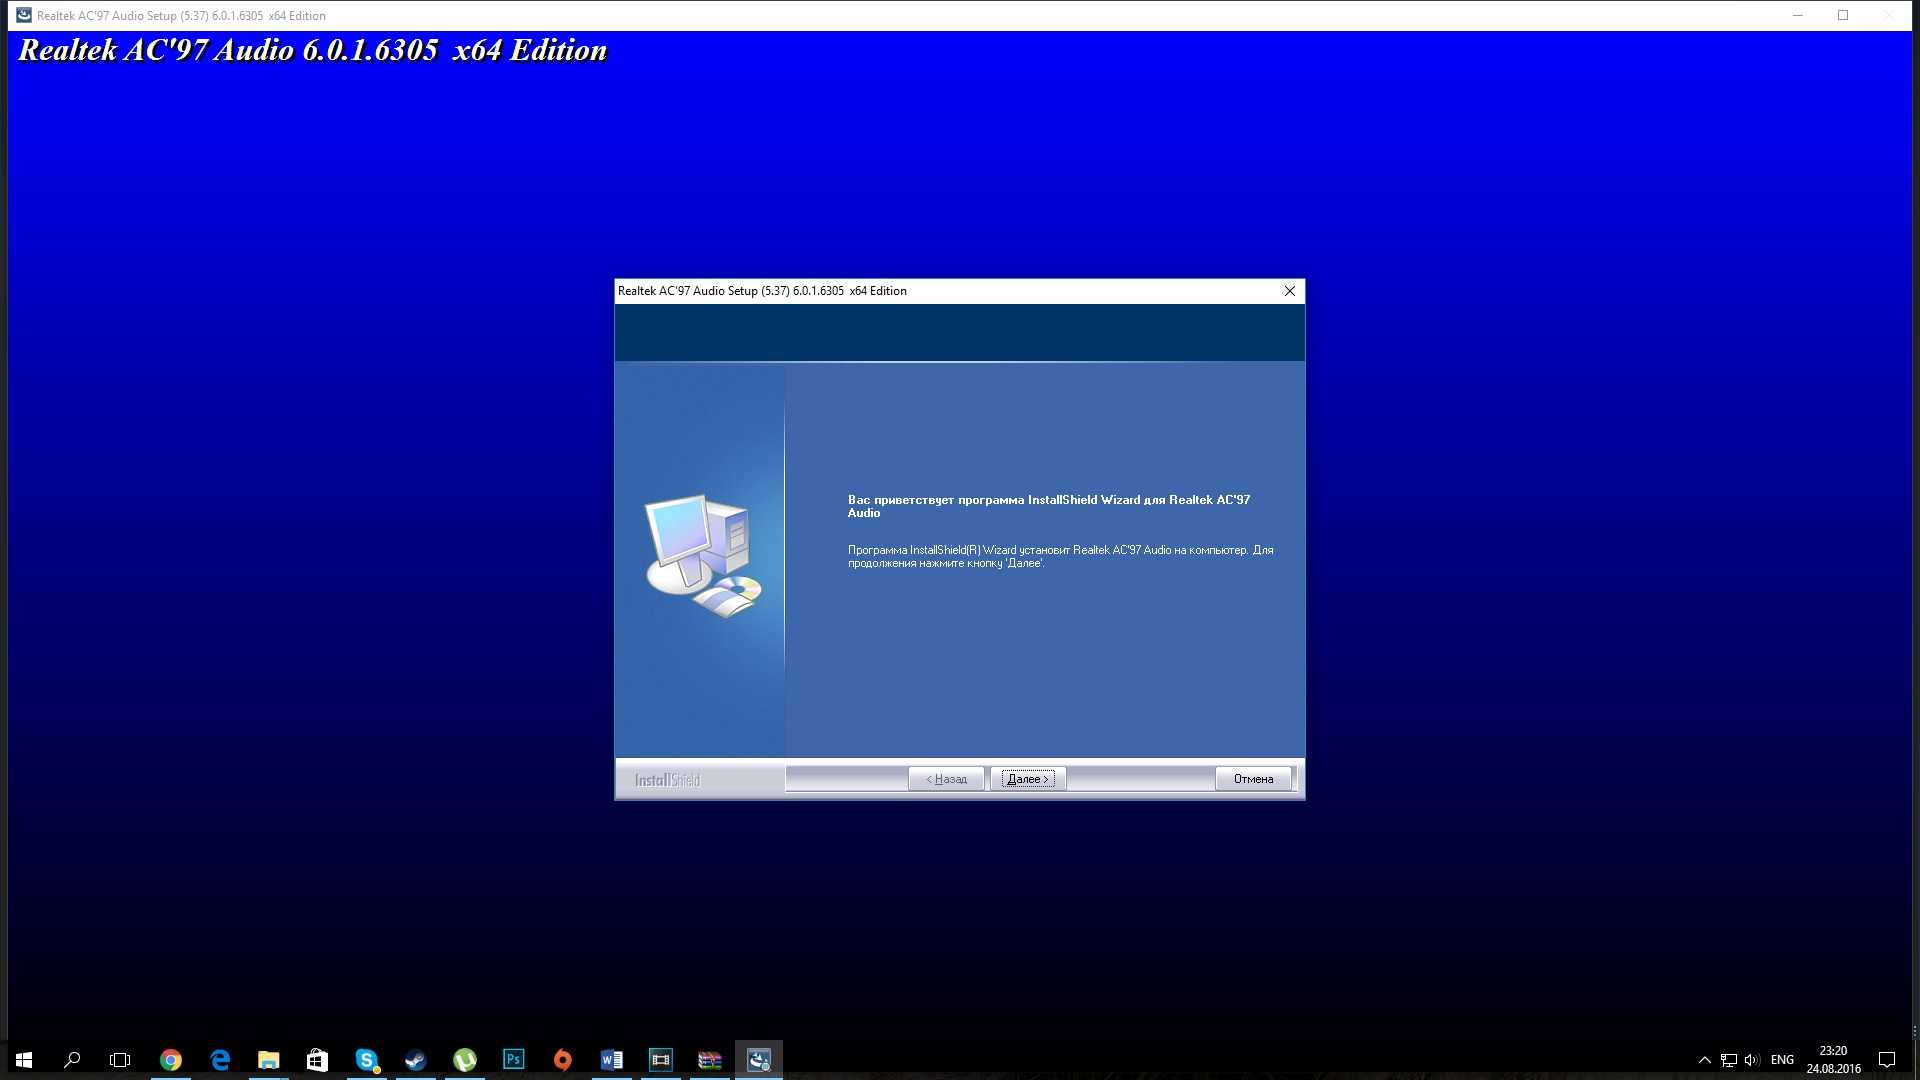
You can go to the Realtek website, find the drivers for your system version, and download them manually.
Once you’ve downloaded the correct drivers for your system, double-click on the downloaded file and follow the on-screen instructions to install the driver.
Option 2 – Automatically update Realtek audio drivers
Driver Easy will automatically recognize your system and find the correct drivers for it. You don’t need to know exactly what system your computer is running, you don’t need to risk downloading and installing the wrong driver, and you don’t need to worry about making a mistake when installing.
You can update your drivers automatically with either the FREE or the Pro version of Driver Easy. But with the Pro version, it takes just 2 clicks (and you get full support and a 30-day money-back guarantee):
1)and install Driver Easy.
2) Run Driver Easy and clickScan Now. Driver Easy will then scan your computer and detect any problem drivers.
3) Click theUpdate button next to the flagged Realtek audio driver to automatically download the correct version of this driver, and then you can manually install it (you can do this with the FREE version).
Or clickUpdate All to automatically download and install the correct version ofallthe drivers that are missing or out of date on your system (this requires the Pro version – you’ll be prompted to upgrade when you click Update All).
Hopefully, you find the article helpful. If you have any questions, ideas, or suggestions, feel free to leave a comment below.
Download and reinstall Realtek HD Audio Manager
Before downloading the new drivers, uninstall all the current drivers. To avoid duplicate conflicts among several drivers, one must check the driver version and uninstall the duplicate audio drivers as well. To do this follow these steps-


Click on the Start button and navigate to Device Manager. You can also access it via the Control Panel.
Expand Sound, video and game controllers from the list in Device Manager.
Under this, locate the audio driver Realtek High Definition Audio.
Right-click on it and select Uninstall device from the drop-down menu.
Check the option with Delete the driver software for this device and hit the uninstall button.
Now go to the Views tab and click on Show hidden devices from the drop-down menu.
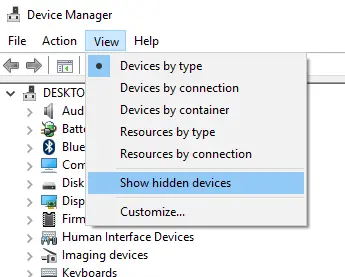
Now search for duplicate audio drivers if any. Right-click on it and hit the Uninstall option.
Restart the system.
Realtek Audio Control
Realtek Audio Control is an audio configuration utility that allows users of Realtek audio hardware to access audio device settings, audio effects, and other control tools via a simple-to-use interface integrated directly into the modern Windows OS experience. It is built from the ground up by Realtek Semiconductor Corporation to take full advantage of the popular Realtek audio codec that is today used in hundreds of millions of PCs and is a basic preinstalled package in many modern motherboards.
For millions of users, Realtek audio is managed automatically by the preinstalled set of drivers and configuration utilities that are provided directly by Windows OS. However, in the event of driver or service corruption caused by a wide variety of events such as crashes, file corruption, or accidental deletion of system files, a standalone version of Realtek Audio Console can provide Windows PC users a way to access their audio management tools and take full control over their audio playback and record experience.
Realtek Audio Control is distributed online as an incredibly lightweight app hosted on the Microsoft Store, enabling all Windows 10 and Windows 11 users to install it by just clicking on the blue “Get“ button.
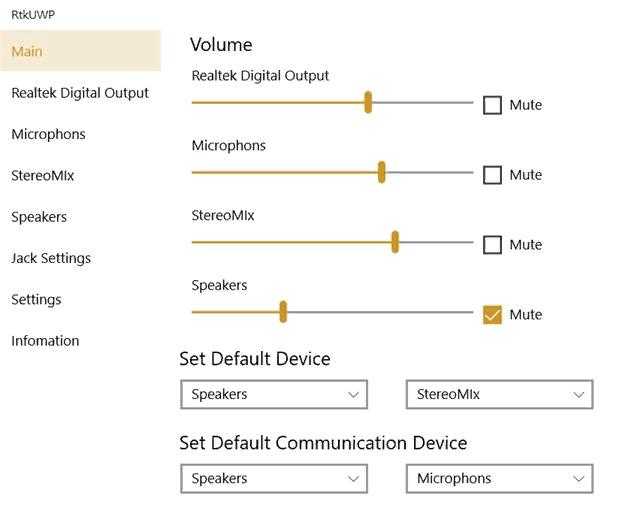
All the audio options these app offers are located in a streamlined dashboard interface that features four main navigation tabs – “Main” section where there are controls for the main Speaker and Microphone volume (with optional Mute and configuration tools), “Speakers” section for managing the sound balance between channels, default playback format, and speaker configuration (everything between mono and surround sound), “Microphone Array” for detailed management of microphone volume and recording format, and “Device Advanced Options” for picking the active audio ports and switching between Classic and Multi-stream audio processing modes.
PROS
- Free and lightweight app for Realtek audio hardware users
- Simple and streamlined dashboard interface with four main navigation tabs
- Optimized for modern versions of Windows OS and available on the Microsoft Store
CONS
- Only useful for Realtek audio hardware users
- Users with functional preinstalled drivers may not need it
Realtek Audio Control app is 100% FREE and is optimized only for modern versions of Windows OS (both 32-bit and 64-bit) that have access to the Microsoft Store.
What Is Realtek Audio Console?
Realtek Audio Console is a tool that allows you to configure your audio devices like headphones, headsets, microphones, speakers, etc. It is also known as Realtek Audio Control. After you connect an audio device, you can open Realtek Audio Console to adjust your speaker or microphone settings according to your requirements. You can also adjust the volume individually for each speaker in your range.
Realtek Audio Console vs Realtek HD Audio Manager
In theory, Realtek Audio Console is an advanced version of Realtek HD Audio Manager. But these two tools are not in conflict, you can have both tools at the same time.
Realtek Audio Console has all the features in Realtek HD Audio Manager and it also contains some more advanced features. Besides, its interface is more user-friendly. All features are in one interface. You don’t need to switch between tabs to change the settings.
How to Open Realtek Audio Console?
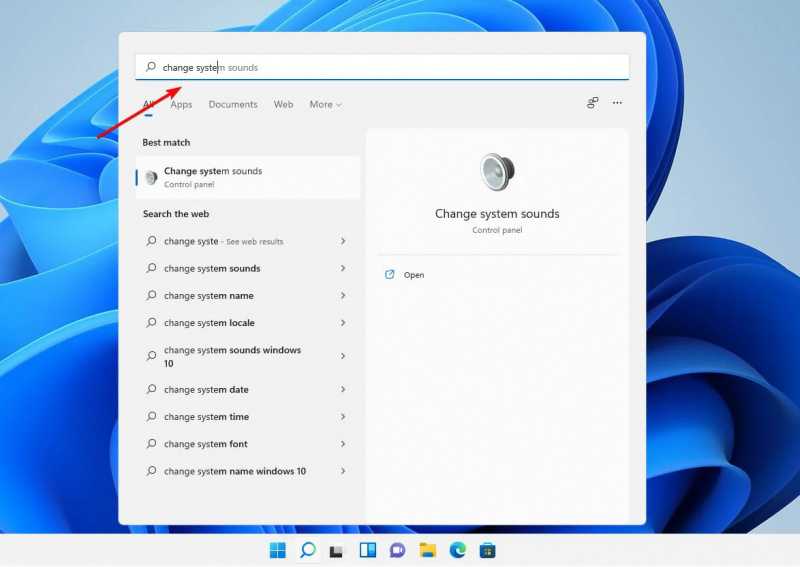
It is very easy to open Realtek Audio Console. It is an app on your device. So, you can go to Start > All apps to find and open it. You can also click the search icon in the taskbar, search for Realtek audio console, and click Realtek Audio Console from the search result to open it.
If you use this tool frequently, you can also pin it to the Start menu or taskbar. After that, you can open Realtek Audio Console from the Start menu or by clicking the app icon from the taskbar.
- How to Pin Shortcuts to the Taskbar?
- How to Add Program to Start Menu?
Top 6 Frequently Asked Questions
1. What is Realtek Audio Driver?
Realtek Audio Driver is a software driver for Realtek audio hardware. It is used to enable the audio hardware on your computer to communicate with your operating system and audio applications. It is the most commonly used audio driver for Windows computers.
2. Why is it important to install Realtek Audio Driver?
Realtek Audio Driver is important for a few reasons. It allows your audio hardware to communicate with your operating system and audio applications. This is important for allowing your audio hardware to be able to play audio correctly. Additionally, it is important for allowing your operating system to recognize your audio hardware and use its features correctly.
3. What is Windows 11?
Windows 11 is the latest version of the Windows operating system. It is the successor to Windows 10 and was released in 2020. It includes many new features and improvements over previous versions of Windows.
4. How do I install Realtek Audio Driver for Windows 11?
To install Realtek Audio Driver for Windows 11, you first need to download the driver from Realtek’s website. Once the driver is downloaded, double click the file to start the installation process. Then, follow the on-screen instructions to complete the installation. Once it is installed, you should be able to use your audio hardware with Windows 11.
5. What additional software may I need to install?
In addition to the Realtek Audio Driver, you may need to install additional software such as a sound card driver or a virtual audio device driver. Additionally, you may need to install an audio application such as a music player or audio editor.
6. How can I make sure my installation was successful?
To make sure that your installation was successful, you can open the Device Manager in Windows 11 and check that your audio device is listed. Additionally, you can check that your audio device is working properly by playing some audio in an audio application or by using the Windows sound settings.
How To Install Realtek HD Audio Driver In Windows 11
If you have been struggling with how to install Realtek Audio Driver Windows 11, you now have a clear and straightforward guide that you can follow. With this guide, you should be able to easily install the Realtek Audio Driver Windows 11 on your computer and enjoy the improved sound quality. So, if you want to take advantage of the improved sound quality that Realtek Audio Driver Windows 11 provides, make sure to follow this guide and you’ll be good to go.