
Creating a Config File
Configuration of the Office suite is now done via an XML file. You can generate one by using the Microsoft 365 Apps admin center. Simply go to the site and click on the “Create a new configuration” button.
- Under “Products and releases” choose what architecture and Office Suite you require, how often you want Office to update — I recommend the “Monthly Enterprise Channel”, and which apps to include or exclude.
- For “Language” either choose specific languages or “Match Operating System”.
- Under “Installation options” you should choose “Local source” and enter the “Source path” of: as this will be where the files are stored in MDT. is automatically mapped to during an MDT Task Sequence.
- For the “Update and upgrade” options this will depend on whether you plan on Office updating from the internet on the systems once it is deployed, or if you want to have a central Office update on the local network (maybe using my Office Update Utility), or if you are using Config Manager.
- For the Upgrade options, these can be disabled as we will be installing office as part of a clean build of Windows.
- Under “Licensing and activation” you will need to set “Automatically accept the EULA” to enabled, set any product keys if required and choose what type of activation you need.
- For “General” provide your Company name and a description for this config file. I tend to use a brief list of the config choices for future reference.
- Under “Application preferences” you can set any specific preferences that you require.
- When you are happy with your config file, click “Export” and you will be prompted to choose the “Default File Format”. I generally choose the “Office Open XML formats”.
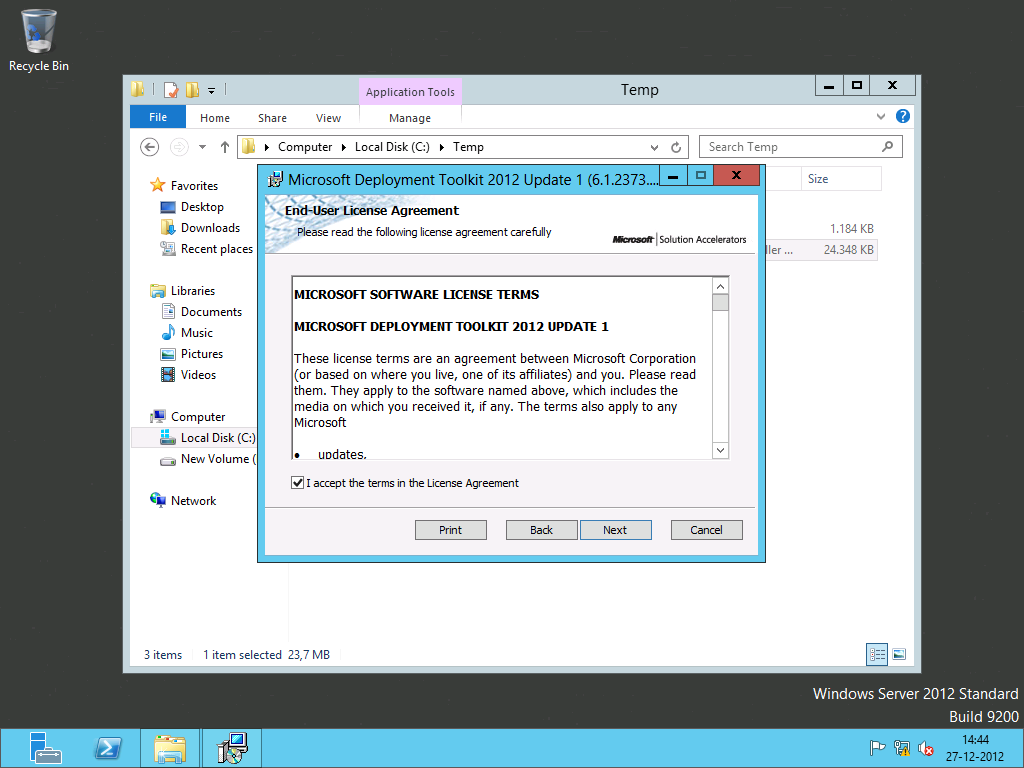
- Finally, accept the terms in the license agreement, enter a file name and download the file.
Install Windows Assessment and Deployment Kit (ADK)
When installing ADK, please select only those 4 components:
- Deployment Tools
- Imaging and Configuration Designer (ICD)
- Configuration Designer
- User State Migration Tool (USM)
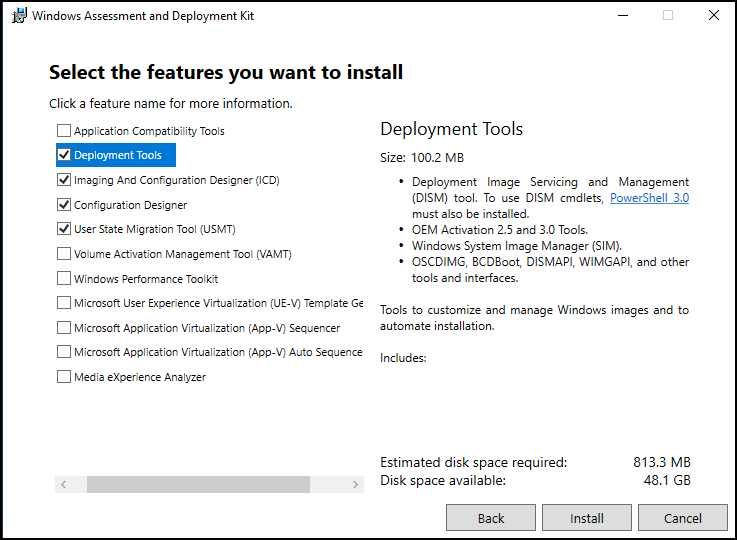
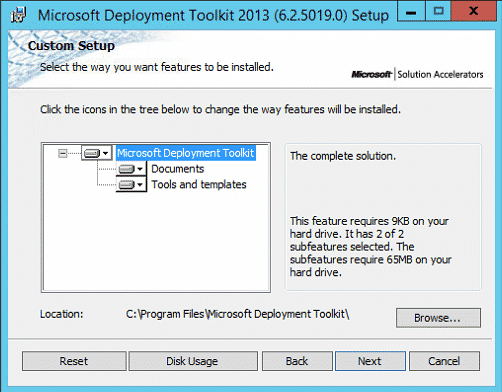
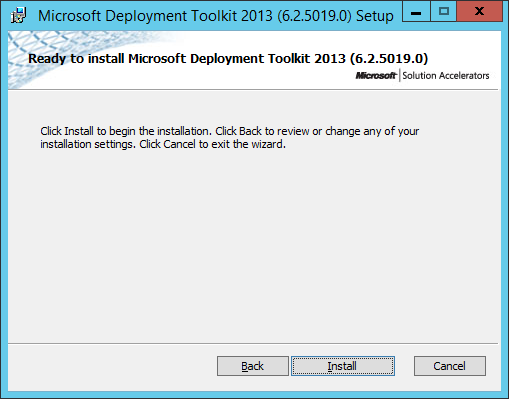
Select those four components when installing Microsoft MDT
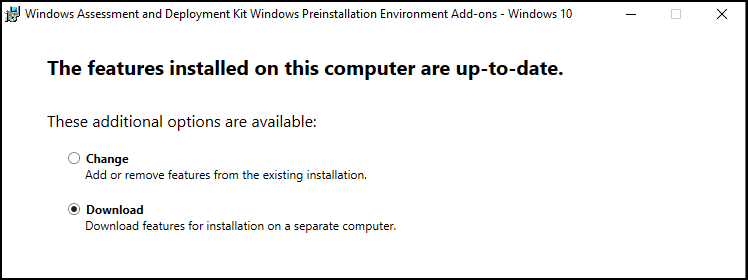
Note: I have kept the defaults at the end, as I had previously downloaded all the parts from the Internet. You have an option to install or to download where the download will automatically create folder where you have the installer.exe file to start the installation. The install option will automatically download the necessary files behind the scene so you don’t know where they go on the disk.
And when you need them later, you’ll have to go again through the process. Hence, the best is to choose download, then when you’re installing go and execute the installer from within the folder that’s created by the downloader.
Download everything to your workstation first
Настройка Office для развертывания Office
После загрузки запустите исполняемый файл развертывания офиса и извлеките его содержимое в каталог. Согласитесь с лицензией и нажмите Продолжить . Инструмент состоит из setup.exe и образца файлов configuration.xml . Вы будете использовать его для создания точной конфигурации Office, которую вы хотите, которую вы можете запустить в командной строке для установки.
Чтобы настроить его, перейдите на веб-сайт средства настройки Office и при необходимости войдите в систему. Графический интерфейс дает вам простой способ создать собственный XML-файл. Нажмите « Создать» прямо под « Создать новую конфигурацию» .
Настройки развертывания
Введите все соответствующие параметры, подробно описанные ниже, для вашей установки Office.
Архитектура : выберите 32-разрядную или 64-разрядную версию.
Продукты : установите либо выпуск с корпоративной лицензией на основе щелчка, либо Office 365. Вы даже можете включить Visio и Project.
Канал обновления : выберите Ежемесячное корпоративное обновление, чтобы обновлять Office раз в месяц по фиксированному расписанию. Или выберите « Полугодовой», чтобы выпускать обновления с обширным тестированием. Перейдите на текущий канал, если вы хотите получать обновления, как только они будут готовы.
Приложения : выберите из списка приложения, которые хотите установить.
Язык : включите все языковые пакеты, которые вы планируете развернуть. Выберите « Соответствие операционной системе», чтобы установить тот же язык, который используется в операционной системе.
Параметры установки : укажите источник файлов Office. Это может быть Microsoft CDN или локальный источник.
Обновление и обновления : укажите источник будущих файлов обновлений и укажите, нужно ли удалять предыдущую установку MSI.
Лицензирование и активация : для установок на основе томов укажите источник ключа продукта (KMS или MAK). По умолчанию лицензия основана на пользователе.
Общие : вы можете добавить название организации и описание для документации.
Настройки приложения : вы можете настроить сотни параметров политики для Office и отдельных приложений.
Экспорт файла конфигурации
По завершении нажмите Готово . Затем нажмите кнопку « Экспорт» и выберите формат документа.
Я выберу настройки по умолчанию для этой конфигурации развертывания. Примите условия лицензионного соглашения. Переименуйте его и нажмите « Экспорт» . Затем сохраните файл в каталоге развертывания офиса. В моем случае это «D: Downloads OfficeDeploy».

What is the Microsoft Office Deployment Tool
Before proceeding further, let’s understand the working and usage of the Office Deployment tool for a better understanding of the installation process.
The Office deployment tool (ODT) by Microsoft is the latest tool for businesses and tech-support companies to install Microsoft Office 365 and its related apps such as Microsoft Excel, Powerpoint, Word, Outlook, and many more using a simple command-line interface. This tool is used to install Microsoft 365 and its associated apps on your client computers.
The ODT tool gives you more control over the installation process such as which Product/App you want to install or which language to select, etc. It also helps you with cloud storage and product updates with very easy tools.
Замечание о препятствии загрузки для пользователей из РФ и РБ
Примечание. Решение ниже подходит не только для загрузки ODT, но и для установки языковых пакетов Office, скачанных с этой страницы. В этом случае сообщение об ошибке может отличаться, но в логах все равно фиксируется блокировка по географическому признаку.
С 2022 года Microsoft блокирует загрузку О365 посредством ODT для российских и белорусских пользователей. При запуске установщика появляется сообщение Command not supported.
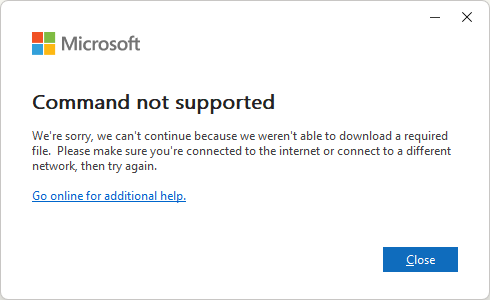
В логах установки (см. в %temp%) появляется такая запись:
Чтобы обойти это ограничение, нужно установить значение GeoID не равным РФ и РБ и удалить несколько разделов реестра, если имеются. В PowerShell:
#Текущее значение GeoId (на память, потом вернуть)
(Get-WinHomeLocation).GeoId
#Смена GeoID на США
Set-WinHomeLocation -GeoId 244
#Удаление разделов реестра
Remove-Item -Path HKCU:\SOFTWARE\Microsoft\Office\16.0\Common\Experiment -Recurse -Force -ErrorAction Ignore
Remove-Item -Path HKCU:\SOFTWARE\Microsoft\Office\16.0\Common\ExperimentConfigs -Recurse -Force -ErrorAction Ignore
Remove-Item -Path HKCU:\SOFTWARE\Microsoft\Office\16.0\Common\ExperimentEcs -Recurse -Force -ErrorAction Ignore
Затем можно запускать установщик снова. См. также этот скрипт на GitHub.
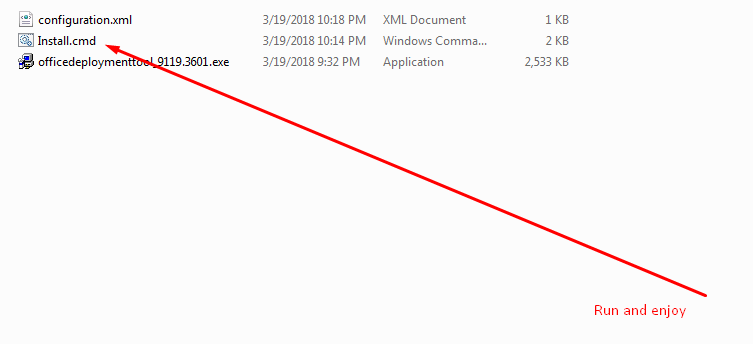
I. Download, create folder and setup only 1 click (Recommended)
Download office deploymet tool
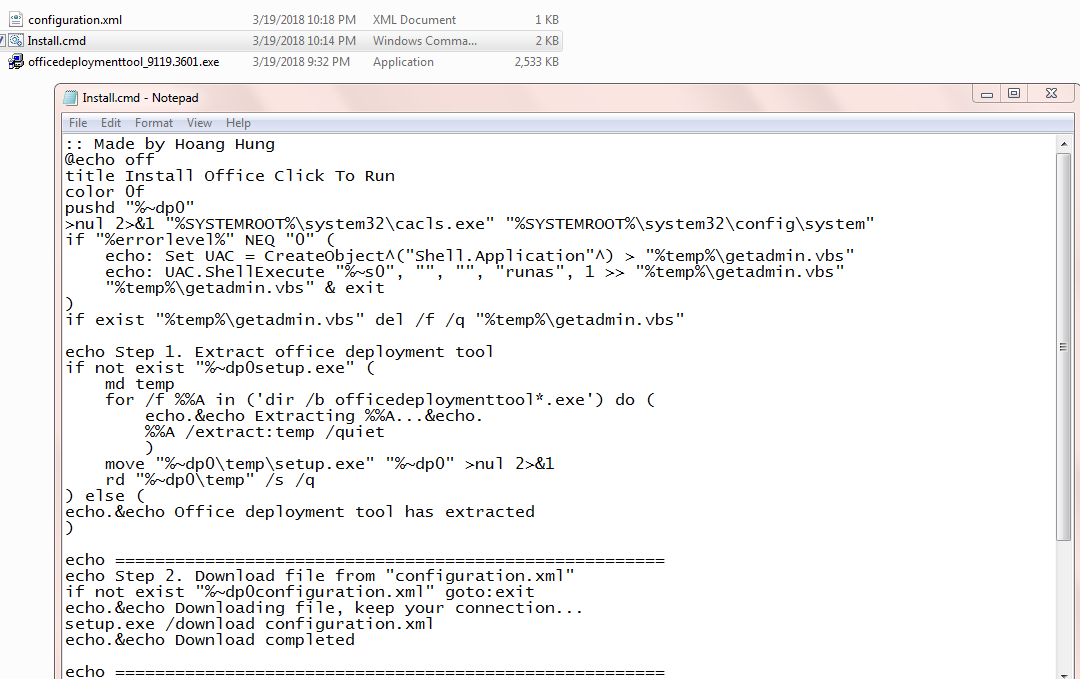
:: Made by Hoang Hung
@echo off
title Install Office Click To Run
color 0f
pushd "%~dp0"

echo Step 1. Extract office deployment tool
if not exist "%~dp0setup.exe" (
    md temp
    for /f %%A in ('dir /b officedeploymenttool*.exe') do (
        echo.&echo Extracting %%A...&echo.
        %%A /extract:temp /quiet
        )
    move "%~dp0\temp\setup.exe" "%~dp0" >nul 2>&1
    rd "%~dp0\temp" /s /q
) else (
echo.&echo Office deployment tool has extracted
)

echo =======================================================
echo Step 2. Download file from "configuration.xml"
if not exist "%~dp0configuration.xml" goto:exit
echo.&echo Downloading file, keep your connection...
setup.exe /download configuration.xml
echo.&echo Download completed

echo =======================================================
echo Step 3. Install office from "configuration.xml"
echo.&echo Installing office, do not turn off your computer...
setup.exe /configure configuration.xml
echo.&echo Install completed
if not exist "%~dp0Setup_Offline.cmd" (
    echo @echo off > Setup_Offline.cmd
    echo setup.exe /configure configuration.xml >> Setup_Offline.cmd
    echo exit >> Setup_Offline.cmd
)
echo.&echo Press any key to exit !
pause >nul
del %0 /q /f
exit

:exit
echo.&echo configuration.xml not exist, please generator it and save to this folder
echo.&echo Press any key to exit !
pause >nul
Что такое средство развертывания Office?
Средство развертывания Office – это инструмент командной строки для установки приложений Microsoft 365 на ваш компьютер. Это единственная утилита, которая дает вам полный контроль над установкой Office. Вы можете выбрать линейку продуктов, язык, частоту обновления и другие параметры для своей установки.
Это особенно хорошо для развертывания Microsoft Office на нескольких компьютерах, подключенных к общей сети.
Для начала создайте общую папку в своей сети или создайте обычную папку на своем диске. Последний лучше всего подходит для личного использования.
Затем перейдите в Центр загрузки Microsoft и загрузите последнюю версию установочного файла средства развертывания Office. Этот инструмент совместим с Windows 8.1, Windows 10, Windows Server 2016 и более поздними версиями.
Идентификаторы продуктов, поддерживающие развертывание Office
Средство развертывания Office работает не со всем. Однако, согласно официальной документации Microsoft , вот список всех идентификаторов продуктов Office 365, которые с ним работают:
- O365ProPlusRetail (приложения Microsoft 365 для предприятий)
- O365BusinessRetail (приложения Microsoft 365 для бизнеса)
- VisioProRetail
- ProjectProRetail
- ДоступRuntimeRetail
- Языковой пакет
И вот все идентификаторы продуктов, не относящихся к Office 365, которые с ним работают:
- ГлавнаяСтуденты2019Розничная торговля
- ГлавнаяБизнес2019Розничная торговля
- Личный2019Розничная
- Профессиональный2019Розничная
- Стандарт2019 Объем
- ProPlus2019Объем
Office Deployment Tool for Click-to-Run
In this section, I will demonstrate the different possibilities from the Office Deployment Tool.
-
- Download the Office Deployment Tool for Click-to-Run from the Microsoft website.
- Extract / Install the Office Deployment Tool on your deployment server or any machine you want to use for this.
- Select Click here to accept…
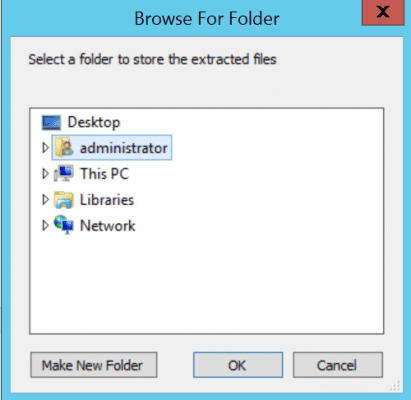
- Browse for a folder where you want to save the exe-file (e.g. c:\ODT).
- Run the setup.exe tool from an admin command prompt.
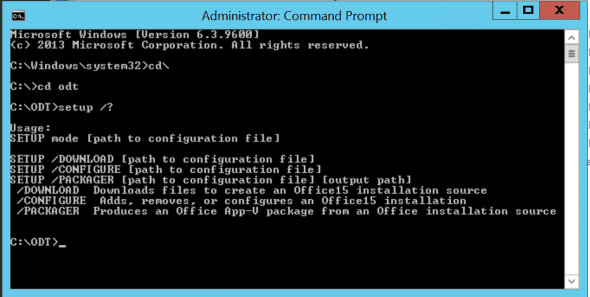
Now, as you can see, the missing component is the for each of the different options we can specify. Microsoft makes it already a bit easy for you, by providing a sample configuration.xml file. When opening this file, the content looks like this:
<Configuration>

<!--  <Add SourcePath="\\Server\Share\Office\" OfficeClientEdition="32" >

<Product ID="O365ProPlusRetail">

<Language ID="en-us" />

</Product>

<Product ID="VisioProRetail">

<Language ID="en-us" />

</Product>

</Add>  -->

<!--  <Updates Enabled="TRUE" UpdatePath="\\Server\Share\Office\" /> -->

<!--  <Display Level="None" AcceptEULA="TRUE" />  -->

<!--  <Logging Name="OfficeSetup.txt" Path="%temp%" />  -->

<!--  <Property Name="AUTOACTIVATE" Value="1" />  -->

</Configuration>
Check out this Technet document for all possible .
While this is not a requirement as such, my personal best practice is to create separate XML-files for my different setup.exe options, allowing me to have control of the different steps. For example, I’ve created the following XML-files in my demo environment:
- Download.XML
- Install.XML
- Package.XML
The contents look like this:
| Sample Install.xml | Sample Download.xml |
| <Configuration><Add SourcePath=”C:\Data\” OfficeClientEdition=”32″ ><Product ID=”O365ProPlusRetail“><Language ID=”en-us” /></Product><Product ID=”VisioProRetail”><Language ID=”en-us” /></Product>
</Add> <Updates Enabled=”TRUE” /> <Display Level=”None” AcceptEULA=”TRUE” /> <Logging Name=”OfficeSetup.txt” Path=”c:\temp” /> </Configuration> |
<Configuration><Add SourcePath=”c:\data” OfficeClientEdition=”32″ ><Product ID=”O365ProPlusRetail“><Language ID=”en-us” /></Product><Product ID=”VisioProRetail”><Language ID=”en-us” /></Product>
</Add> <Logging Name=”OfficeSetup.txt” Path=”C:\Temp” /> </Configuration> |
The fields marked in red may need some explanations.
C:\Data – This is the location where I save the Office 365 Pro Plus install files
Product ID – This parameter define the different install packages and applications I want to install; as you can see, Visio Professional is also available as part of the subscription
Logging Name – While this parameter is optional, it is very interesting in the beginning to troubleshoot possible issues during the download of the deployment itself.
Нюансы установки OneNote
OneNote – это последняя классическая версия. На момент публикации статьи версия была заморожена на 2016, а Microsoft заявляла, что дальше она развиваться не будет, предлагая использовать магазинное приложение, которое входит в состав Windows 10. Позже компания передумала ![]() Впрочем, классическое приложение давно вывели за рамки набора Office, предлагая его для отдельной загрузки с помощью веб-установщика на этой странице. .
Впрочем, классическое приложение давно вывели за рамки набора Office, предлагая его для отдельной загрузки с помощью веб-установщика на этой странице. .

OneNote в составе Office 365 и Office 2019
В принципе, на это намекает OCT, хотя по умолчанию приложение попадает теперь не попадает в список исключений.
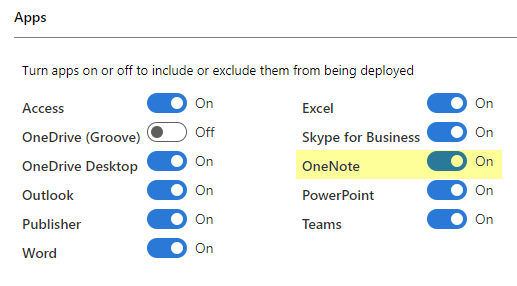
Как я и предполагал в исходной версии статьи, OCT претендует на роль индикатора отношения Microsoft к OneNote. См. также документацию по установке OneNote, где в том числе раскрываются аспекты развертывания посредством SCCM.
Установка Office 365 + OneNote
Следуйте примерам развертывания . Я не исключал OneNote из установки в образцах конфигурационных файлов, поэтому приложение установится автоматически.
Установка Office 2019/2021 + OneNote
В конфигурационном файле необходимо указать , а также учесть, что канал обновления Office 365 не подходит для Office 2019/2021. В остальном все работает так же, как и при развертывании Office 365. Пример конфигурационного файла для развертывания английской 32-разрядной версии Office 2019/2021 Retail (устанавливаются только Word, Excel, PowerPoint и OneNote).
<Configuration>
  <Add OfficeClientEdition="32">
    <Product ID="ProPlus2019Retail">
      <Language ID="en-us" />
      <ExcludeApp ID="Access" />
      <ExcludeApp ID="Groove" />
      <ExcludeApp ID="Lync" />
      <ExcludeApp ID="OneDrive" />
      <ExcludeApp ID="Outlook" />
      <ExcludeApp ID="Publisher" />
    </Product>
  </Add>
  <Display Level="Full" AcceptEULA="TRUE" />
</Configuration>
Установка OneNote в качестве отдельного приложения
Вадимс Поданс, с которым у нас давно налажен обмен тайным знанием по PowerShell и Windows, столкнулся с необычной проблемой. Веб-установщик OneNote не мог скачать приложение из CDN, а диагностика вывела на особенности защитного периметра вкупе с медленным подключением к интернету.
Поскольку ODT поддерживает развертывание отдельных приложений Office, нужно лишь знать ИД продукта OneNote для данного сценария – . Это пример конфигурационного файла, где папка C:\ODT используется для загрузки и установки OneNote (с поправкой на то, что ODT всегда загружает пакет Office 365 целиком).
Примечание. Если установлен Office 365 или Office 2019, он удаляется при развертывании OneNote с этим конфигурационным файлом. Смотрите выше, как установить OneNote наряду с остальными приложениями Office.
<Configuration>
  <Add SourcePath="C:\ODT\" OfficeClientEdition="32">
    <Product ID="OneNoteFreeRetail">
      <Language ID="ru-ru" />
    </Product>
  </Add>
</Configuration>
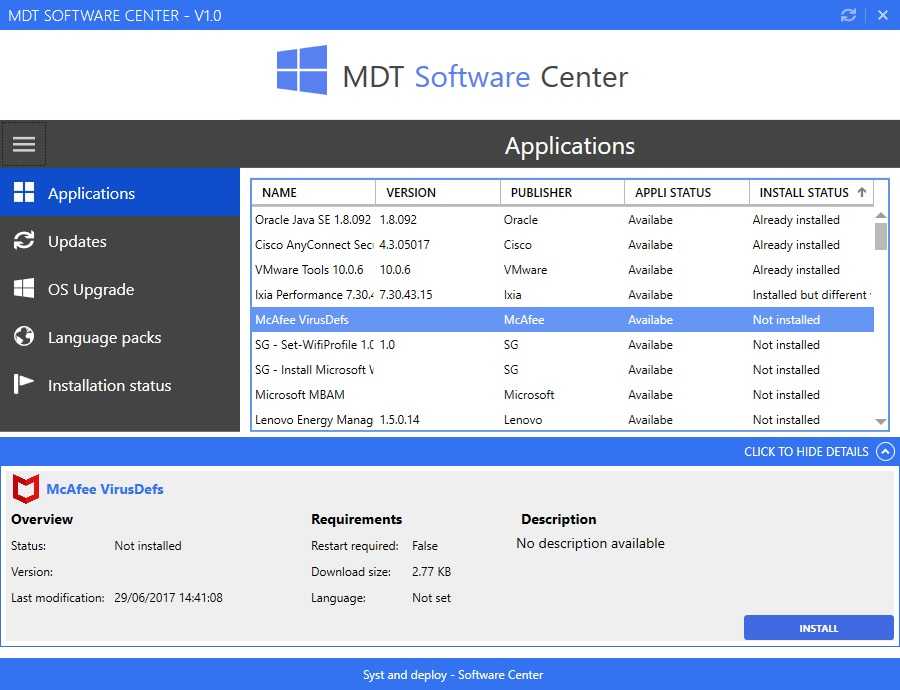
Как и в примерах выше, для установки используется ключ /configure, а исключительно для загрузки — ключ /download. Результат из меню File — Account:
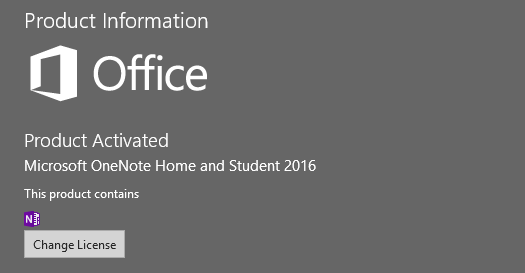
Занятно, что в этом же окне приложений Office 365 значок OneNote пока присутствует в списке.
Развертывание Office 2019 в корпоративной среде (для ИТ-специалистов) +7
- 20.01.19 12:23
•
Aickis
•
#436788
•
Хабрахабр
•
Tutorial
•
•
2500
IT-инфраструктура
Рекомендация: подборка платных и бесплатных курсов дизайна интерьера — https://katalog-kursov.ru/
Для настройки и развертывания корпоративных версий Office 2019 в вашей организации, включая Project и Visio (и других программ), используйте средство развертывания Office Deployment Tool (ODT).
Файлы установки для Office 2019 доступны непосредственно из сети CDN Office, т.е. пакеты Windows (MSI) больше не используется.
А по факту это значит, что на одном компьютере у тебя будет одна установка 2019 Office, и невозможно будет установить любой другой пакет Office. Для примера: приобретен Office 2019 Standard, вы установили его на пользовательский компьютер и планируете установить Skype for Business Basic c помощью установщика MSI – это не будет работать. И, даже если вы выкачаете Skype for Business Click to Run пакет с офиса 365, он тоже не установится. Извините, повторюсь: может быть только одна установка Office 2019 на компьютер, независимо каким способом распространяется дополнительный продукт Office.
И так, вам нужно создать один пакет для развертывания Office 2019.
центра загрузки МайкрософтДля чего это нужно:Office Customization Tool
- версия архитектуры офиса;
- продукты, компоненты и языки;
- параметры установки (CDN Office или «Локальный источник»);
- тип лицензирования.
Skype for Busies
| Product | Product ID |
| Skype for Business Basic 2015 Skype for Business 2015 Skype for Business Basic 2016 Skype for Business 2016 Skype for Business 2019 Skype for Business 2019 (volume licensed) Skype for Business Basic 2019 |
LyncEntryRetail LyncRetail SkypeforBusinessEntryRetail SkypeforBusinessRetail SkypeforBusiness2019Retail SkypeforBusiness2019Volume SkypeforBusinessEntry2019Retail |
Другие продукты
| AccessRetail Access2019Retail Access2019Volume ExcelRetail Excel2019Retail Excel2019Volume HomeBusinessRetail HomeBusiness2019Retail HomeStudentRetail HomeStudent2019Retail O365HomePremRetail OneNoteRetail OutlookRetail Outlook2019Retail Outlook2019Volume Personal2019Retail PowerPointRetail PowerPoint2019Retail PowerPoint2019Volume ProfessionalRetail Professional2019Retail ProjectProXVolume |
ProjectPro2019Retail ProjectPro2019Volume ProjectStdRetail ProjectStdXVolume ProjectStd2019Retail ProjectStd2019Volume ProPlus2019Volume PublisherRetail Publisher2019Retail Publisher2019Volume Standard2019Volume VisioProXVolume VisioPro2019Retail VisioPro2019Volume VisioStdRetail VisioStdXVolume VisioStd2019Retail VisioStd2019Volume WordRetail Word2019Retail Word2019Volume |
Официальная ссылка на поддерживаемые продукты (, которую я долго искал).
III. Channel
1. Monthly Channel
Monthly Channel might be the right choice for your organization in the following situations:
-
You want to provide your users with the newest features of Office as soon as those features are available
-
You don’t have many line-of-business applications, add-ins, or macros that you need to test to determine if they work with an updated version of Office.
A Monthly Channel with new features is expected to be released each month, although there is no set schedule for when a feature release occurs. In addition to new or updated features, the release might also contain non-security updates, such as updates that provide stability or performance improvements for Office. Security updates for Monthly Channel are usually released on the second Tuesday of the month. At any other time, if there is a critical non-security issue that needs to be fixed, we will provide a separate Monthly Channel release that fixes the issue.
Monthly Channel releases are cumulative. The most current Monthly Channel release contains all the features, security updates, and non-security updates from the previous Monthly Channel releases.
A Monthly Channel release is supported only until the next Monthly Channel release is available. No new security updates are provided for previous Monthly Channel releases.
2. Monthly Channel (Targeted)
This update channel provides an early look at the upcoming Monthly Channel release. It is a supported update channel, and usually is available at least one week ahead of time when it’s a Monthly Channel release that contains new features.
3. Semi-Annual Channel
If your organization doesn’t want to deploy the latest features of Office right away or you have a significant number of line-of-business applications, add-ins, or macros that you need to test with Office, then Semi-Annual Channel might be the better choice for your organization. That’s because new features are added to Semi-Annual Channel only twice a year, instead of every month. Semi-Annual Channel is the default update channel for Office 365 ProPlus.
A Semi-Annual Channel with new features is expected to be released twice a year, in January and July. New features aren’t added to Semi-Annual Channel at any other time. The features that are included in Semi-Annual Channel are features that have been released previously in Monthly Channel.
In the four months prior to a new Semi-Annual Channel feature release, Microsoft provides builds of the upcoming release so that pilot users and application compatibility testers in your organization can work with the upcoming release. These builds are provided through the Semi-Annual Channel (Targeted) update channel.
After the January and July releases of Semi-Annual Channel, additional security updates, if needed, can also be added to Semi-Annual Channel. A release of Semi-Annual Channel with these updates usually occurs on the second Tuesday of the month. If there is a critical non-security issue that needs to be fixed in Semi-Annual Channel, that non-security update will also be included in a Semi-Annual Channel release.
4. Semi-Annual Channel (Targeted)
To help your organization prepare for a Semi-Annual Channel release, Microsoft provides Semi-Annual Channel (Targeted). The primary purpose of this update channel is to give pilot users and application compatibility testers in your organization a chance to work with the upcoming Semi-Annual Channel release. During this time, which is about four months, you might identify possible issues that you need to fix with your line-of-business applications, add-ins, or macros or that you want Microsoft to fix.


A Semi-Annual Channel (Targeted) with new features is expected to be released twice a year, in March and September. New features aren’t added to Semi-Annual Channel (Targeted) at any other time. The features that are included in Semi-Annual Channel (Targeted) are features that have been released previously in Monthly Channel.
The March and September feature releases for Semi-Annual Channel (Targeted) also include security and non-security updates that have been released previously in Monthly Channel. After the March and September releases, additional security and non-security updates, if needed, can also be added to Semi-Annual Channel (Targeted). A release of Semi-Annual Channel (Targeted) with these updates usually occurs on the second Tuesday of the month.
Even though this update channel is primarily designed for your testing, it’s a fully supported version of Office 365 ProPlus.
Заключение MDT против ODT
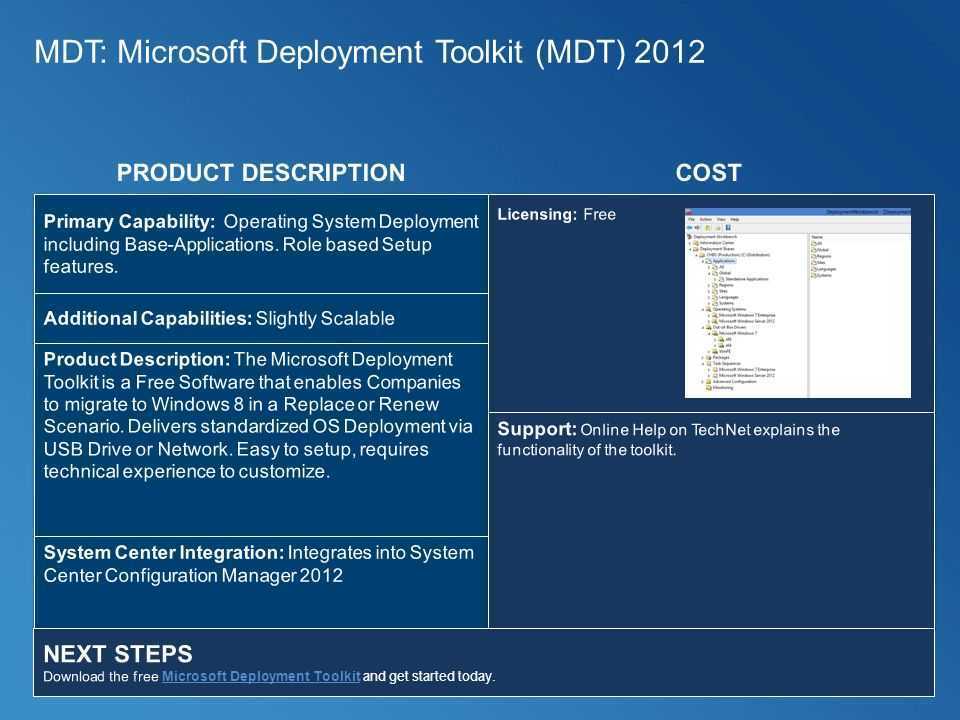
Хотя мы можем использовать любой инструмент для развертывания Microsoft Office, ODT в первую очередь предназначен для этой конкретной цели. Однако MDT — это более комплексное решение, которое администраторы могут использовать для более широкого диапазона сценариев развертывания, включая операционные системы и другие приложения.
Короче говоря, Microsoft Deployment Toolkit и Office Deployment Tool — это мощные инструменты, которые могут помочь ИТ-администраторам упростить и автоматизировать процесс развертывания. Однако благодаря централизованному развертыванию программного обеспечения, настраиваемым параметрам развертывания и функциям автоматического развертывания MDT предлагает ряд преимуществ организациям любого размера. Если мы хотим сэкономить время, повысить производительность или сократить расходы на ИТ, эти инструменты развертывания могут нам помочь. Действительно, эффективно используя MDT или ODT, мы можем упростить процесс развертывания и убедиться, что все устройства обновлены и работают эффективно.
ITпедия LinkedIn Финансовые руководители LinkedIn
резюме

статья
Microsoft Deployment Toolkit и Office Deployment Tool, в чем разница?
Описание
В современной бизнес-среде развертывание и внедрение нового программного и аппаратного обеспечения является постоянной проблемой. С различными устройствами, операционными системами и приложениями для ИТ-администраторов может оказаться непростой задачей убедиться, что все устройства обновлены и работают эффективно. Здесь в игру вступают Microsoft Deployment Toolkit (MDT) и Office Deployment Tool (ODT). Для чего они используются и в чем разница? Поэтому в этой статье мы более подробно рассмотрим их функции и то, как они упрощают процесс внедрения.
Автор
Имя издателя
ITpedia
Издательство Логотип