
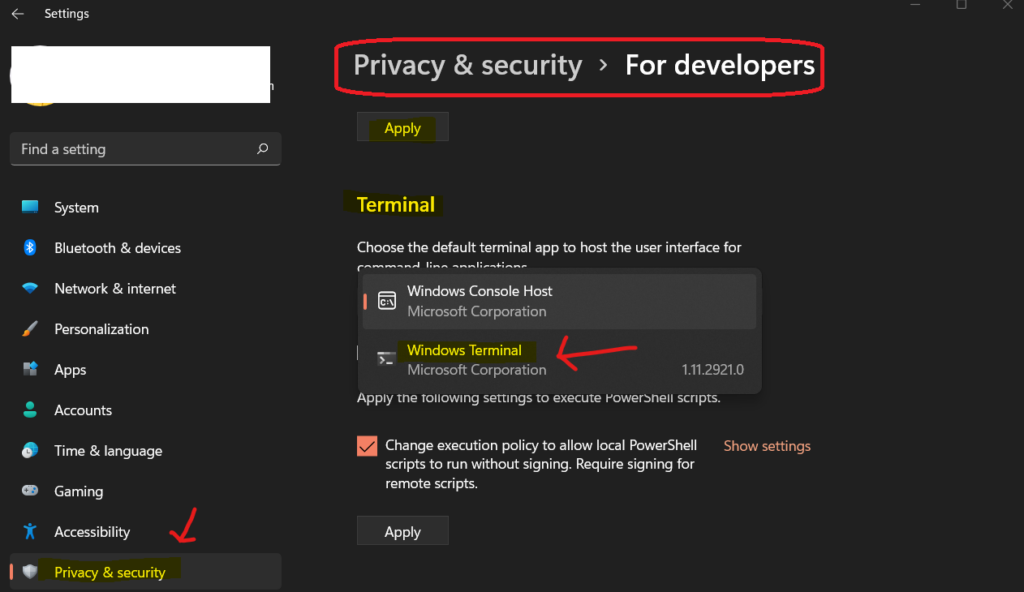
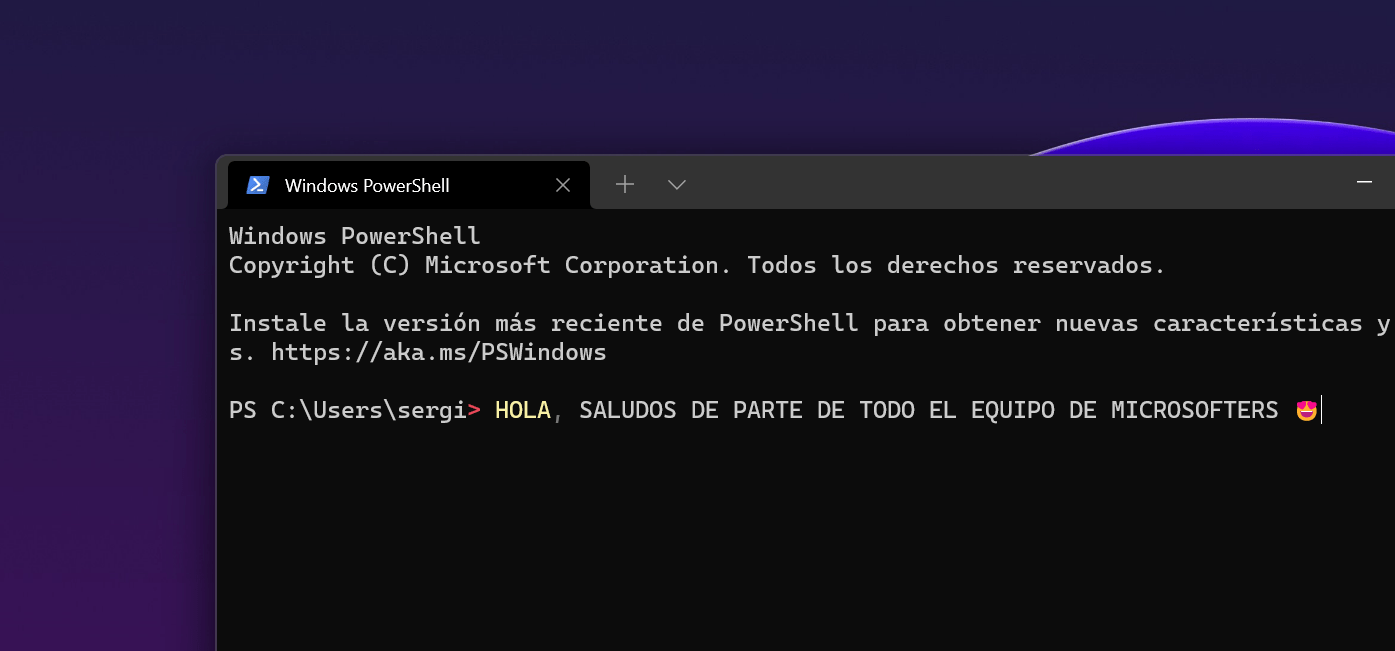
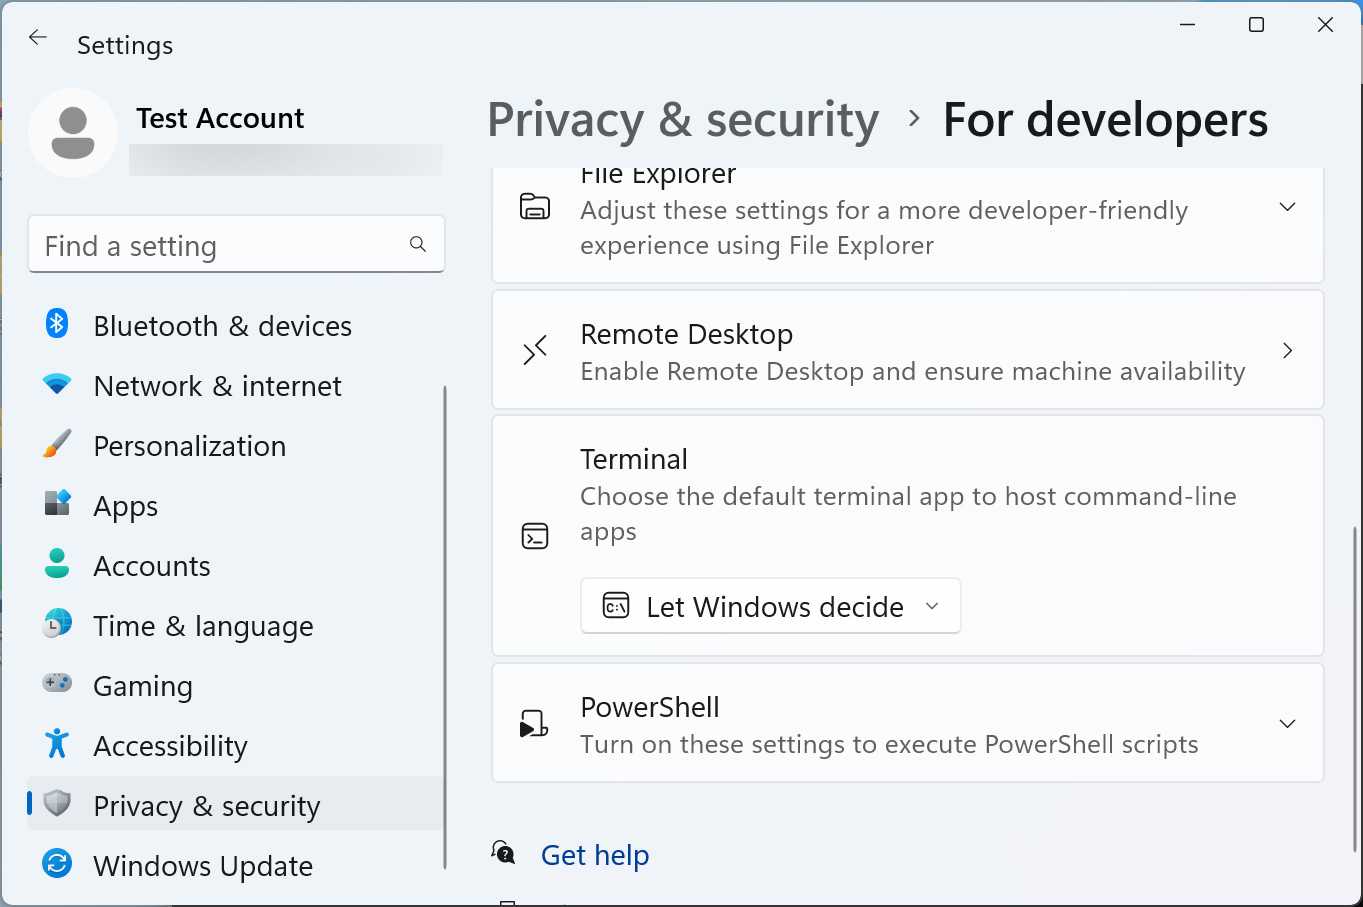
Option 1 Settings App – How to Make Windows Terminal Default Command Line Tool
Let’s check How to Make Windows Terminal Default Command Line Tool. You can open the settings app from the Windows 11 PC and follow the steps mentioned below to change the default terminal emulator tool to Terminal.
- Open the Settings app.
- Navigate to Provacy & Security Tab.
- Click on For Developers section under Security.
- Scroll down to the bottom of the page.
- Click on the drop down option below Terminal section.
- From the Drop-Down option, select Windows Terminal.
You have chosen Windows Terminal as the default terminal application to host the user interface for command-line tools and applications such as PowerShell, Command Prompt, etc.
Option 1 Settings App – How to Make Windows Terminal Default Command Line Tool
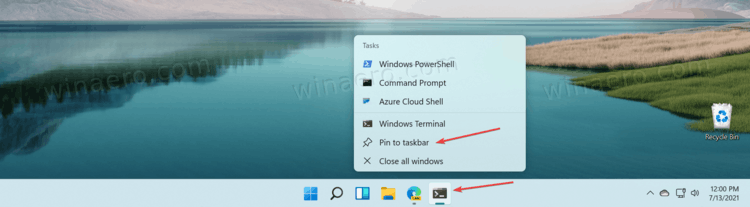
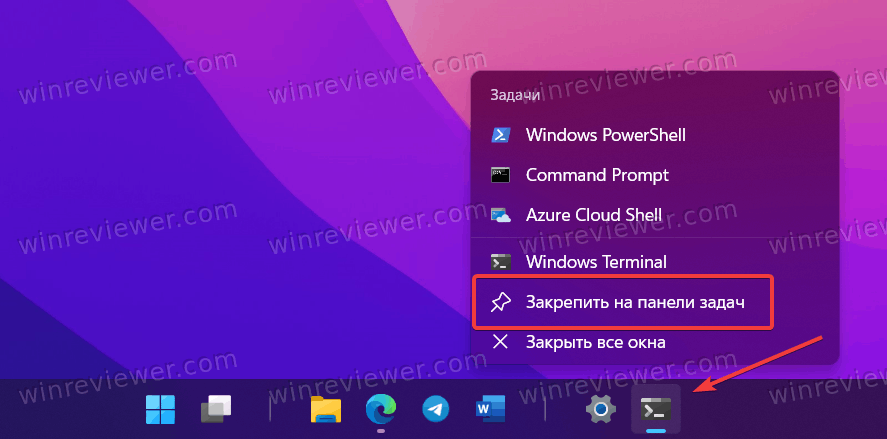
7. Open Windows Terminal From the Taskbar
Instead of having a desktop shortcut, you can add a Windows Terminal icon to the taskbar. Then you can open Terminal from the taskbar without needing to minimize software windows. Here is how you can Windows Terminal to your taskbar.
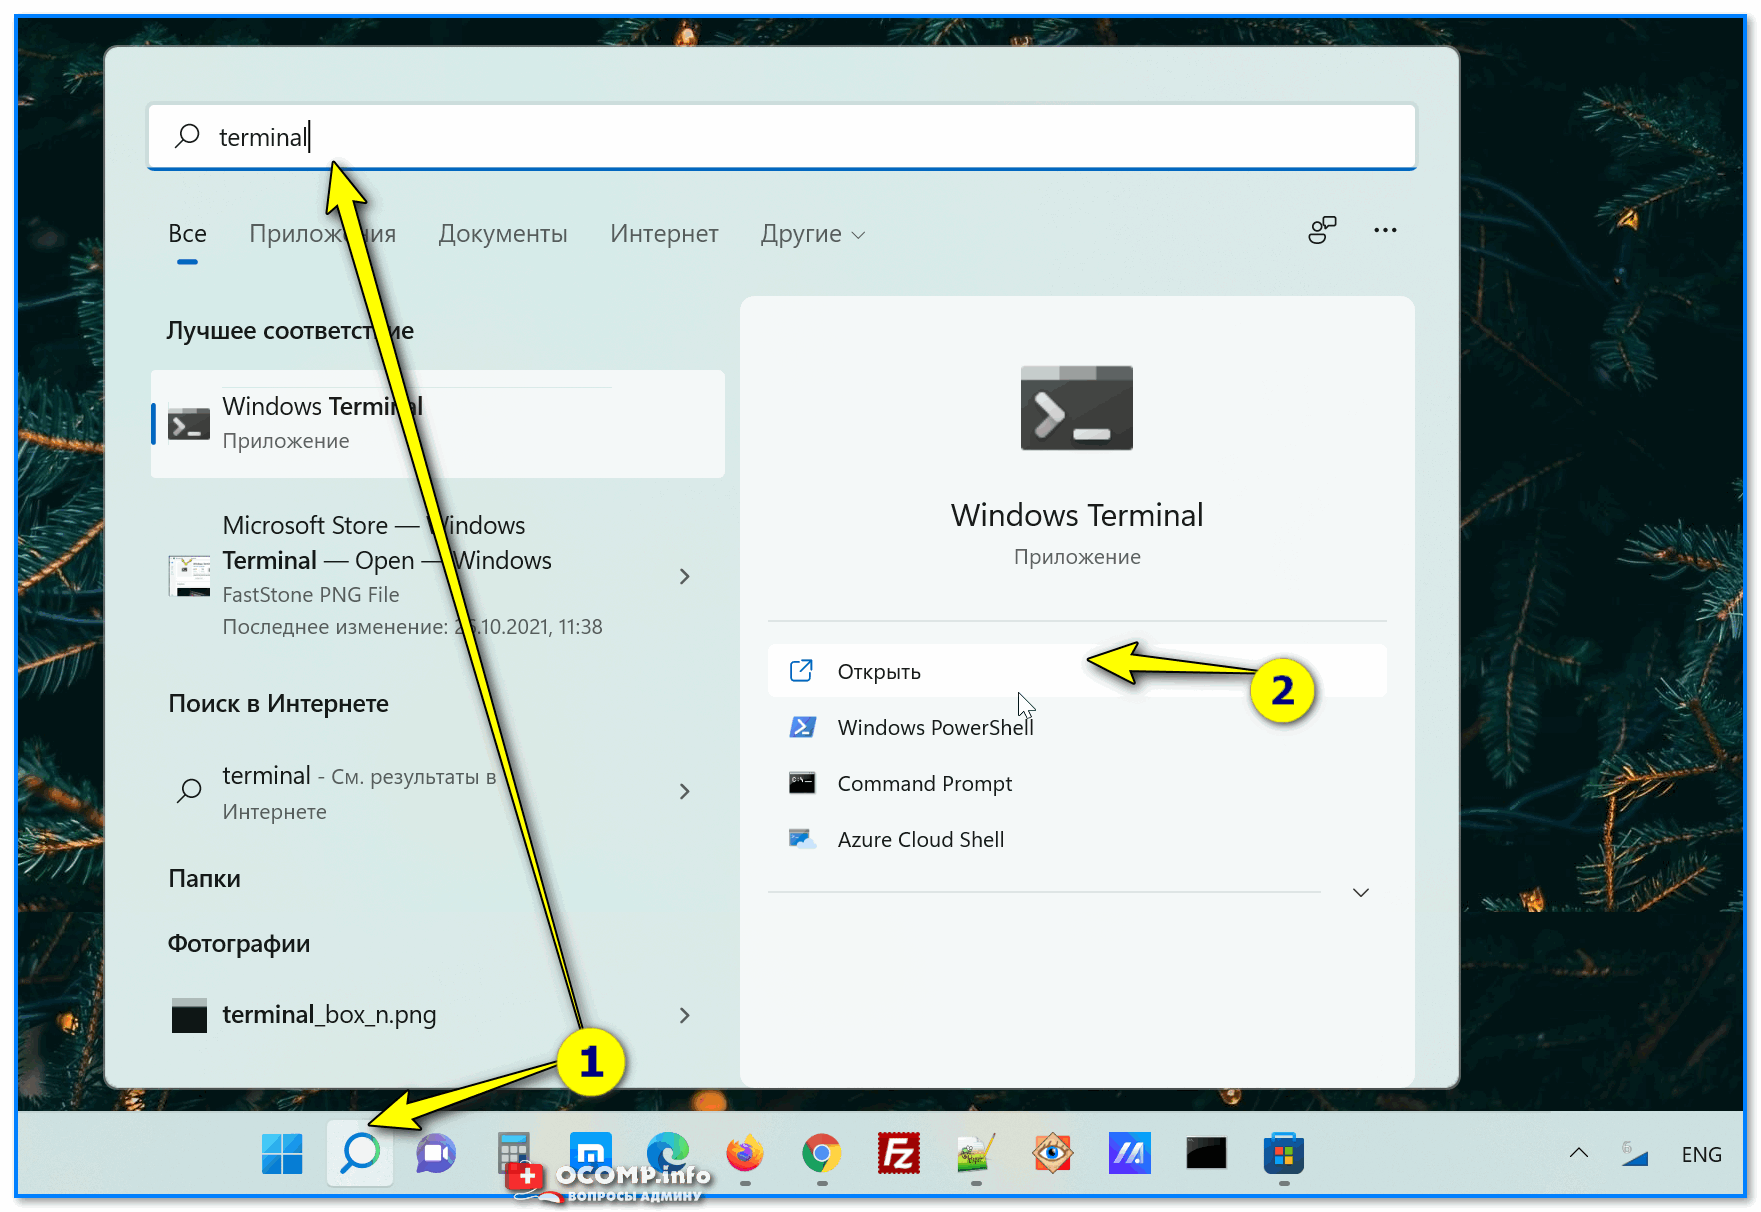
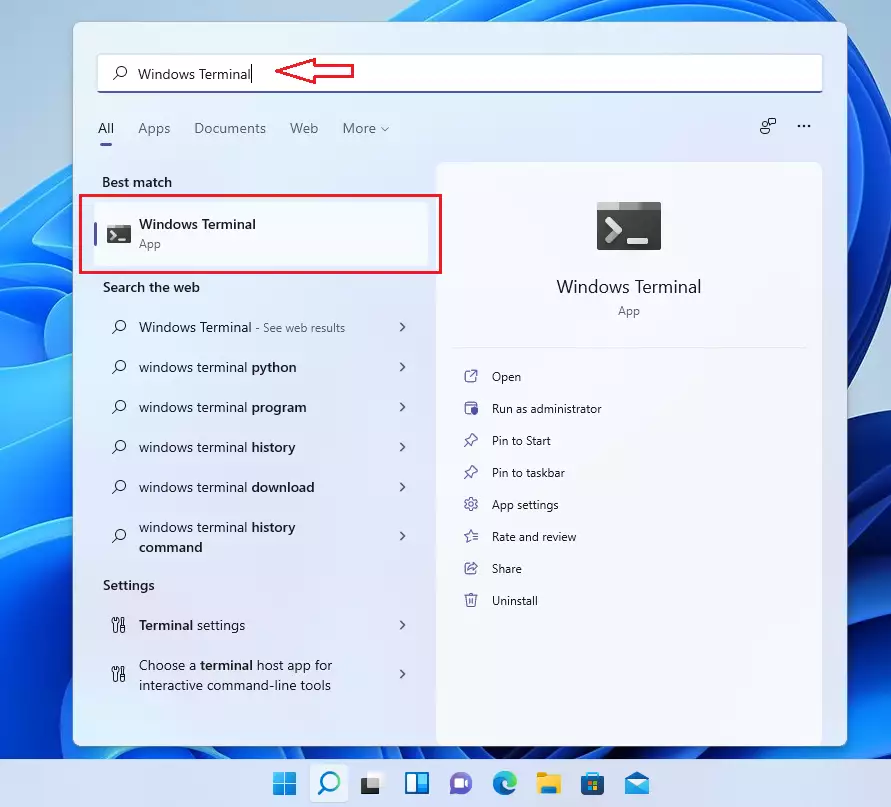
- Open the search box from the taskbar.
- Enter the keyword Windows Terminal within the search text box.
- Right-click Windows Terminal to select its Pin to taskbar option.
- Then click the new Terminal taskbar button.
You can also pin Windows Terminal to the Start menu. To do so, select the Pin to Start context menu option instead when you right-click the app’s search result. Then Terminal will be among the pinned apps at the front of the Start menu.
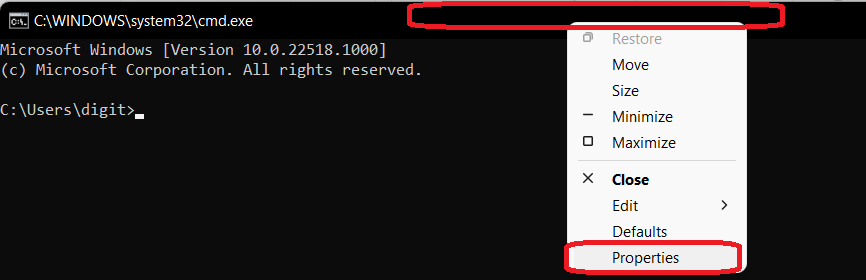
Option 3 Windows Console Host Properties – To Set up Windows Terminal as Default Terminal App
We will see how to use Windows Console Host to change the default terminal app settings to Windows Terminal in this option.
NOTE! – This method will only work if you have Windows Console Host as the default terminal application.
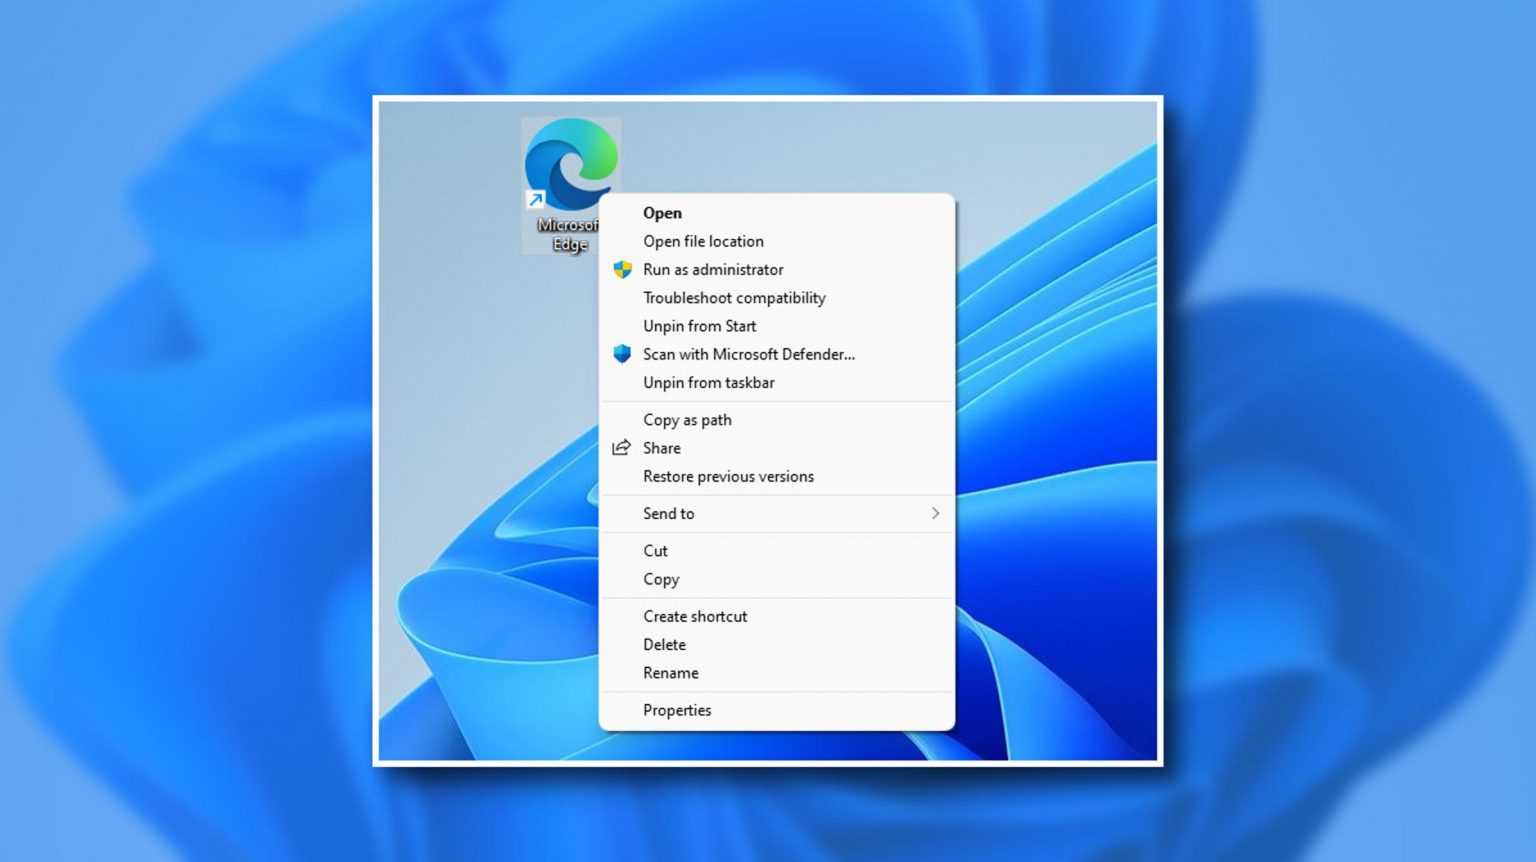
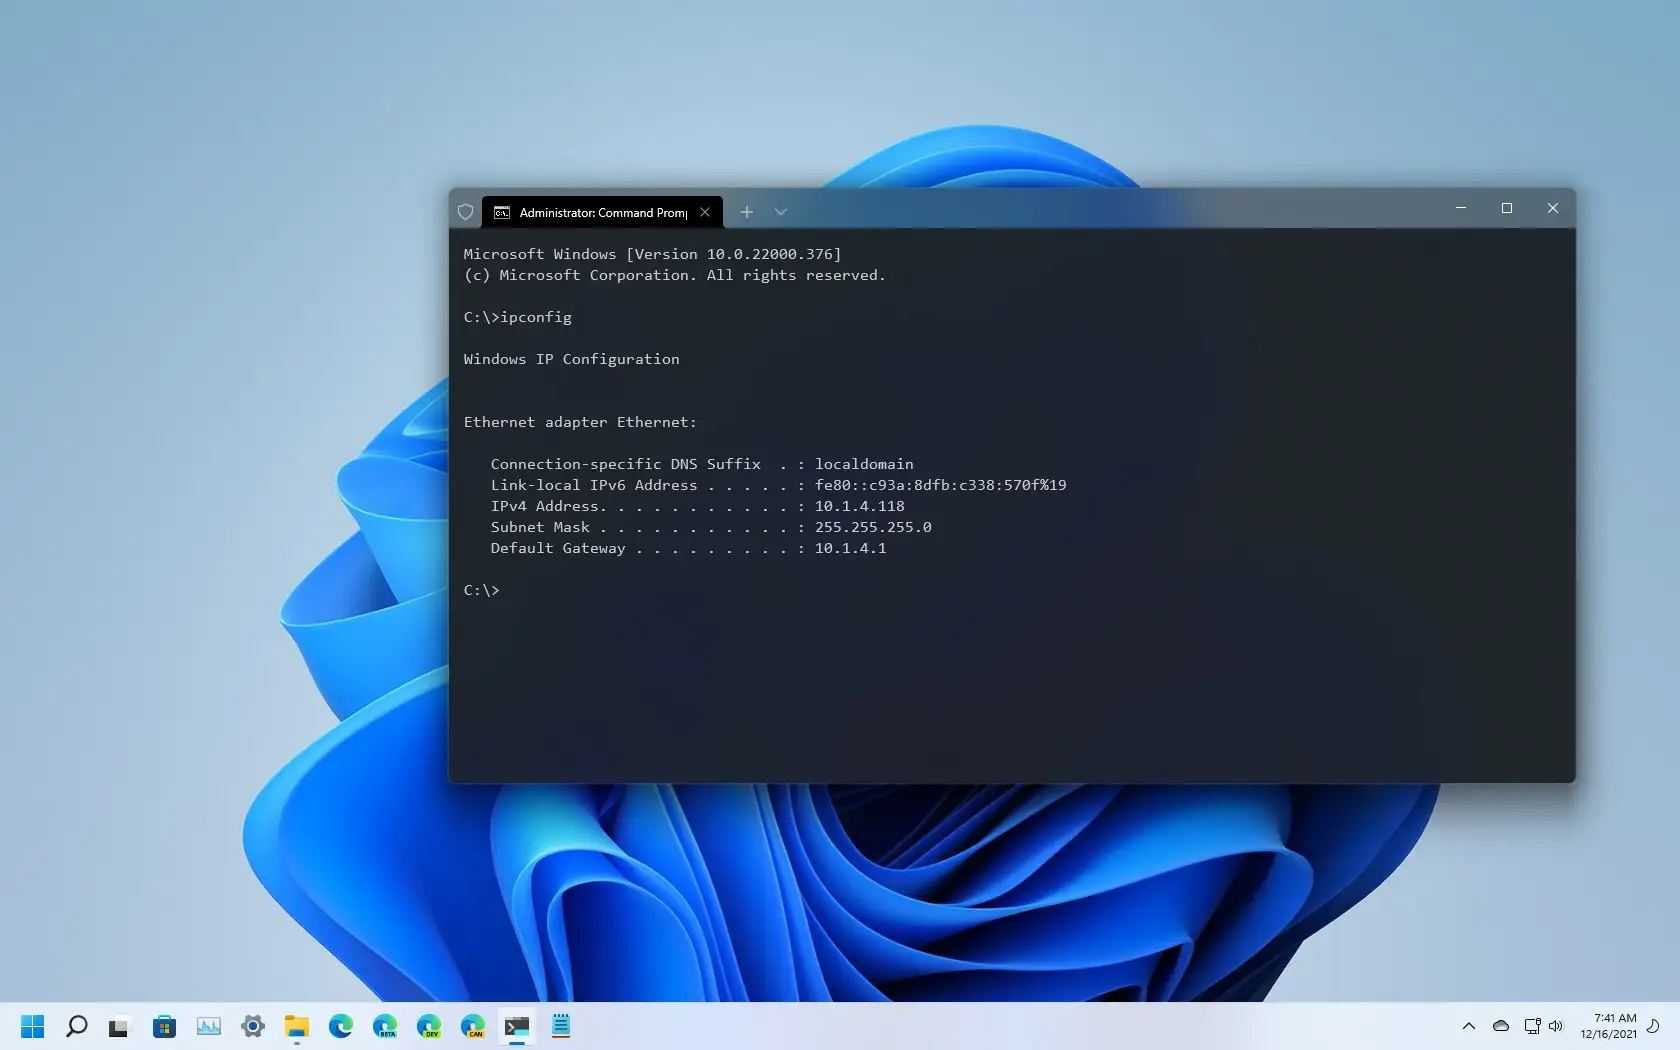
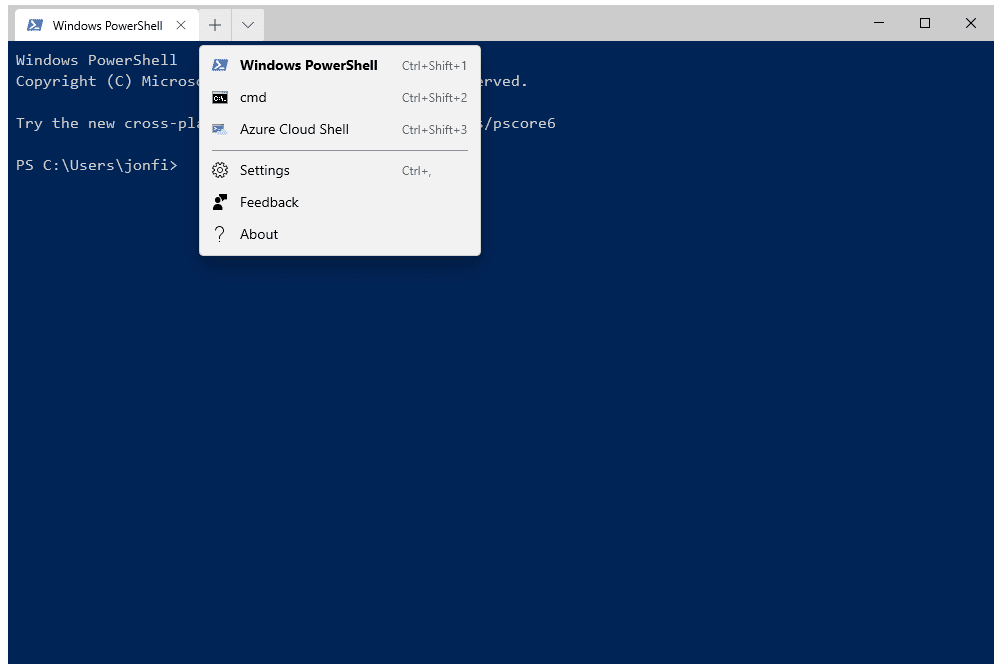
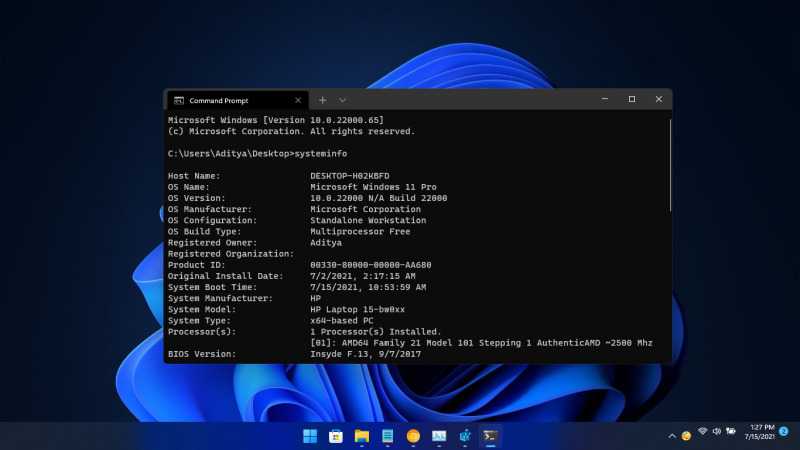
- Launch Command Prompt (CMD) or PowerShell.
- Right Click on the Top Bar and select Properties to change the Default terminal application in Windows 11.
Option 3 Windows Console Host Properties – To Set up Windows Terminal Default Terminal App
Now, it’s time to click on the tab called Terminal. At the bottom of the Properties window, you will have an option to change the Default Terminal Application to a Windows terminal. Click OK to confirm the changes.
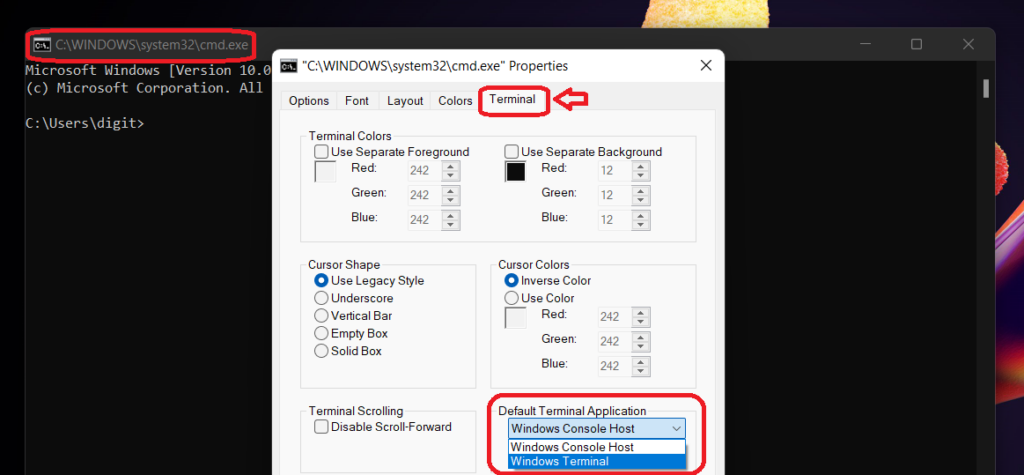
Option 3 Windows Console Host Properties – To Set up Windows Terminal Default Terminal App
Open Windows Terminal in Windows 11
Here is how you can open Windows Terminal in Windows 11. We will review several methods of launching the app, including the Start menu, Search, the Run dialog, and File Explorer. Other methods involve the Task Manager app, and the Win + X menu.
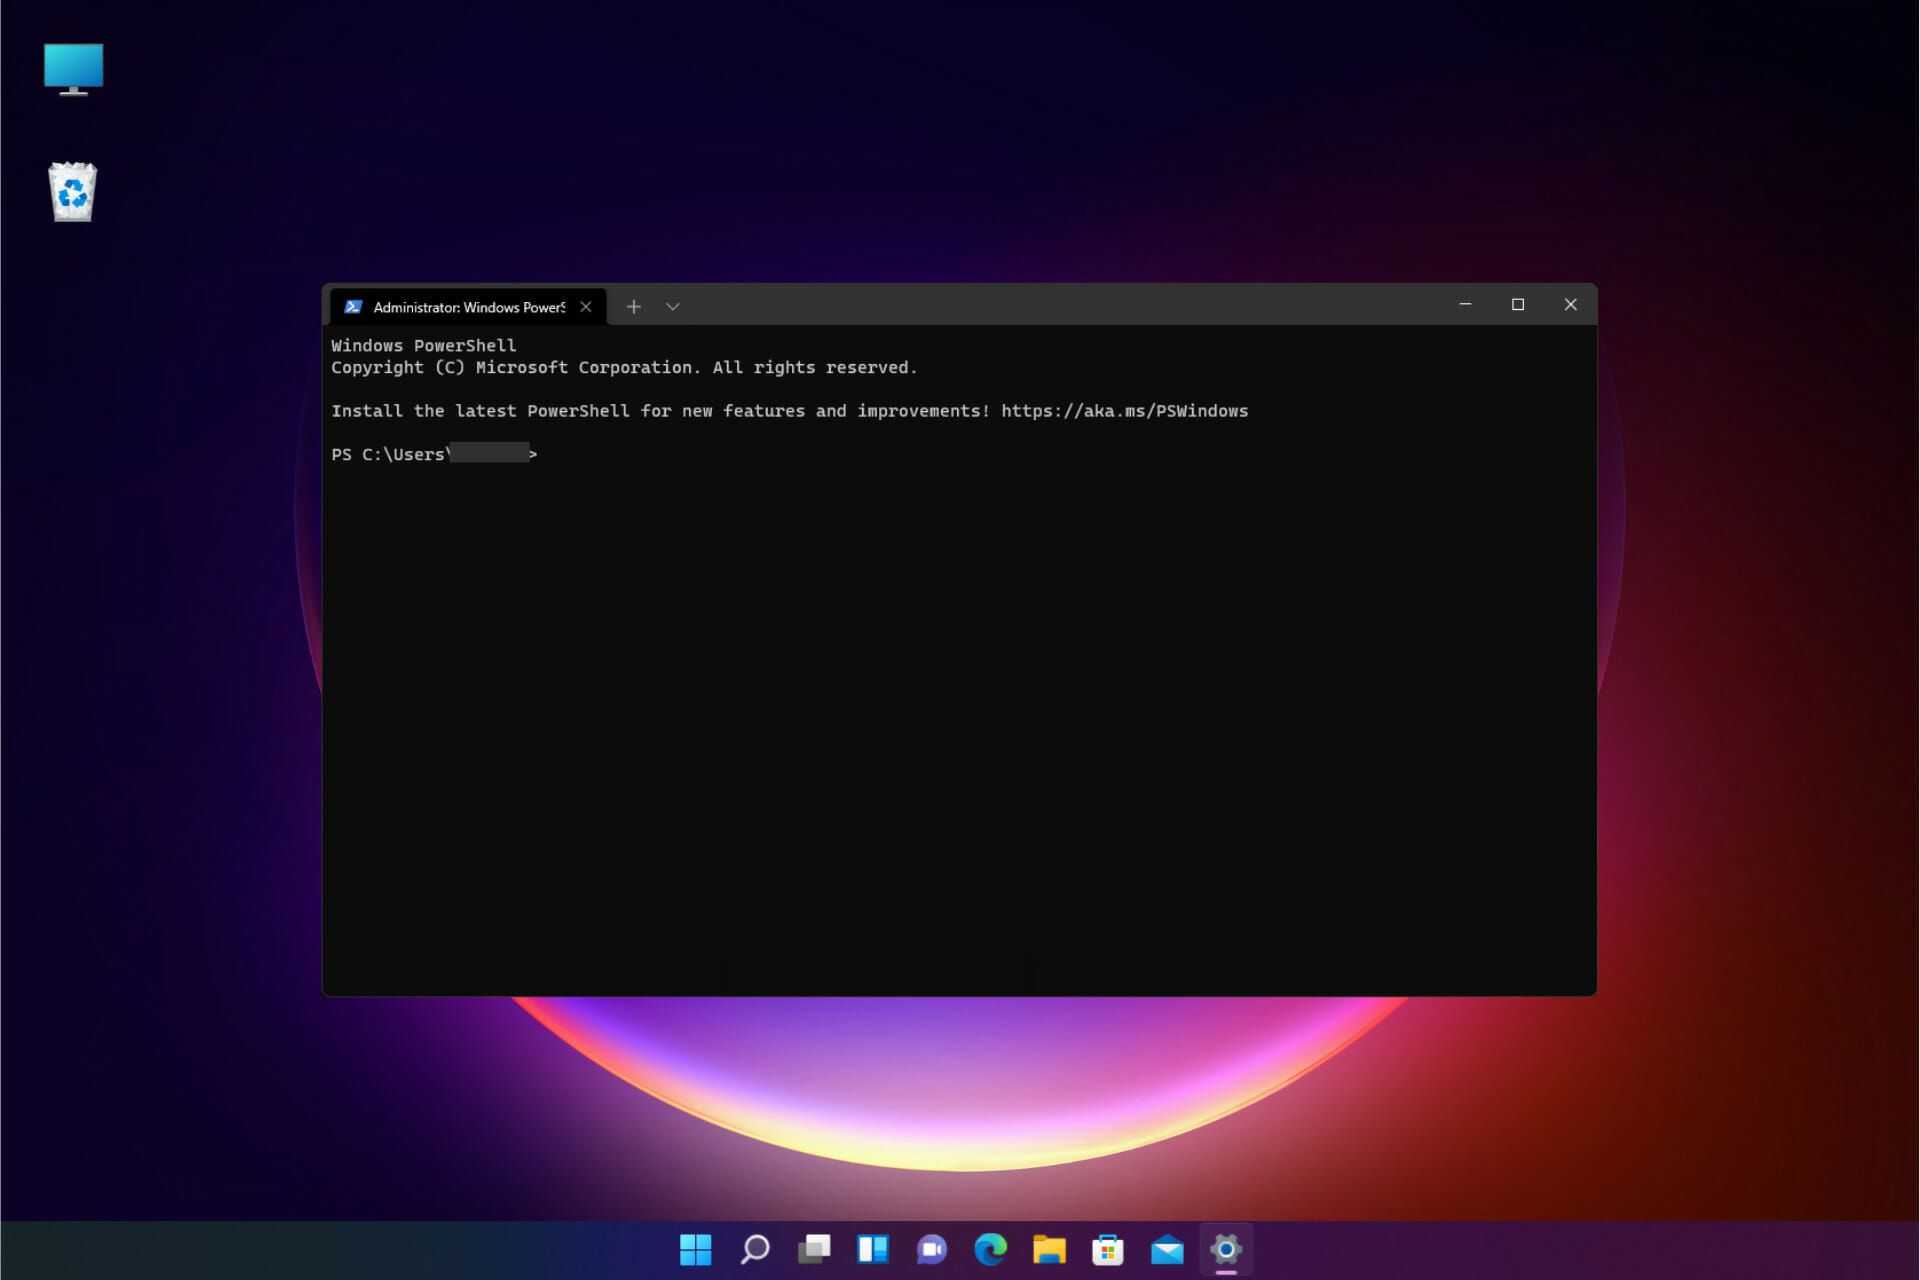
Tip: Working with Windows Terminal quite often requires an Administrator access level. Learn how to «Run as Administrator» in Windows 11 using our dedicated guide.
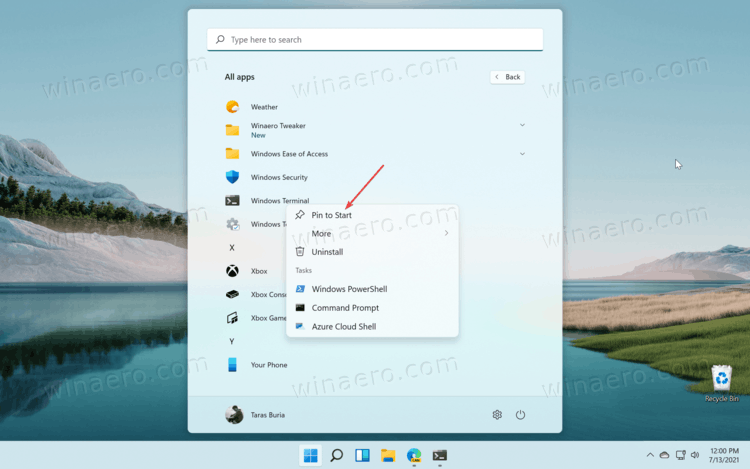
Using the Start menu
- Press the Start button, which now has four blue squares and is the leftmost icon at the taskbar center. You can disable the centered taskbar in Windows 11.
- Click All Apps.
- Scroll down the list and click Windows Terminal. You can also find apps by letter in Windows 11 using alphabet navigation.
Tip: If you plan to work with Windows Terminal frequently, pin the app to the taskbar so that you always have it nearby. Launch Windows Terminal using any of the methods in this article, then right-click its icon and select Pin to Taskbar.
The same idea applies to the Start menu. Windows 11 allows pinning any app, including Windows Terminal, to the Start menu. Right-click Windows Terminal in the list of all apps and select Pin to Start.
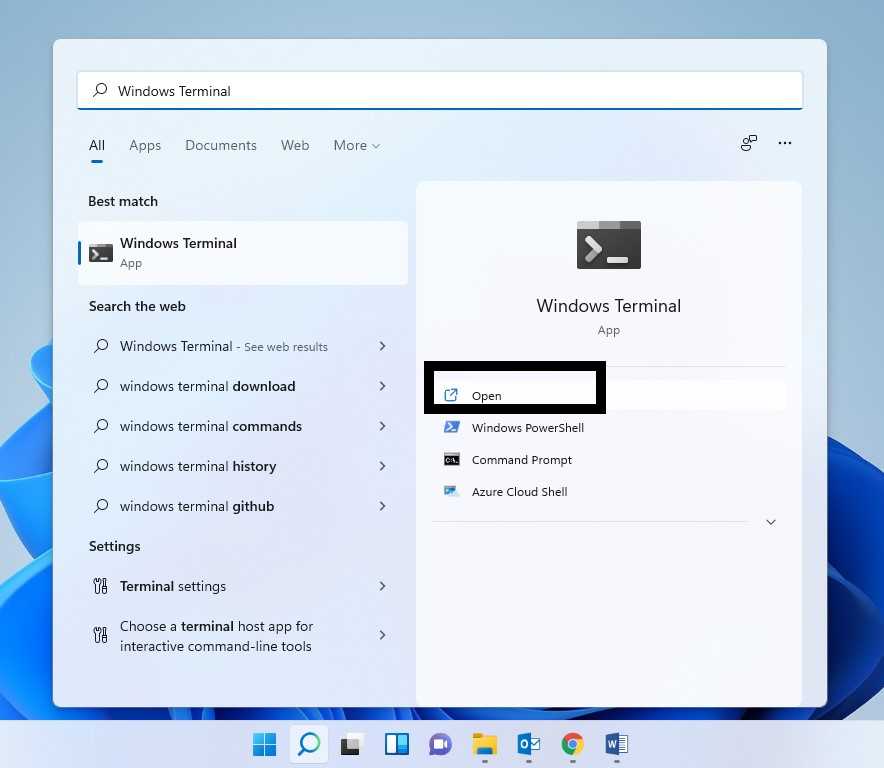
Launch Windows Terminal using Search
- Press Win + S or open the Start menu and click the search bar at the top. Alternatively, you can just start typing right away after opening the Start menu.
- Enter Windows Terminal or Terminal. Windows will show the app in the Best Match or Apps section.
- Click on the Open entry. There you can also find a button to run Windows Terminal as an Administrator.
Open Windows Terminal in Windows 11 using the Run dialog box
- Press Win + R, then enter the following two-letter command: .
- Press Enter.
- From there, you can also open Windows Terminal as Administrator by pressing the Ctrl + Shift + Enter shortcut keys.
Using Task Manager
Windows 11 allows launching apps and processes within Task Manager. Before you proceed, we recommend reading the «How to open Task Manager in Windows 11» article, as Microsoft removed some popular ways many people used to open Task Manager.
- Open Task Manager.
- Click File > Run new Task.
- Enter the command. If needed, place a checkmark next to the Create this task with administrator privileges option.
Open Windows Terminal in Windows 11 using the Win + X menu
You can also use the Win + X menu in Windows 11 to launch different utilities, such as Task Manager, Device Manager, Disk Management, and Windows Terminal.
- Press Win + X, or right-click the Start button. If you have a computer with a touch screen, you can tap and hold the Start button.
- Click Windows Terminal.
- Alternatively, if needed, click Windows Terminal (Admin) to open Windows Terminal as Administrator in Windows 11.
Context menu
Finally, you can open any folder in Windows Terminal using the built-in command, or add a set of custom commands to open it directly in the required profile and/or as Administrator.
Right-click to open Windows Terminal in File Explorer
Finally, you can open any folder in Windows Terminal by right-clicking it and selecting Open in Windows Terminal. That works on the Desktop and any other directory.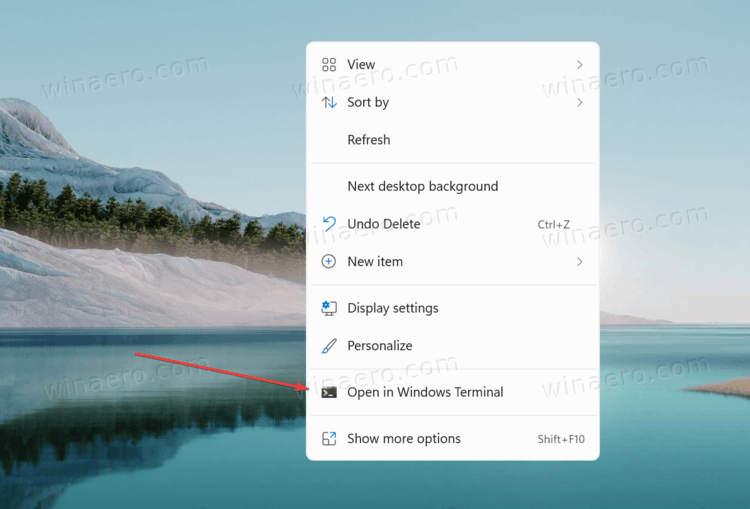
Advanced context menu
Note that the previous method does not allow you to run Windows Terminal as an Administrator. Also, you cannot select a profile other than the default one. You can change that using Winaero Tweaker. It allows you to place a Windows Terminal option with different profiles in cascading menus in Windows 11.
- Download Winaero Tweaker and install it.
- Launch the app, then find the Windows Terminal option.
- Place a checkmark next to the Add Windows Terminal Cascading Menu and/or Add Windows Terminal (Administrator) settings. You can enable both. Also, Winaero Tweaker allows you to specify the profiles you want to have in the menu.
- Now, right-click on any folder in File Explorer and select Show more options.
- Select one of the Windows Terminal items.
If you don’t like the idea of using Winaero Tweaker, there are also ready-to-use Registry files that are available in the following blog post for the regular menu commands, and in this one for elevated.
That is it. Now you know all the ways to open Windows Terminal in Windows 11.
Support us
Winaero greatly relies on your support. You can help the site keep bringing you interesting and useful content and software by using these options:
If you like this article, please share it using the buttons below. It won’t take a lot from you, but it will help us grow. Thanks for your support!
Advertisеment
Why ?
If you want to read complete history and reasoning about why Windows Terminal project was started and why it was required, I would suggest to go through the 5 part blog series by Rich Turner. Below part is summary from those articles, which I thought was more relevant to the topic.
The MS-DOS (command.com) was a relatively simple command line tool. Later, Windows NT’s “Command Prompt” (cmd.exe) was created to enable users to run the batch scripts and other several commands through command line interface.
In 2006, Microsoft released Windows PowerShell, which was relatively modern object based command line tool, compatible with .NET framework.
Later, Microsoft also started on Windows Subsystem for Linux to enable running of Linux binaries side by side on Windows 10 and Windows Server 2019, without need of recompiling them or without need of dual boot setup.
Early in Windows 10’s development, Microsoft opened up a UserVoice page, asking the community what features they wanted in various areas of the OS. The developer community was particularly vociferous in its requests that Microsoft:
- Make major improvements to the Windows Console
- Give users the ability to run Linux tools on Windows
After this, Microsoft focused on adding these abilities on Windows platform and the result is WSL and Windows Terminal.
Windows Terminal Hacks
A collection of hacks and interesting things you can do with Windows Terminal.
Elevate PowerShell Easily
This is probably the most (currently) annoying thing with Windows Terminal and that’s the inability to natively invoke an elevated process natively. We work around this with using gsudo — an open-source for Windows you can find in chocolatey.
Then add to the profile you want to elevate — I’ve chosen a new elevated PowerShell for my goodness.
The UAC prompt will appear as normal and the tabbed process will be elevated!
NOTE: This is a workaround until the official Windows Terminal supports it.
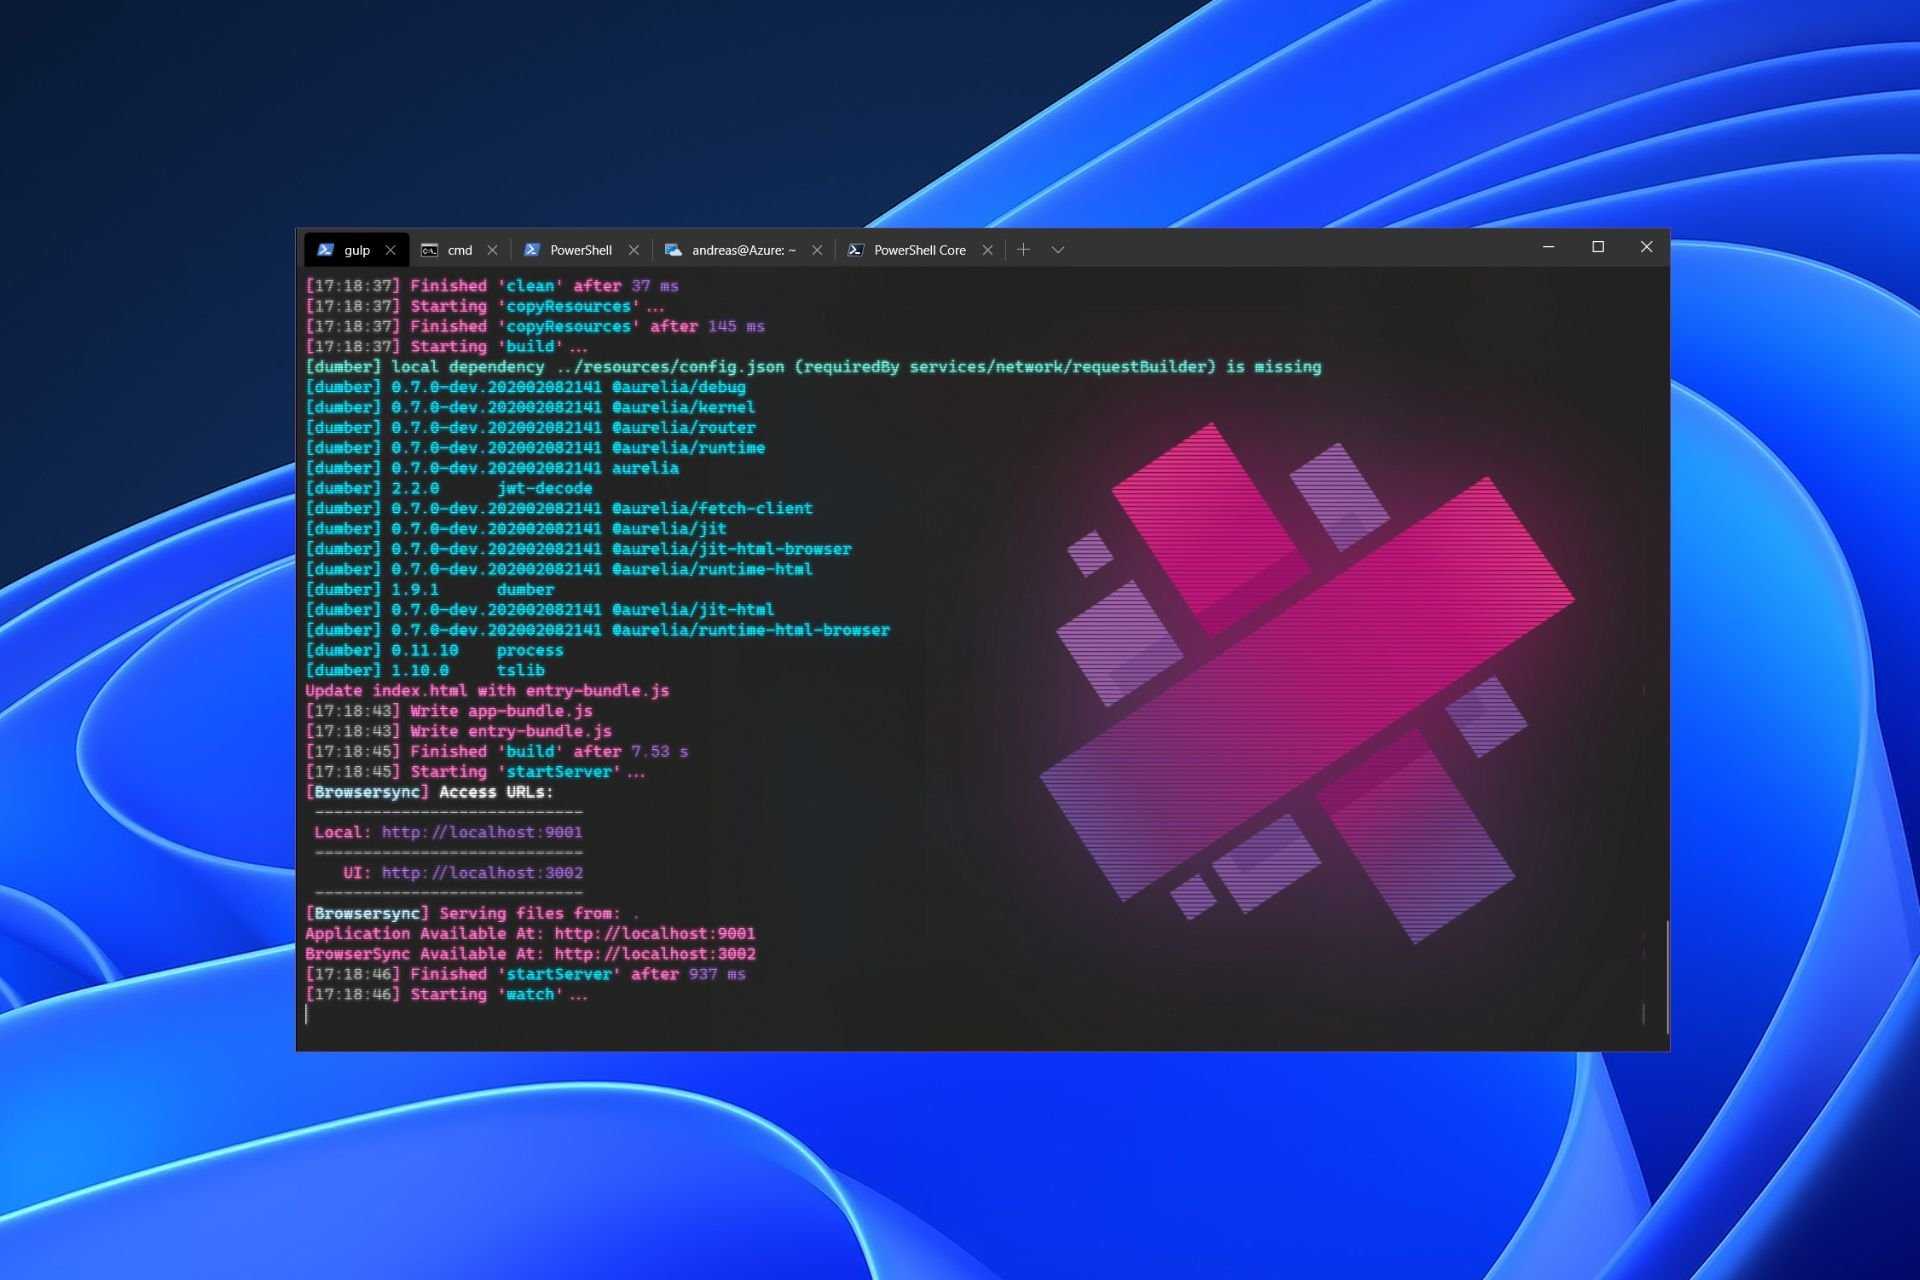
Setup Most Used SSH Sessions / Terminals / Shells
The great thing about ConEmu and now Windows Terminal is that you can add your custom SSH endpoints easily. If you SSH into several boxes regularly, set those up as terminals themselves in your list.
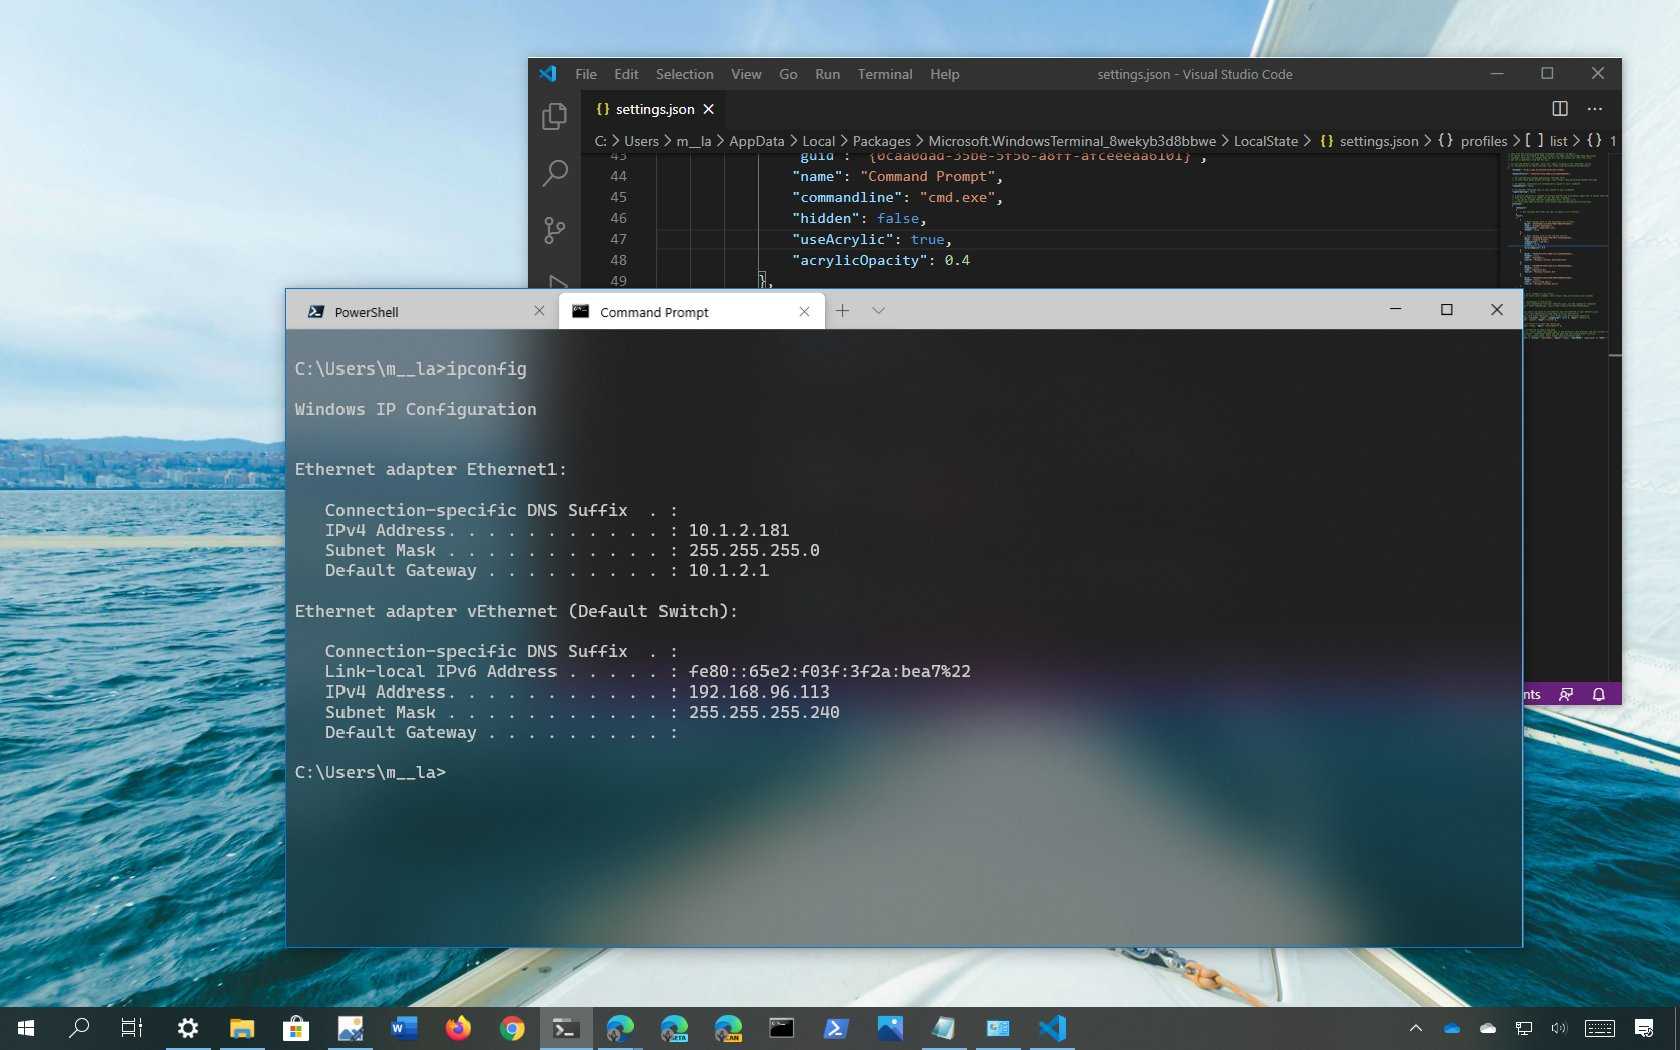
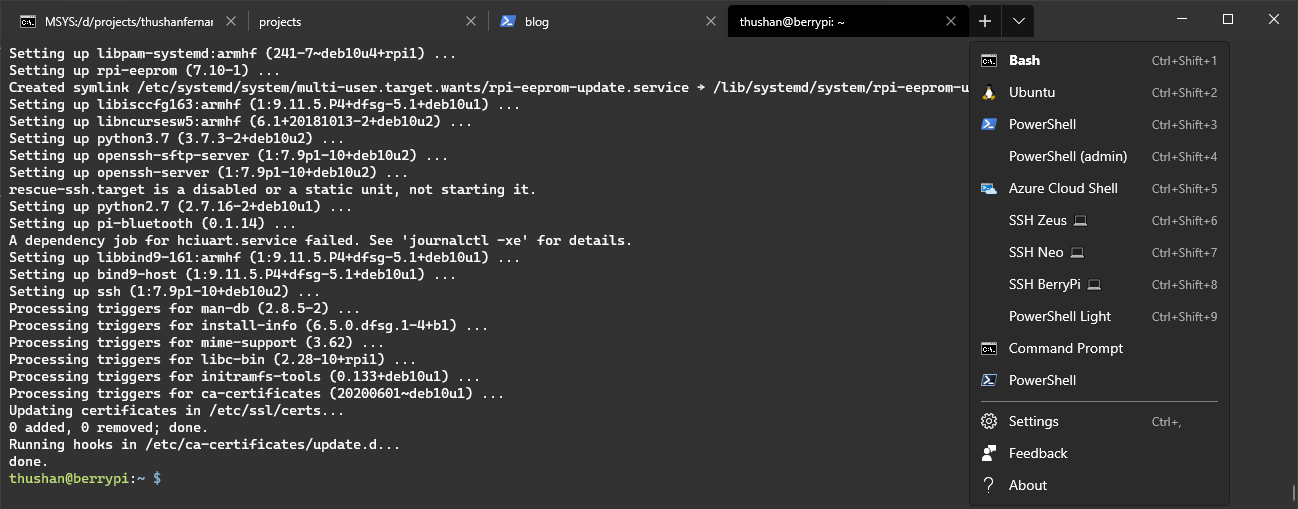 Figure 3. Windows Terminal with SSH profiles to common endpoints.
Here I’ve got my FreeBSD and Linux box as specific profiles that can be activated via some shortcuts too.
It’s a good idea to add the setting so the tab closes when the SSH session ends.
Python Shell in Windows Terminal
If you use Python a lot, you can go straight to a python shell.
I’ve installed Python 3.8 (32bit) and it resides in the path below. As I still maintain some Python 2.7.x things, I have both profiles in my Windows Terminal profile.
AWS Shell in Windows Terminal
If you thought having SSH endpoints was cool, you can even do that for your AWS Shell.
Make sure that Python3 is installed and that is available (included in v3.4+).
First install the with pip (or follow their recommended approach):
Then add a new profile:
Configure start-up panes
You can create your perfect startup layout too via the command line with some nifty tricks.
For a new tab use with the profile specified with a . For example will by default open a new bash shell.
To split the pane, use the with the profile specified with a and whether to split Vertically or Horizontally . For example to split an instance of Ubuntu horizontally . With this you can create a sequential splitting on panes to get the ideal layout you want. At this stage it’s only customisable to equal splitting of panes (which reduces it’s command line arg complexity too). There’s more options in the documentation.
The command line for the initial screenshot I have is:
You can opt to resize the panes with ALT
SHIFT
arrow-key
as appropriate. You can close a pane with CTRL
SHIFT
W
.
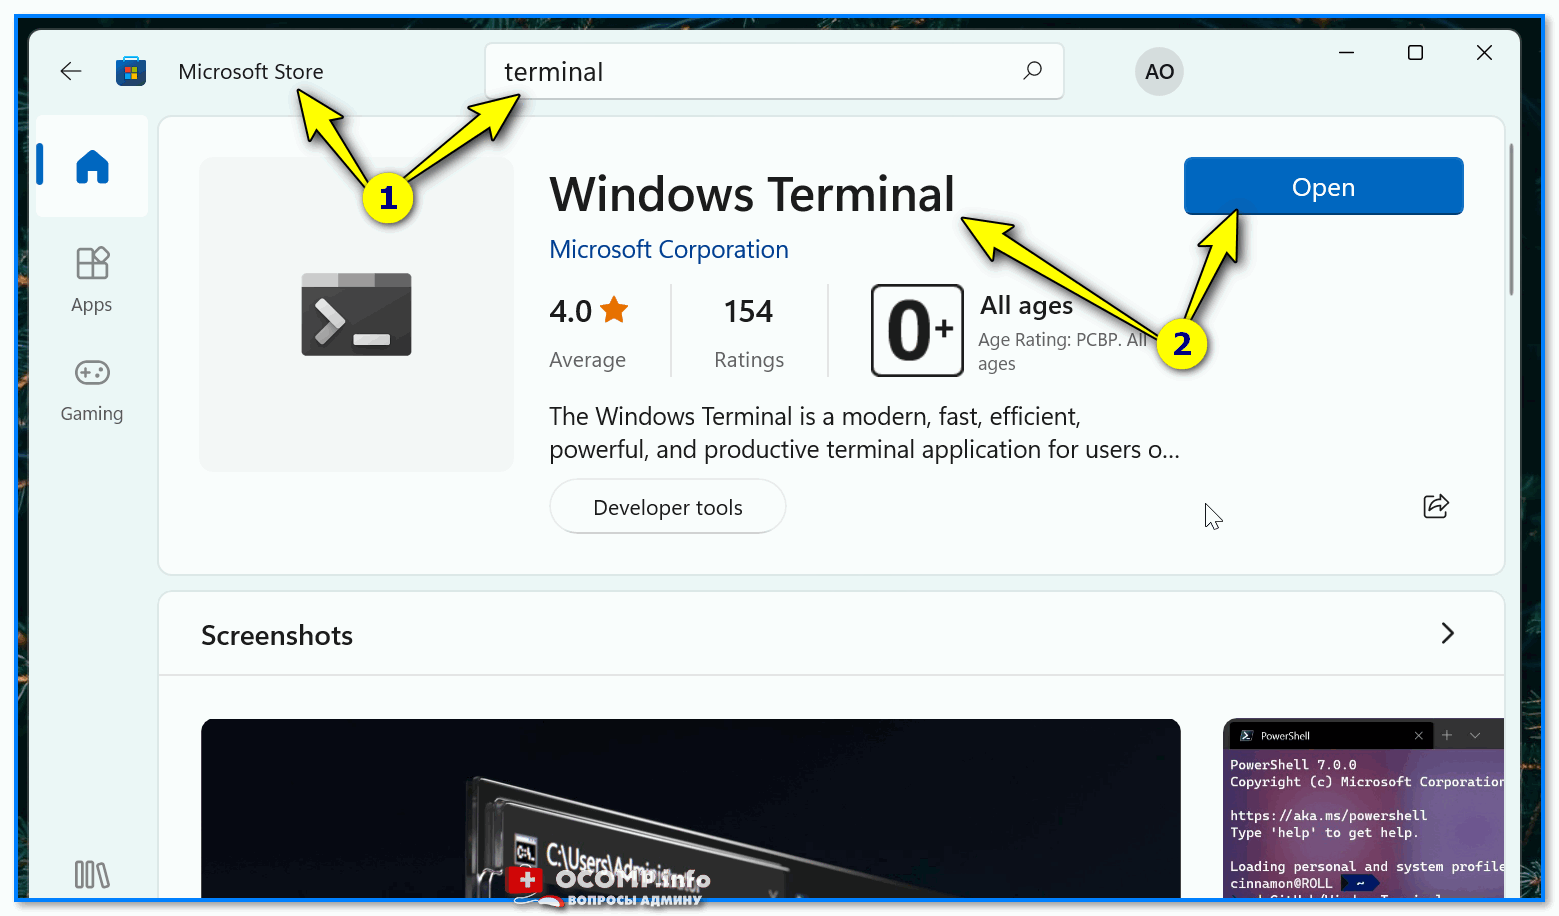
How to Install Windows Terminal
The easiest way to install Windows Terminal is via the Microsoft Store:
If this link fails, try opening the Microsoft Store in your browser or launching the Microsoft Store app from the Windows Start menu and searching for “Terminal”.
Note: be careful not to select the earlier “Windows Terminal Preview” application.
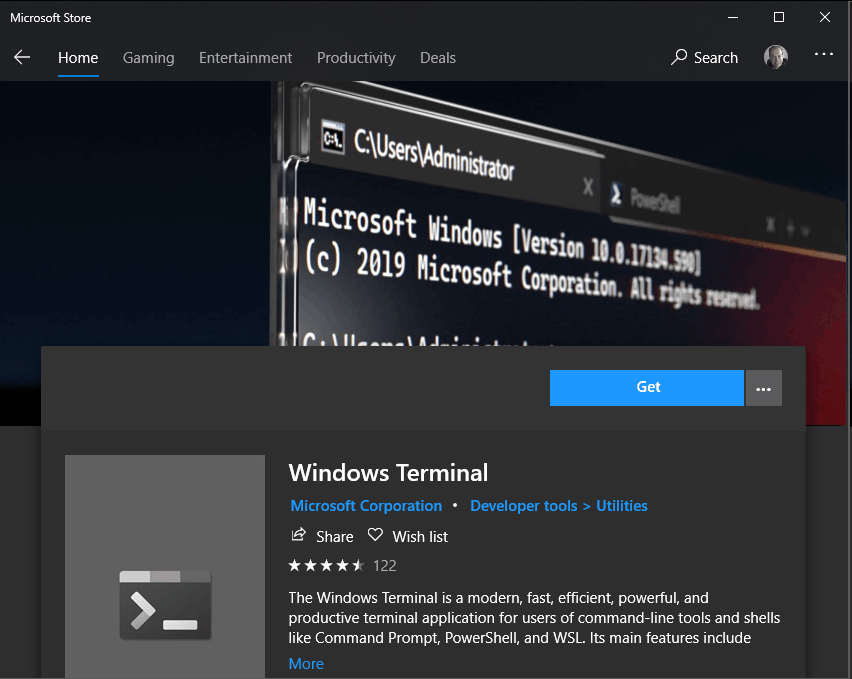
Hit Get and wait a few seconds for installation to complete.
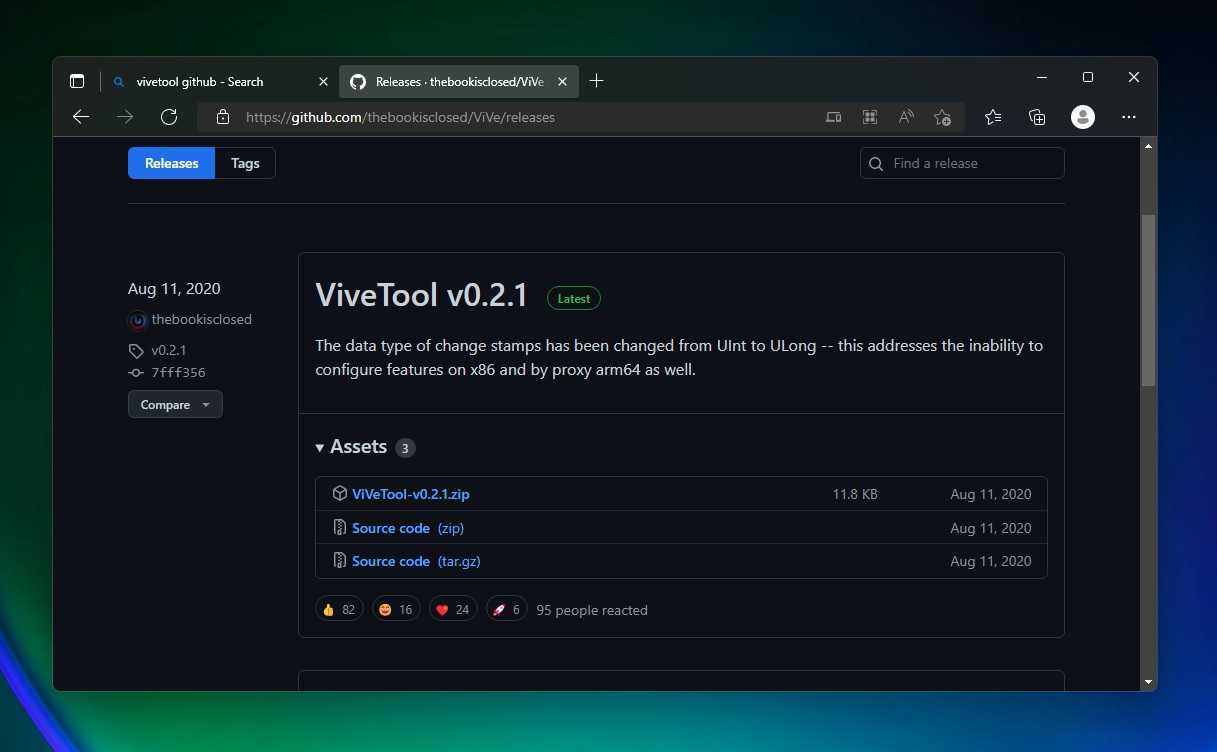
If you don’t have access to the Store, you can download the latest release from GitHub.
The Windows Terminal app icon is now available in the Windows Start menu. For easier access, right-click the icon and choose Pin to Start or More, followed by Pin to taskbar.
Как открыть терминал Windows в Windows 11
Ниже приведены подробные инструкции по открытию терминала Windows различными способами.
Наиболее часто используемые инструменты Windows всегда доступны в меню Win + X, также известном как меню опытного пользователя. Ранее Windows PowerShell был доступен в меню Win+X. В Windows 11 эта опция была заменена терминалом Windows.
Сначала нажмите сочетание клавиш «Клавиша Windows + X» или щелкните правой кнопкой мыши меню «Пуск». Во всплывающем меню выберите опцию «Терминал Windows». Если вы хотите открыть Windows Terminal с правами администратора, выберите опцию «Windows Terminal (Admin)».
Выполнить команду, чтобы открыть терминал Windows
Как и в случае с командной строкой или PowerShell, вы также можете открыть терминал Windows с помощью команды «Выполнить». Вот как.
Сначала откройте окно команды «Выполнить», нажав сочетание клавиш «Windows + R» или выполнив поиск «Выполнить» в меню «Пуск». В диалоговом окне «Выполнить» введите «wt» и нажмите Enter или нажмите кнопку «ОК».
Как только вы это сделаете, Windows Terminal мгновенно откроется со своим профилем по умолчанию.
Старый способ открыть любую программу в Windows — найти ее в меню «Пуск». Терминал Windows ничем не отличается.
Сначала откройте меню «Пуск», нажав клавишу «Пуск» или клавишу «Windows». Затем введите «Терминал Windows», чтобы начать поиск. Это действие отобразит результат терминала Windows вверху; либо щелкните по нему, либо нажмите кнопку «Ввод», чтобы открыть терминал Windows в Windows 11.
Кроме того, вы также можете открыть его с экрана «Все приложения». Для этого откройте меню «Пуск», нажмите кнопку «Все приложения» в правом верхнем углу, прокрутите список вниз, чтобы найти запись «Терминал Windows», и нажмите на нее.
Откройте терминал Windows из проводника
Знаете ли вы, что вы можете открыть терминал Windows прямо из проводника? Лучшее в этом методе то, что он откроет Windows Terminal непосредственно в папке по вашему выбору, а не в домашней папке по умолчанию или в папке system32. Это очень полезно, если вы не хотите перемещаться по папке после открытия терминала Windows вручную.
Чтобы открыть терминал Windows из проводника, нажмите «клавиша Windows + E», чтобы открыть проводник и перейти в папку по вашему выбору. Затем щелкните правой кнопкой мыши пустое место в папке и выберите параметр «Открыть в терминале Windows».
Как только вы это сделаете, Windows Terminal откроется в этой папке.
—
Надеюсь, это поможет.
Если вы застряли или вам нужна помощь, оставьте комментарий ниже, и я постараюсь помочь как можно больше.
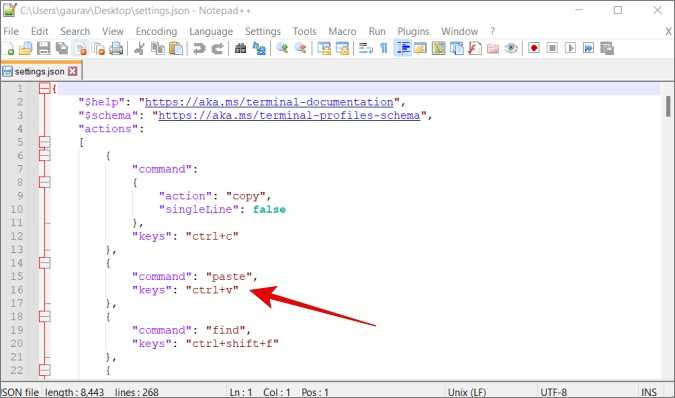
Как изменить привязки клавиш по умолчанию
Первый раздел относится к привязкам клавиш, если вам не нравится конкретное сочетание клавиш, вы можете изменить их здесь. Например, если вы хотите, чтобы Ctrl + e закрыл вкладки, вы найдете этот раздел:
{
 "command" : "closeTab",
 "keys" :

 },
Измените «ctrl + w» на «ctrl + e» (обязательно сохраните кавычки), а затем сохраните файл. Если вы хотите выровнять все в соответствии с существующим отступом, имейте в виду, что в файле используются пробелы вместо табуляции. И, как видно на наших снимках экрана, в файле используются окончания строк Unix, но большинство текстовых редакторов (даже Блокнот) могут без проблем обрабатывать окончания строк Unix.

Открыть Терминал в Windows 11
Открыть Терминал в Windows 11 можно с помощью меню Пуск, поиска, диалогового окна «Выполнить», Проводника, меню Win + X, и других способов.
Как запустить Терминал Windows с помощью меню Пуск
- Откройте меню Пуск.
- Щелкните по кнопке Все приложения.
- В списке приложений найдите Терминал Windows и откройте его.
Подсказка: если вы планируете часто работать с Терминалом, закрепите иконку приложения на панели задач, чтобы в дальнейшем запускать его в один клик. Запустите Терминал любым способом из этой статьи, а затем щелкните по иконке правой кнопкой мыши и выберите Закрепить на панели задач.
По такому же принципу вы можете закрепить Терминал в меню Пуск. В списке всех приложений щелкните правой кнопкой мыши по Windows Terminal и выберите Закрепить на начальном экране.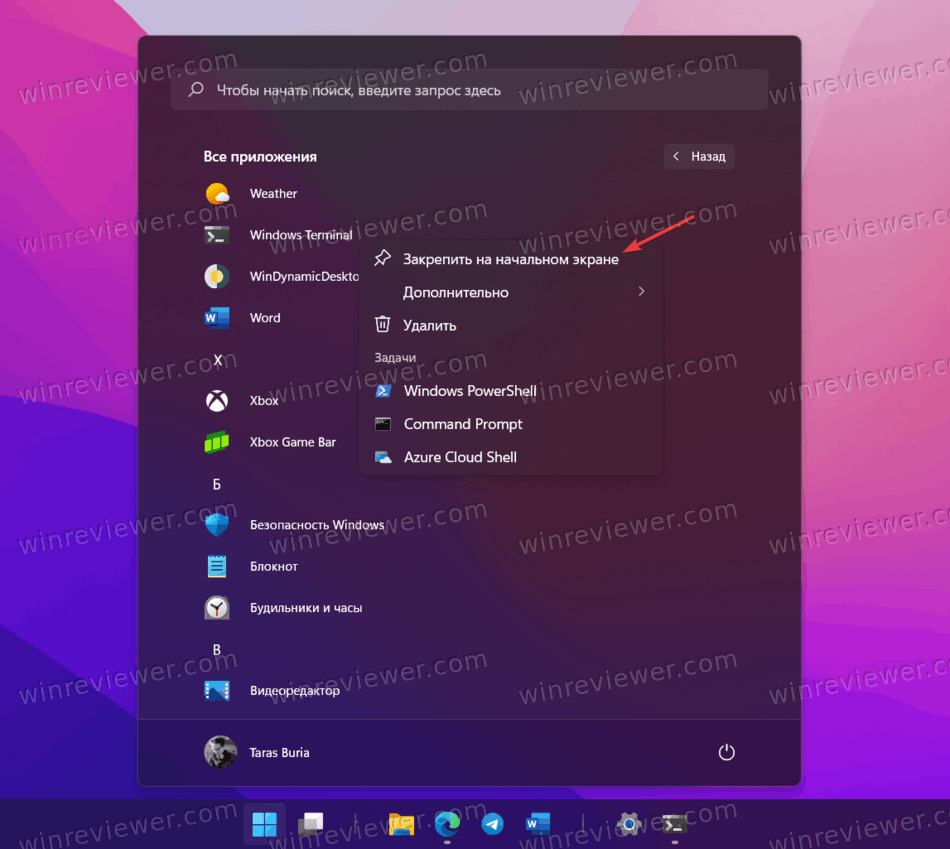
Запустить Терминал Windows 11 с помощью поиска
Нажмите Win + S или же откройте меню Пуск и щелкните по строке поиска в верхней части меню. Как вариант, вы можете просто начать сразу набирать поисковый запрос.
Введите в поиск Windows Terminal или просто Terminal
Обратите внимание, что Windows не отображает приложение при вводе слова «Терминал». Вам надо вводить именно на английском.
Щелкните по приложению в поисковой выдаче для запуска.
Как открыть Терминал в Windows 11 с помощью диалогового окна Выполнить
Это один из самых простых способов запустить Windows Terminal. Вам надо лишь нажать на кнопки Win + R и ввести команду . Нажмите Enter, после чего Windows откроет Терминал.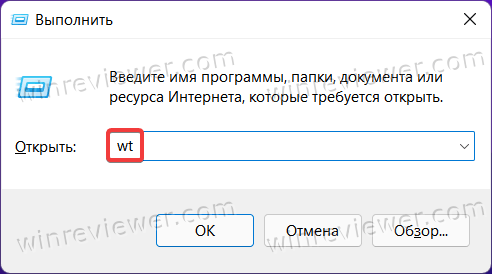
Подсказка: если вам надо запустить Терминал с правами Администратора, нажмите не Enter, а Ctrl + Shift + Enter.
Как открыть Windows Terminal через Диспетчер задач
Прежде стоит отметить, что в Windows 11 Microsoft убрала любимый всеми способ открыть Диспетчер задач с помощью правого клика по панели задач. Теперь вам надо делать правый клик по кнопке Пуск. О всех других способах открыть Диспетчер задач в Windows 11 рассказывает отдельная статья.
Чтобы открыть Windows Terminal из Диспетчера задач, сделайте следующее.
- Нажмите Win + X или щелкните правой кнопкой мыши по кнопке Пуск.
- Выберите Диспетчер задач.
- Щелкните Файл > Новая задача.
- В новом окне введите команду . Если вам нужен Терминал с правами Администратора, поставьте соответствующую отметку под полем для ввода команды.
Как запустить Терминал в Windows 11 с помощью меню Win + X
Меню Win + X (оно также вызывается правым кликом или длинным тапом на сенсорных компьютерах по кнопке Пуск) содержит в себе самые популярные команды и системные утилиты, которые могут пригодится в повседневном использовании компьютера.
Нажмите Win + X и выберите Терминал Windows или Терминал Windows (Администратор).
Как открыть Терминал из контекстного меню
Windows 11 позволяет запустить Терминал сразу в нужной вам директории с помощью контекстного меню. Просто щелкните правой кнопкой мыши и выберите Открыть в Терминале Windows.

Недостаток этого метода в том, что он не позволяет запустить Терминал с правами Администратора. Исправить этот недочет можно добавлением Терминала в классическое контекстное меню, которое вызывается кнопками Shift + F10 или пунктом Показать дополнительные параметры.
Если вы не хотите устанавливать дополнительные приложения ради одного твика, можете воспользоваться готовыми файлами реестра, которые доступны в отдельной статье.
Готово. Теперь вы знаете, как открыть Терминал в Windows 11.
Узнавайте о новых статьях быстрее. Подпишитесь на наши каналы в Telegram и .

Судя по тому, что вы читаете этот текст, вы дочитали эту статью до конца. Если она вам понравилась, поделитесь, пожалуйста, с помощью кнопок ниже. Спасибо за вашу поддержку!
Вы здесь:
Главная страница » Windows » Windows 11 » Как в Windows 11 открыть Терминал Windows
5. Open Windows Terminal With a Desktop Shortcut
Desktop shortcuts are one of the most direct ways to open software and apps. So, adding a Windows Terminal shortcut to the desktop will give you a very quick way to open that app. Here is how you can set up a Windows Terminal desktop shortcut within Windows 11:
- Right-click an area of your desktop wallpaper to select the New and Shortcut context menu options.
- Then input %LocalAppData%\Microsoft\WindowsApps\wt.exe within the item location text box.
- Click Next to bring up the name box.
- Type Windows Terminal within the text box.
- Select Finish to add the shortcut to the desktop.
- Now click the desktop shortcut to bring up Windows Terminal.
You can configure the shortcut to always run Windows Terminal as an administrator, which might be necessary for certain commands. To do that, right-click the desktop shortcut and select Properties. Select the Run this program as an administrator checkbox on the Compatibility tab shown directly below. Then click Apply, and select OK to close the properties window.
How to Use Windows Terminal
Now that you know how to open Terminal, let’s explore how to use it effectively.
The new Windows Terminal is backward compatible with both PowerShell and Command Prompt, meaning all your favorite commands will work inside Terminal. But it offers much more than that.
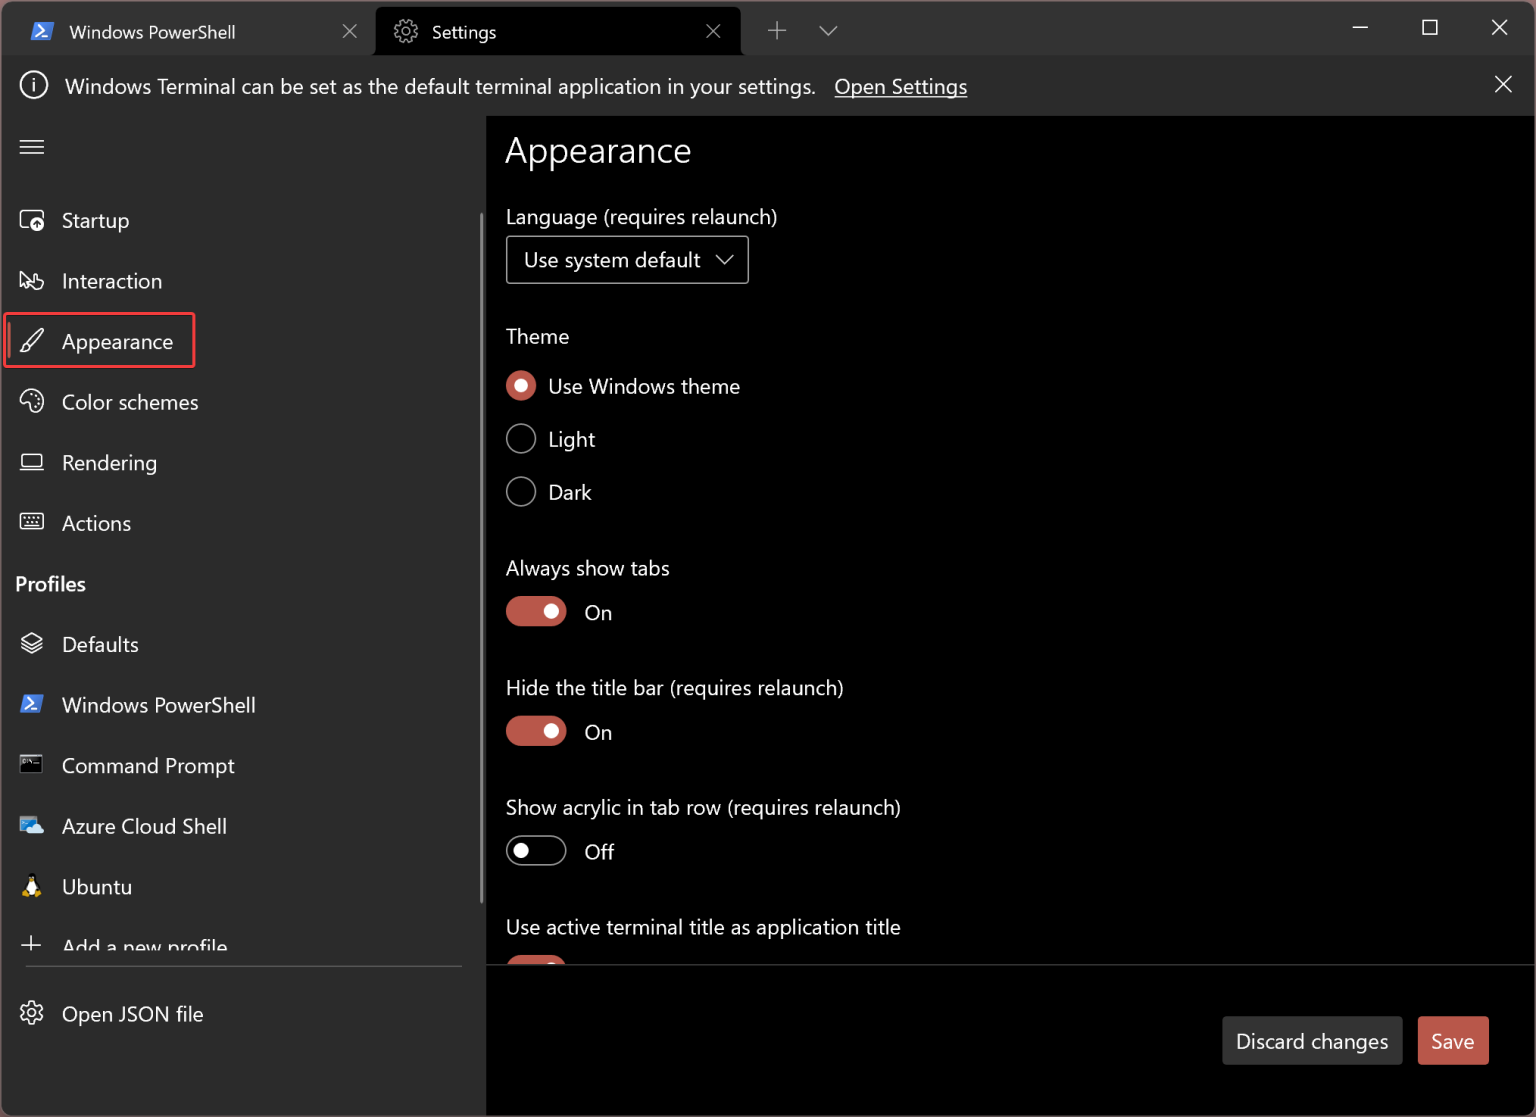
Customizing Windows Terminal
Windows Terminal allows for endless customization. You can change tab colors, background colors, use tabbed view or open multiple tabs in the same window, enable dark mode, change animations, and more. You can even customize font size and appearance for better productivity and efficiency.
Editing the Settings.JSON File in Terminal
While you can change settings using the graphical user interface, Terminal also allows users to edit the settings.json file. To do this, press the Shift button when opening Terminal Settings from the arrow icon. Alternatively, press to open the Settings.JSON file.
Here, you can modify various settings, such as keyboard shortcuts for copy-paste commands. Just make sure to create a backup of the original file before making any changes.
Windows Terminal Keyboard Shortcuts
Here are some useful Terminal keyboard shortcuts that will save you time:
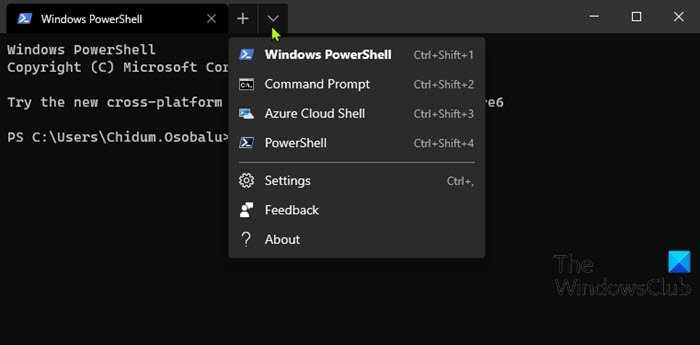
- Ctrl+Shift+1: Open Windows PowerShell
- Ctrl+Shift+2: Open Command Prompt (CMD)
- Ctrl+Shift+3: Open Azure Cloud Shell
- Ctrl+: Open Settings
- Ctrl+Shift+F: Open the search box
- Ctrl+ and Ctrl-: Increase/decrease text size
- Supports universal copy-paste commands
- Ctrl+,: Launches Settings in a new tab
Additionally, you can press to open the command search box, where you can quickly search for commands, view their respective keyboard shortcuts, and execute them efficiently. You can even create custom commands or assign different keyboard shortcuts to existing commands.
Unicode and UTF-8 Support
Windows Terminal now supports Unicode and UTF-8 characters, including emojis, emoticons, and characters from other languages like Latin. This feature adds another layer of versatility to Terminal.
Launching Terminal Anywhere
You can launch Terminal from CMD, PowerShell, or the Run Prompt screen using the command. Moreover, Terminal can run CMD, PowerShell, and other command-line apps inside it, making it a versatile tool for various tasks.
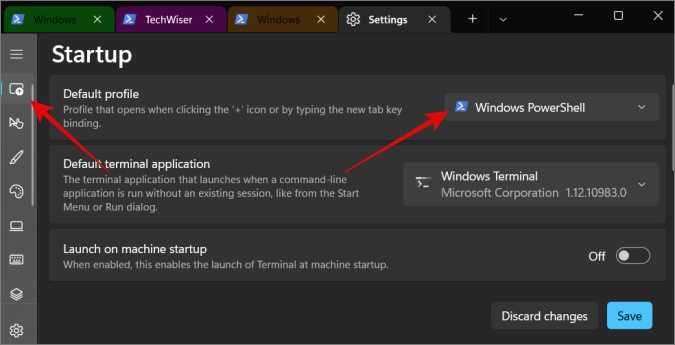
Setting Terminal as Default
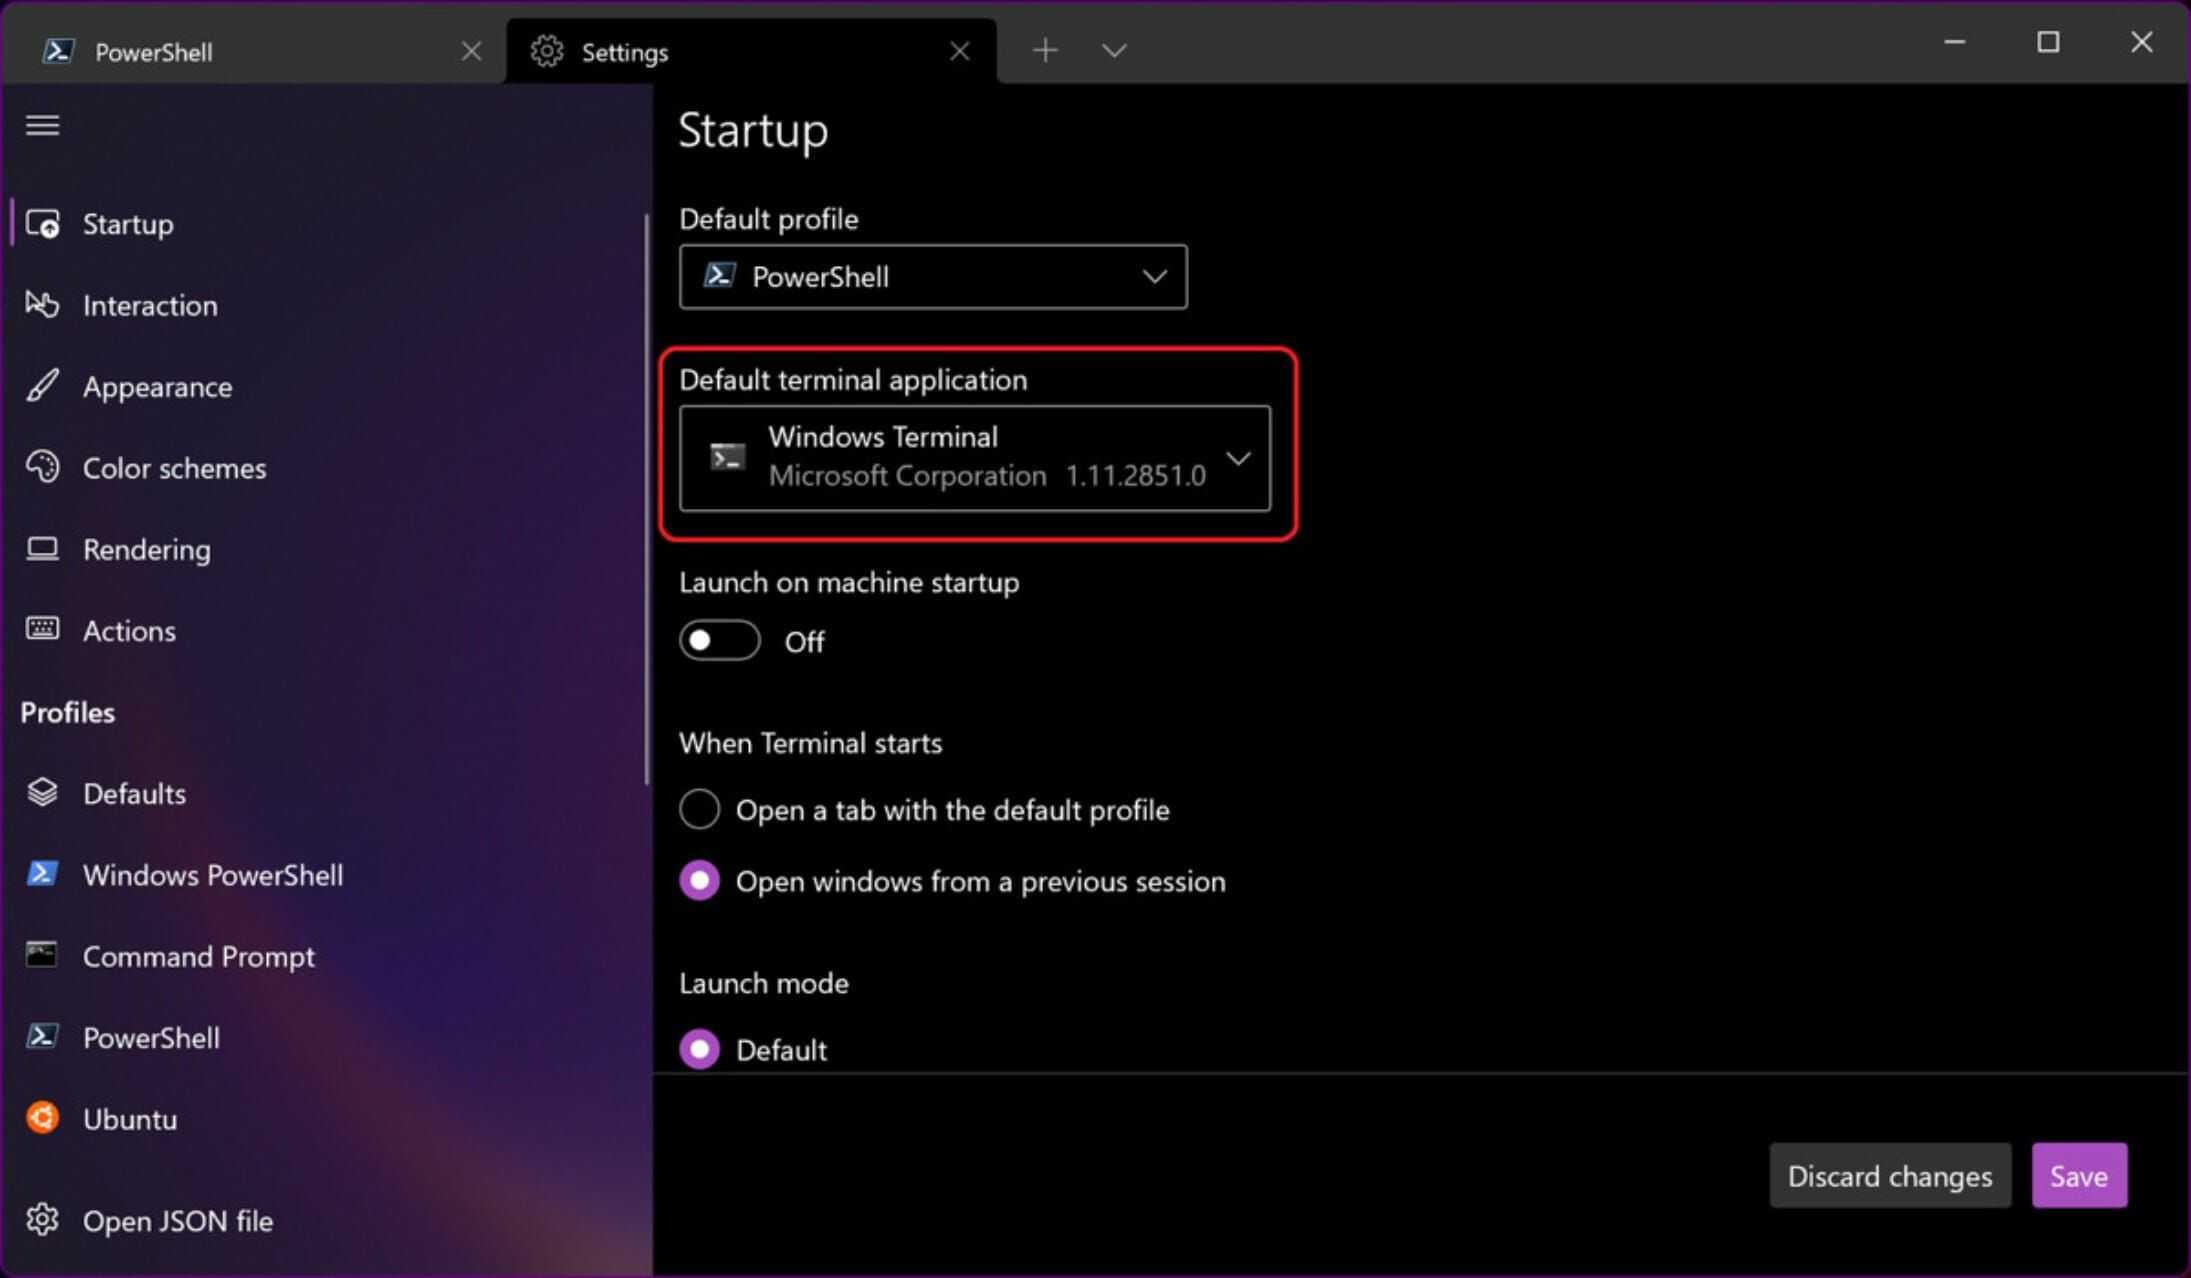
If you want to set Terminal as the default command-line tool on Windows 10 or 11, follow these steps:
- Open Terminal and press to open Terminal Settings.
- Under the Startup tab, select “Windows Terminal” from the drop-down menu next to “Default Terminal application.”
Setting Default Terminal Profile
By default, Windows Terminal opens PowerShell. However, you can change this to open CMD or Azure Cloud Shell instead. Here’s how:
- Press to open Terminal Settings again.
- Under the Profiles tab, select PowerShell, CMD, or Azure Cloud Shell next to “Default profile.”
Как использовать терминал в Windows 11?
В Windows 11 терминал предоставляет более удобный и интуитивно понятный интерфейс. С его помощью вы можете выполнять множество задач, начиная от управления файлами и папками до выполнения расширенных команд и настройки системы.
У терминала в Windows 11 есть несколько полезных возможностей:
- Использование командной строки для выполнения различных задач.
- Просмотр списка доступных команд.
- Использование скриптов для автоматизации задач.
- Изменение настроек и параметров системы.
- Получение дополнительной информации о системе.
Для открытия терминала в Windows 11 вы можете нажать клавишу Win + R и ввести cmd или powershell в окно Выполнить. Также вы можете воспользоваться поиском и найти терминал или terminal в меню Пуск.
Как только терминал открыт, вы можете начать вводить команды и использовать его функции. Список доступных команд можно узнать, введя help или помощь. В терминале вы также можете использовать клавиши со стрелками вверх и вниз для просмотра и повторного выполнения предыдущих команд.
Терминал в Windows 11 также поддерживает использование скриптов, которые позволяют автоматизировать задачи. Вы можете создавать и запускать скрипты на языке командной строки или PowerShell, в зависимости от ваших потребностей.
Все это делает терминал в Windows 11 мощным инструментом для работы с системой и выполнения различных задач. Он позволяет продвинутым пользователям получить больше контроля над своей операционной системой и упростить множество повседневных задач.
Улучшенная безопасность и защита в терминале Windows 11
Виндовс 11 представляет большой прорыв в безопасности и защите данных, и это относится и к терминалу Windows Terminal. В новой версии операционной системы, улучшена политика безопасности, которая обеспечивает более надежное и защищенное использование терминала.
Что это значит для пользователей терминала Windows 11? Во-первых, значительно повышается безопасность при работе с различными командами и скриптами. Все действия пользователя контролируются и аудитятся, что позволяет предотвращать несанкционированный доступ и злоумышленническую активность.
Дополнительные меры безопасности также включают автоматическое обновление терминала Windows, что позволяет оперативно исправлять уязвимости и улучшать безопасность. Обновления могут быть установлены в фоновом режиме, без прерывания работы пользователя, что обеспечивает постоянную актуальность и защищенность терминала.
Система аутентификации и межпроцессное взаимодействие
В Windows 11 реализована улучшенная система аутентификации, которая обеспечивает безопасность при входе в терминал и предотвращает несанкционированный доступ. Пользователю предлагается использовать различные методы аутентификации, такие как пароль, биометрические данные или PIN-код. Это позволяет защитить важные системные команды от несанкционированного использования или изменения.
Межпроцессное взаимодействие в терминале Windows 11 также проходит через повышенные меры безопасности. Пользователь имеет возможность ограничить доступ к определенным командам или скриптам, что позволяет предотвращать возможные атаки или вредоносную активность.
Дополнительные факторы безопасности
Кроме вышеуказанных мер, Windows Terminal в Windows 11 предлагает и другие дополнительные факторы безопасности. Среди них:
- Виртуализация: работа терминала происходит в изолированной среде виртуализации, что обеспечивает защиту от вредоносного кода или воздействия.
- Контроль целостности: операционная система Windows 11 предлагает контроль целостности файлов и приложений, что позволяет обнаруживать и предотвращать любые изменения, которые могут нанести ущерб системе.
Это только некоторые из улучшенных мер безопасности и защиты, предоставленных в терминале Windows 11
В целом, новая версия операционной системы обеспечивает более надежное и защищенное использование терминала, что особенно важно при работе с командами и скриптами
Если вы являетесь пользователем терминала Windows Terminal, рекомендуется обновиться до Windows 11, чтобы воспользоваться всеми новыми возможностями и мерами безопасности, которые он предлагает.
Benefits of Using Windows Terminal in Windows 11
Let’s see what the benefits of using Terminal in Windows 11 are.
Multiple profiles supporting various command-line applications – Any application with a command-line interface can be run inside Terminal. This includes everything from PowerShell and Command Prompt to Azure Cloud Shell and any WSL distribution such as Ubuntu or Oh-My-Zsh.
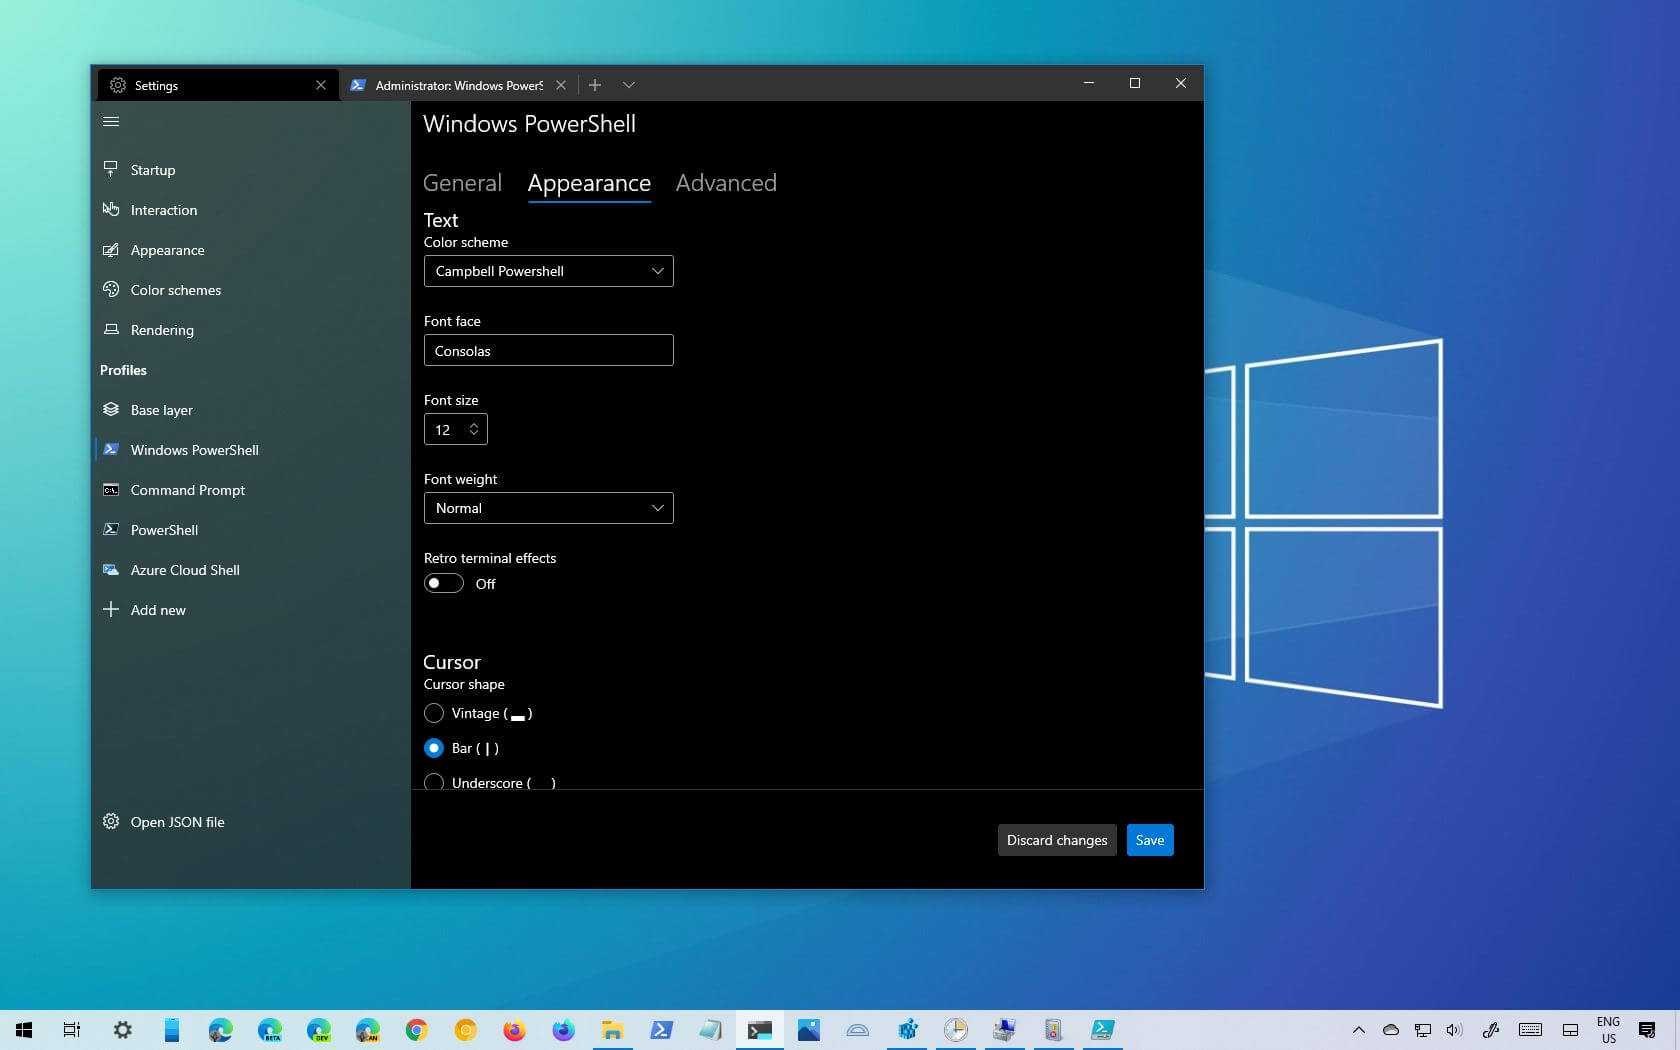
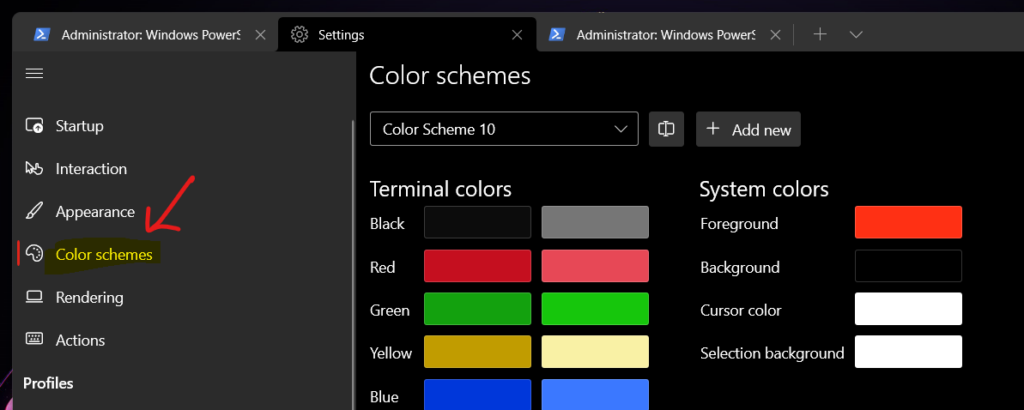
Customized schemes and configurations – You can configure your Terminal to have a variety of color schemes and settings. To learn how to make your color scheme, visit the Color schemes page.
- Custom actions – There are a variety of custom commands you can use in Terminal to have it feel more natural to you.
- Unicode and UTF-8 character support – Terminal can display Unicode and UTF-8 characters such as emoji and characters from a variety of languages.
- Background image support – Windows Terminal uses the GPU to render its text, thus providing improved performance over the default Windows command line experience.
Benefits of Using Windows Terminal in Windows 11
- Command line arguments – You can have background images and gifs inside your Windows Terminal window.
- GPU accelerated text rendering – You can set Terminal to launch in a specific configuration using command line arguments. You can specify which profile to open in a new tab, which folder directory should be selected, open the terminal with split window panes, and choose which tab should be in focus.
Как установить и настроить
Шаг 1. Перейдите на iterm2.com, скачайте терминал и установите его как обычную маковскую программу. iTerm2 распространяется бесплатно, но к сайту прикручены донаты — по желанию вы можете отблагодарить разработчиков за их труд.
iTerm2 не совместим с Windows, Linux и ранними версиями macOS. Нужна OS X 10.14 или более новая версия.
После скачивания iTerm2 визуально не отличается от стандартного терминала: слева — стандартный терминал; справа — iTerm2. Всё изменится после настройки.
Шаг 2. Устанавливаем оболочку Oh My Zsh — специальное расширение, которое позволяет менять оформление iTerm2. Для установки вам необходимо скопировать следующую строку, вставить её в терминал и нажать на Enter:
После загрузки нажмите «Y», Enter и введите пароль от своего мака — Oh My Zsh заменит стандартную оболочку терминала, установит стандартную тему и включит подсветку синтаксиса. Можно оставить так или полностью изменить оформление.
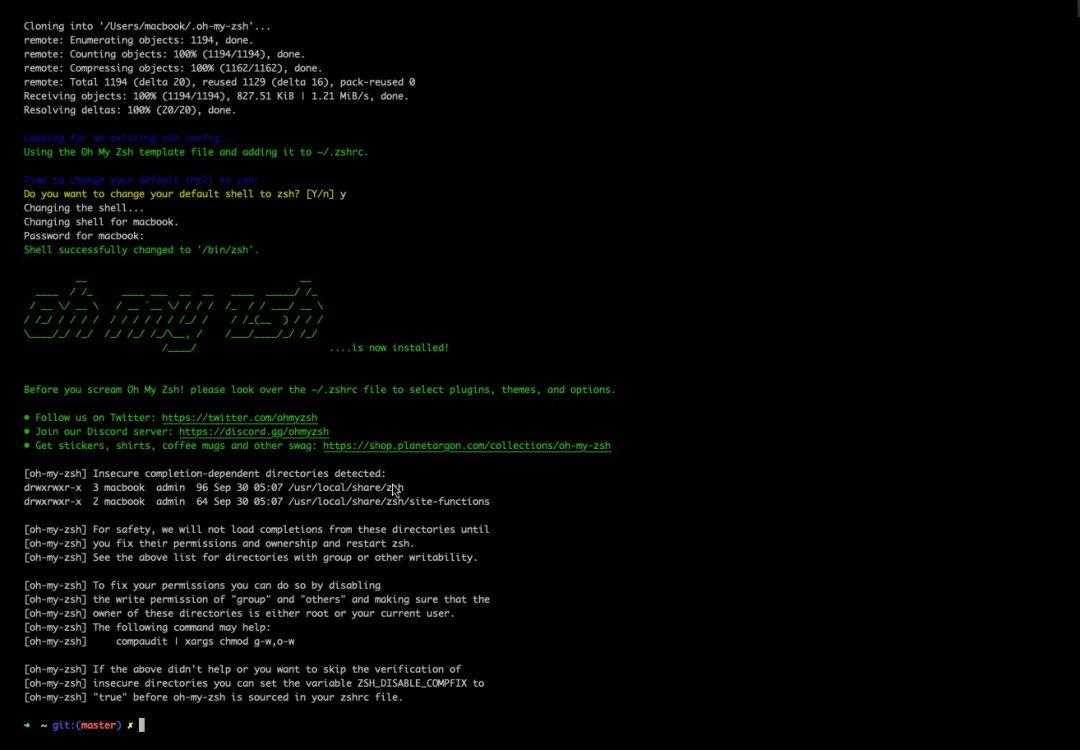
Ставим оболочку Oh My Zsh в iTerm2.
Шаг 3. Откройте репозиторий Oh My Zsh и посмотрите список тем, встроенных в оболочку по умолчанию, — таких, которые можно изменить одной командой без скачивания дополнительных компонентов. Для примера выберем тему Apple. Открываем iTerm2 и пишем команду для перехода к файлу настройки терминала:
Появится текстовый документ, в котором нужно найти строчку «ZSH_THEME =»Пишем название выбранной темы»». Закрываем файл и перезагружаем iTerm2.
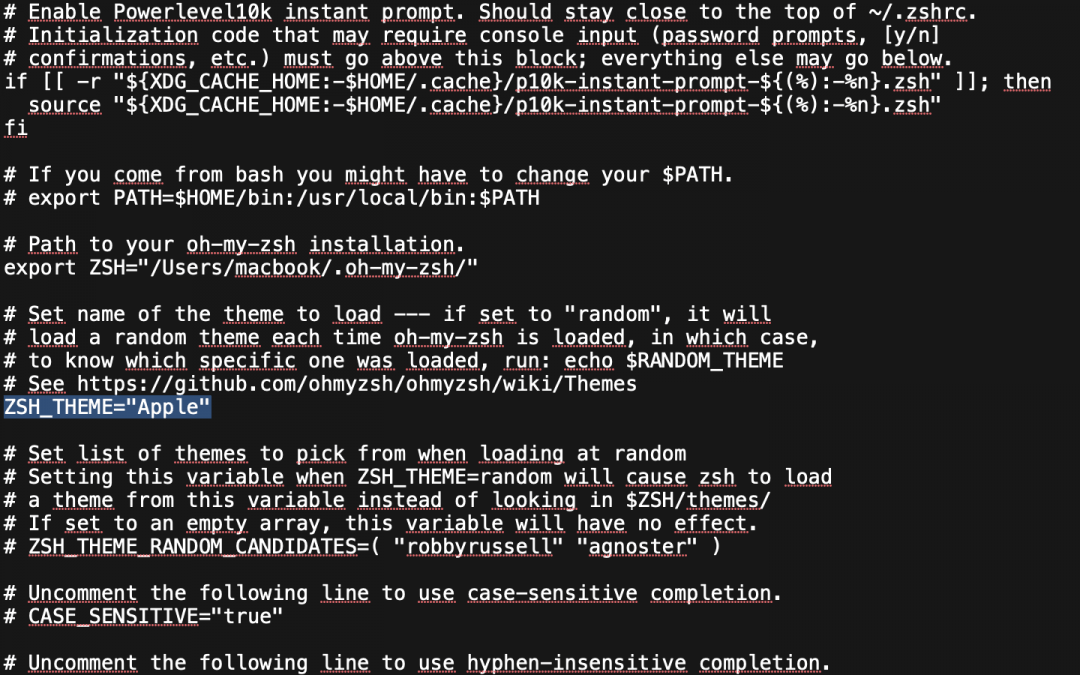
Редактируем файл настройки терминала и устанавливаем тему Apple
После выбора темы можно поменять цветовую схему, контрастность и все цветные элементы синтаксиса. Для этого наведите мышкой на меню → выберите iTerm2 → Preferences → Profiles → Colors. Для изменения цветовой схемы кликните на Colors Presets; для изменения шрифтов перейдите на вкладку Text.
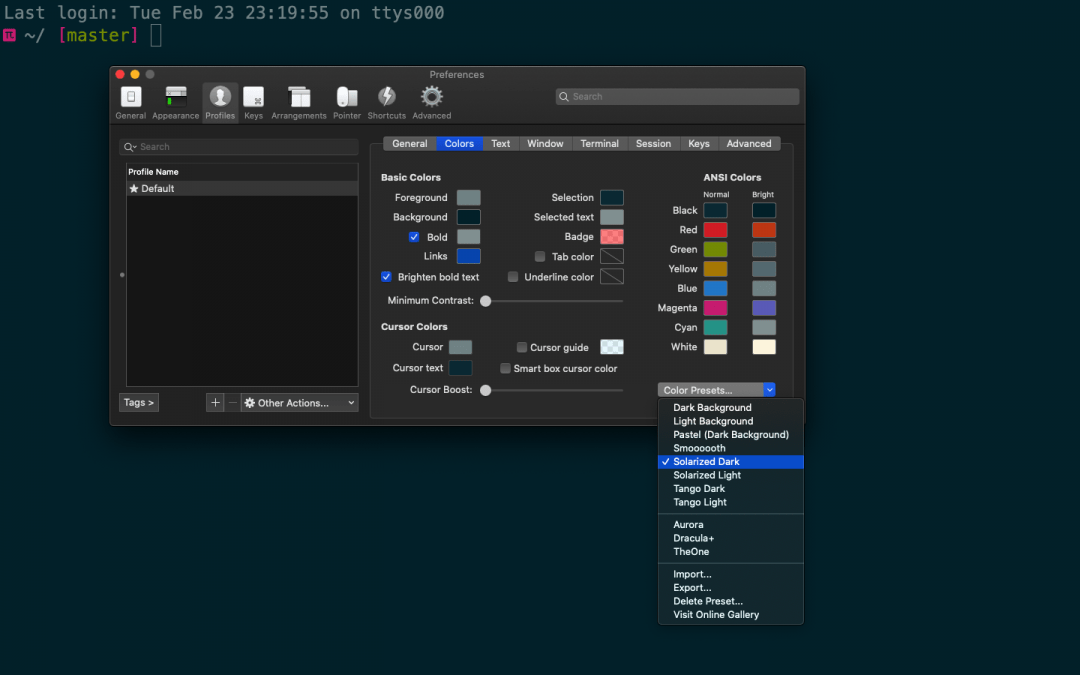
Добавляем к теме «Apple» цветовую схему Solarized Dark
Дальнейшие шаги для тех, кому не подошли стандартные темы Oh My Zsh.
Шаг 4. Установите дополнительные шрифты, которые понадобятся для работы с внешними темами. Чтобы всё настроить — добавьте в iTerm2 такую команду:

У внешних тем для iTerm2 есть техническая документация, рекомендованные настройки и шрифты. В некоторых версиях операционной системы внешние темы устанавливаются с дефектом и часть текстовой информации искажается — вместо букв появляются знаки вопроса и неразборчивые символы. Иногда это происходит даже тогда, когда вы полностью соблюдаете прописанные настройки.
Чтобы исправить дефект — откройте вкладку Text и замените рекомендованный шрифт на какой-то другой. Перезапустите терминал и проверьте изменения. Если ничего не поменялось и другие шрифты не работают — придётся менять тему.
Шаг 5. Загрузите менеджер пакетов Homebrew, который предотвращает ошибки при установке внешних тем. Для загрузки менеджера пакетов вставьте команду:
Шаг 6. После установки дополнительных шрифтов и менеджера пакетов в iTerm2 можно загружать внешние темы. Есть несколько способов, и простой выглядит так:
- Выберите тему и найдите её репозиторий на гитхаб.
- Прочтите документацию и найдите команду git clone — это строка для загрузки темы. Её нужно скопировать и вставить в терминал.
- Откройте файл настройки терминала и в строчке ZSH_THEME пропишите название темы.
- Перезагрузите iTerm2.
Не все внешние темы получится установить. Иногда они повреждены, не содержат всех загрузочных файлов или их просто не найти на гитхабе.
Settings
Settings are accessed from the drop-down menu or Ctrl + , (comma). The configuration is defined in a single file, so you may be prompted to choose a text editor. VS Code is a great choice, although Notepad is fine if you’re happy to edit without color-coding and syntax checking.
controls:
- , which apply to all profiles
- , which define profiles
- , and
The file uses the following format:
Defaults are defined in . Open it by holding down Alt when clicking Settings in the drop-down menu.
Warning: do not change the defaults file! Use it to view default settings and, where necessary, add or change a setting in .
Global Settings
The following global settings are the most useful, although more are documented in the Terminal documentation.
defines the GUID of the profile used as the default when Windows Terminal is launched.
Set to to automatically copy selected text to your clipboard without having to press Ctrl + Shift + C.
Set to to just copy plain text without any styling. (I wish this were the default for every application everywhere!)
Set and to the number of characters for the horizontal and vertical dimensions.
can be set to:
- : each tab is the same width (the default)
- : each tab is set to the width of its title, or
- : inactive tabs shrink to the width of their icon.
sets an array which prevents profiles being automatically generated. For example:
This would disable all generated profiles; remove whichever ones you want to retain.
Profile Settings
New profiles are defined by creating an object group in the , array. A WSL2 Ubuntu example:
Each profiles is defined with the following settings:
| setting | description |
|---|---|
| a unique identifier (required). For new profiles, you can generate a GUID online at guidgen.com | |
| the profile generator. This is only used when a profile has been automatically added and must not be edited. | |
| the executable to run assuming no is set. For example, this could be an SSH command such as | |
| the directory the shell starts in. For WSL distros, this is best set to where is the user created during installation | |
| the profile name shown in the drop-down menu | |
| the name shown in the tab title | |
| set to force the or in bash | |
| the full path to the icon shown in the drop-down and tab, e.g. . 24-bit PNGs are the best option; unfortunately, SVGs are not supported | |
| if set , the profile is not displayed in the drop-down menu | |
| use a specific font | |
| use a specific font point size integer | |
| use a specific font weight. This can be an OpenType integer or a keyword: , , , , , , , , , , | |
| padding around text at the edge of the window. One, two, or four comma-delimited values can be set, e.g. to set left, top, right, and bottom respectively | |
| the anti-aliasing method. Set to (the default), , or | |
| the cursor type. Set to (the default), , , , or | |
| the height of a cursor defined as an integer between and | |
| the cursor color, defined as or |
Theme-specific settings include:
| setting | description |
|---|---|
| the name of a color scheme as defined in or the list in () | |
| set to use a frosted-glass background effect | |
| the acrylic opacity from (fully transparent) to (fully opaque) | |
| the full path to a background image, e.g. | |
| the background image opacity from (fully transparent) to (fully opaque) |
Finally, add to a profile for a retro CRT effect!…