

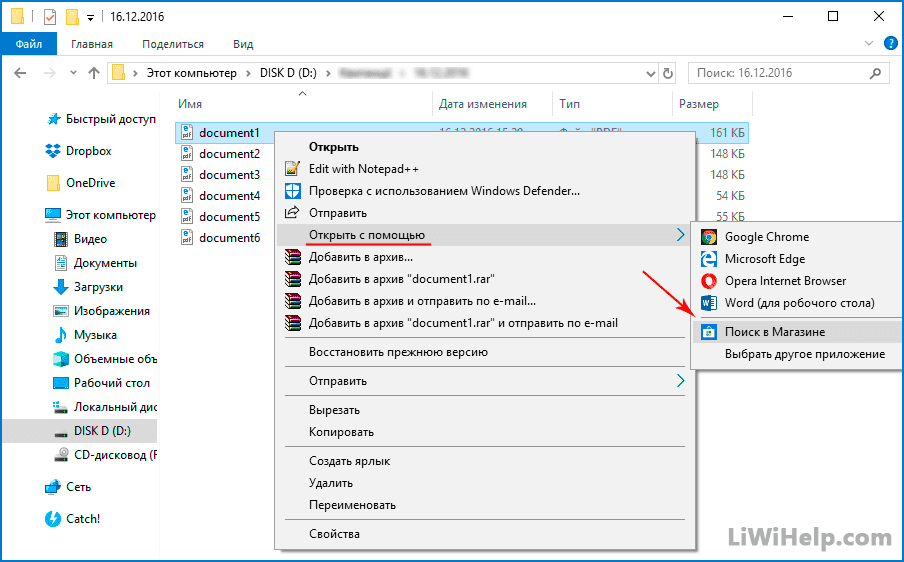
5. Enhanced Start Menu Search
The search on the Start Menu is good, especially with the addition of Cortana, but you can make it even better. Open Start Menu Settings and go to the Search Box tab. There’s a bunch of useful settings that are worth enabling here.
Track frequency of use will see how often you open programs and place them higher in search results. Enable Auto-Complete will automatically detect full folder or file paths. Enabling both Search programs and settings and Search files is perhaps the most useful feature here and basically means that your Start Menu search becomes a one-stop-shop for finding absolutely anything on your system.
Download Classic Shell
First things first: head over to the Classic Shell website and download the program. Launch the installer and progress through the wizard. You’ll be asked which elements of Classic Shell you want to install. For the purpose of this guide, select everything except Classic IE.
This will install Classic Start Menu Settings and Classic Explorer Settings, both of which you’ll find doing a system search. We’ll refer to them as Start Menu Settings and Explorer Settings.
By default, on both settings windows, you’ll only see a small number of tabs and customization options. Tick Show all settings so that you can see all of the tabs because we’ll need them for the upcoming tweaks.
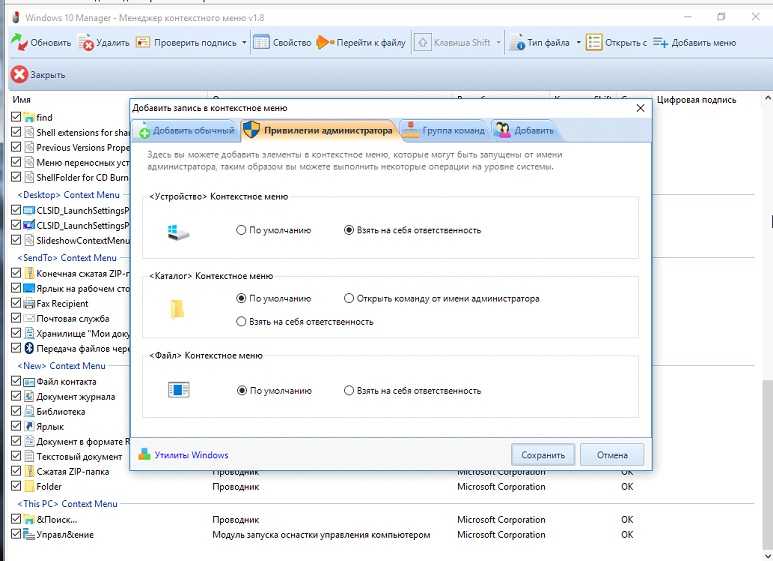
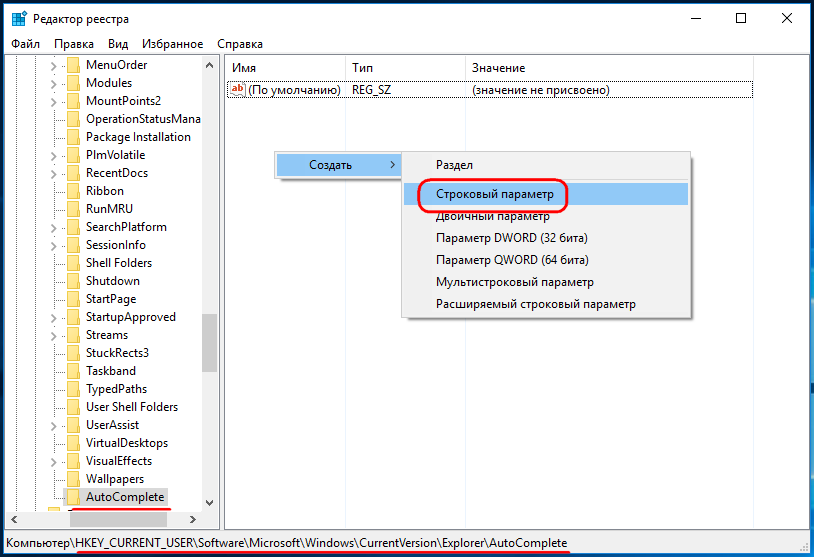
Редактор реестра
Чтобы его запустить нажмите комбинацию клавиш Win + R и в появившемся поле введите команду regedit. Нас интересует ветка, находящаяся по адресу: HKEY_LOCAL_MACHINE\SOFTWARE\Microsoft\Windows\CurrentVersion\FlightedFeatures.
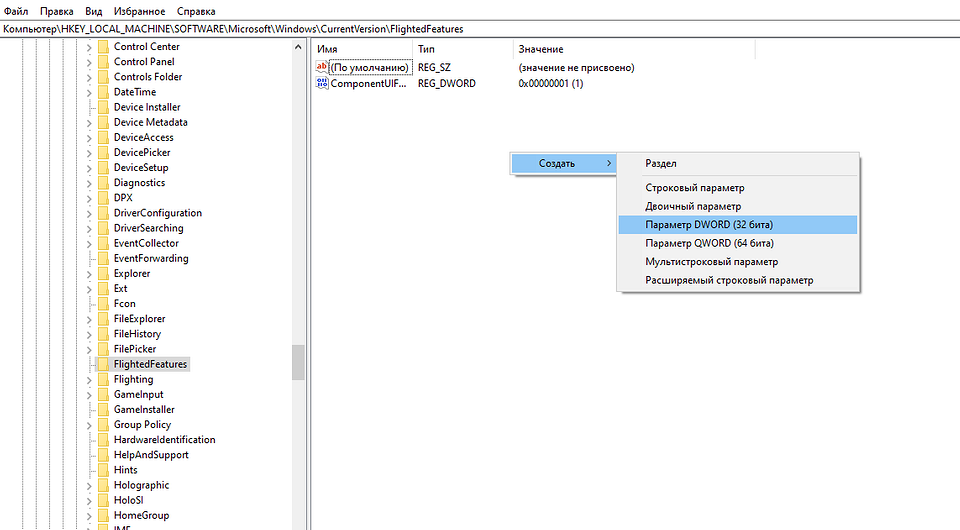
В правой части окна кликаем правой кнопкой мыши и выбираем пункт «Создать параметр DWORD (32-бита)». Задаём для него имя ImmersiveContextMenu и подтверждаем операцию. По умолчанию этому параметру присвоится значение 0. Это то, что нам и нужно, менять ничего не стоит. Для того, чтобы изменения вступили в силу, необходимо перезагрузить операционную систему. Чтобы вернуть всё в исходное состояние, разумеется, придется параметр удалить из реестра аналогичным способом.
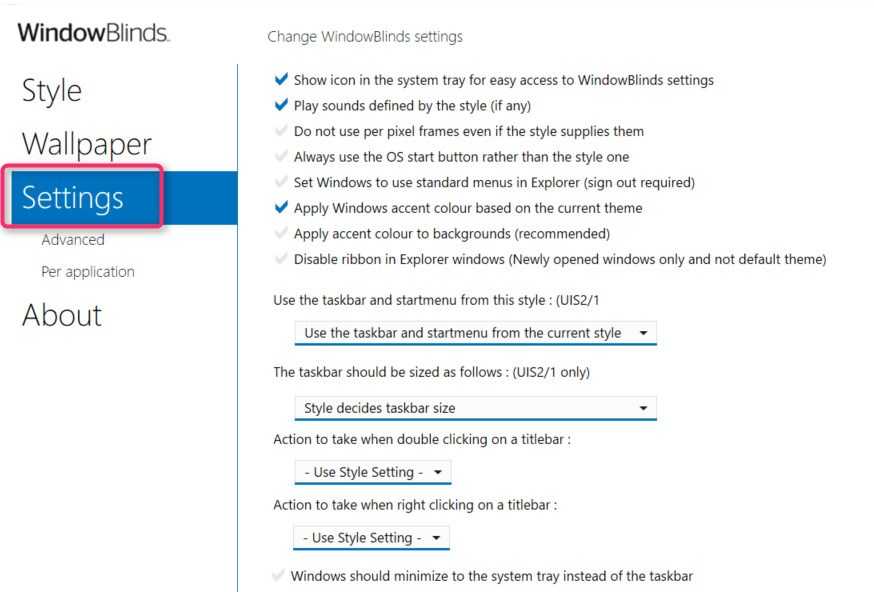
Настройки
Во вкладке «Settings» содержатся настройки оформления Windows. Среди них:
• Отключение Ribbon-панели проводника;• Отключение стилизованных кнопок меню «Пуск»;• Настройка скорости анимации;• Задействование звуковых схем тем, если таковые предусматриваются;• Применение текстур к фону проводника, если это поддерживается;• Настройка тем и параметров для отдельных программ.
***
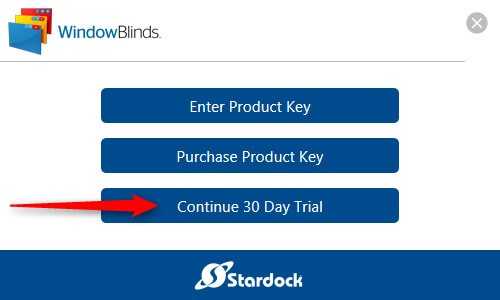
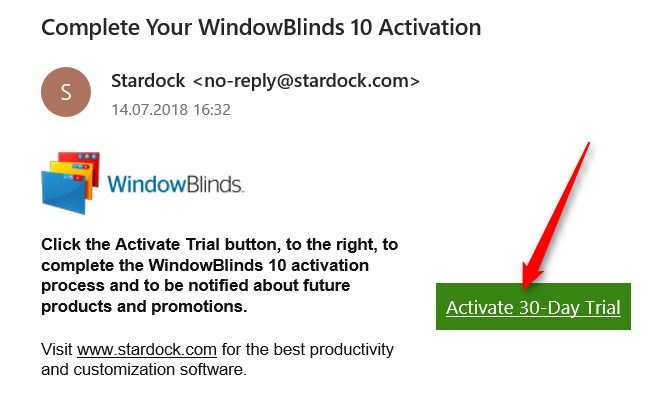
Интерфейс WindowBlinds только на английском, русский язык не поддерживается. Стоит программа $10, предусматривается полнофункциональный бесплатный триал-режим сроком на 30 дней. Для активации триал-режима при запуске программы нужно выбрать «Continue 30 Day Trial».
Затем ввести адрес своей почты и в полученном от Stardock письме нажать кнопку активации.
Скачать программу:
Ribbon interface
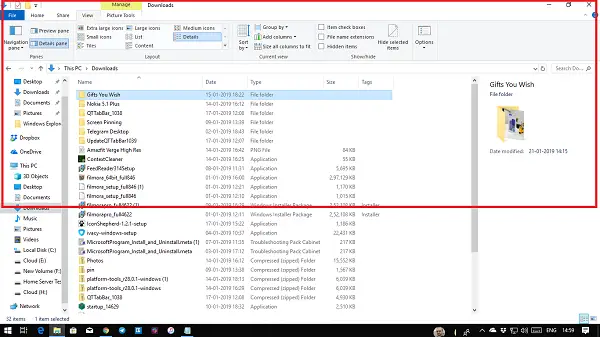
Most user interface space of File Explorer is dedicated to displaying icons and the tree view on the left side because opening and moving files and folders are what you’ll be doing 90% of the time. More advanced functions are available in the ribbon interface (introduced in Windows 8), which you can open by clicking Home, Share, or View. You can make this area visible at all times by clicking the Down button next to the folder name in the window header, then de-selecting Minimize the Ribbon.
Michael Crider/Digital Trends
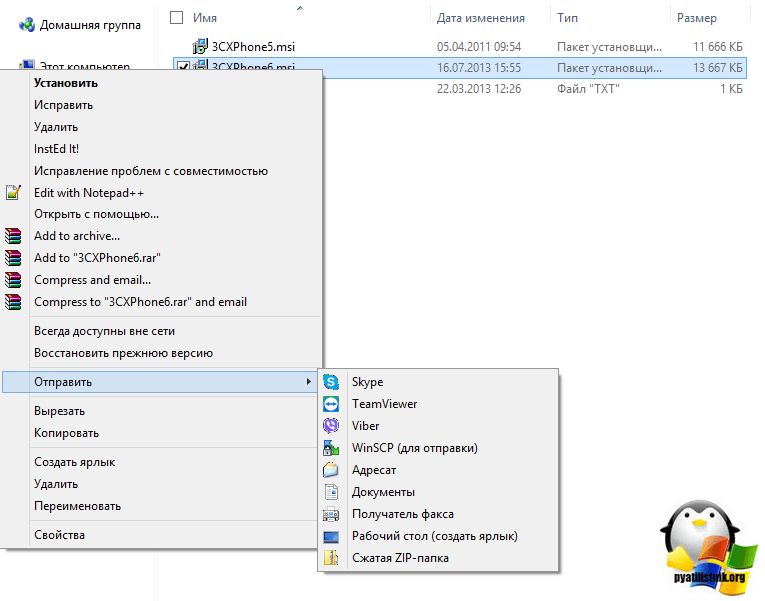
The Home ribbon isn’t all that useful, if only because the functions inside it are all available as standard clicks or well-known keyboard shortcuts, like copy and paste. Share shows functions that are less common: You can use these buttons to send specific files or folders to a ZIP archive, print or fax documents, burn files to a CD or DVD, or share them using Windows’ built-in networking tools.
Michael Crider/Digital Trends
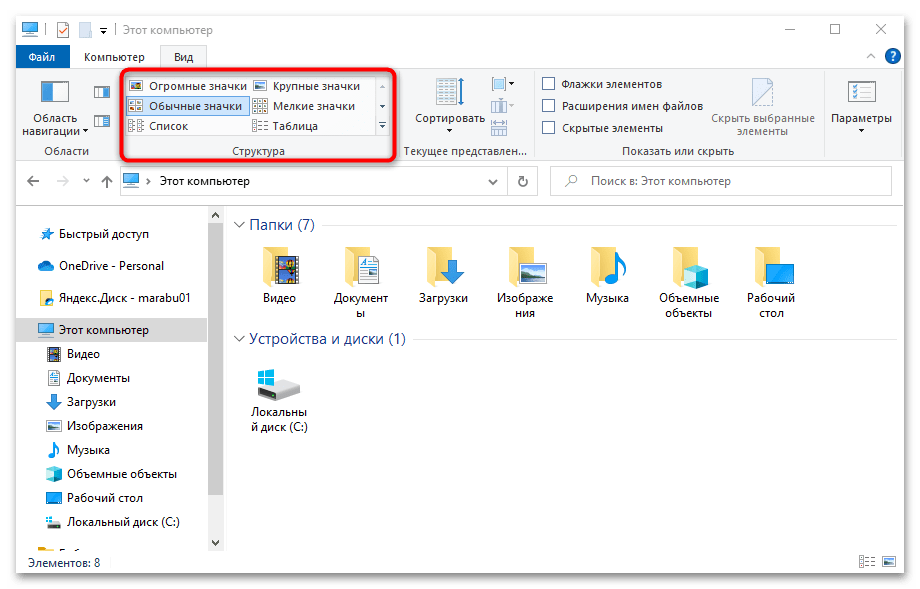
The View tab is where some more interesting tools are located. Here you can enable or disable the Navigation pane (where the Quick Access section is) and show or hide separate panes for Preview (which will show larger versions of things like photos or videos) and Details (which show more technical aspects of a file or group of files at a glance). In the Layout section, you can select entirely different views for this specific folder. More advanced tools are available by clicking the Options icon, then clicking Change Folder and Search Options. Try out all the different view options — you may find that some of them are very useful, especially in folders with large amounts of files.
1. Start Menu Skins
If you miss the Start Menus from Windows past, Classic Shell makes it very easy to turn back the clock. Launch Start Menu Settings and go to the Start Menu Style tab. Here you can choose between Classic style, Classic with two columns and Windows 7 style.
Once selected, click Select skin… beneath and use the Skin drop-down to change between the different styles. For example, you could opt for the classic Start Menu using the XP colors.
Each skin also has its own options, customizable using the radio buttons and checkboxes below the drop-down. For example, some let you set the size of the icons, fonts, and whether to show your user picture.
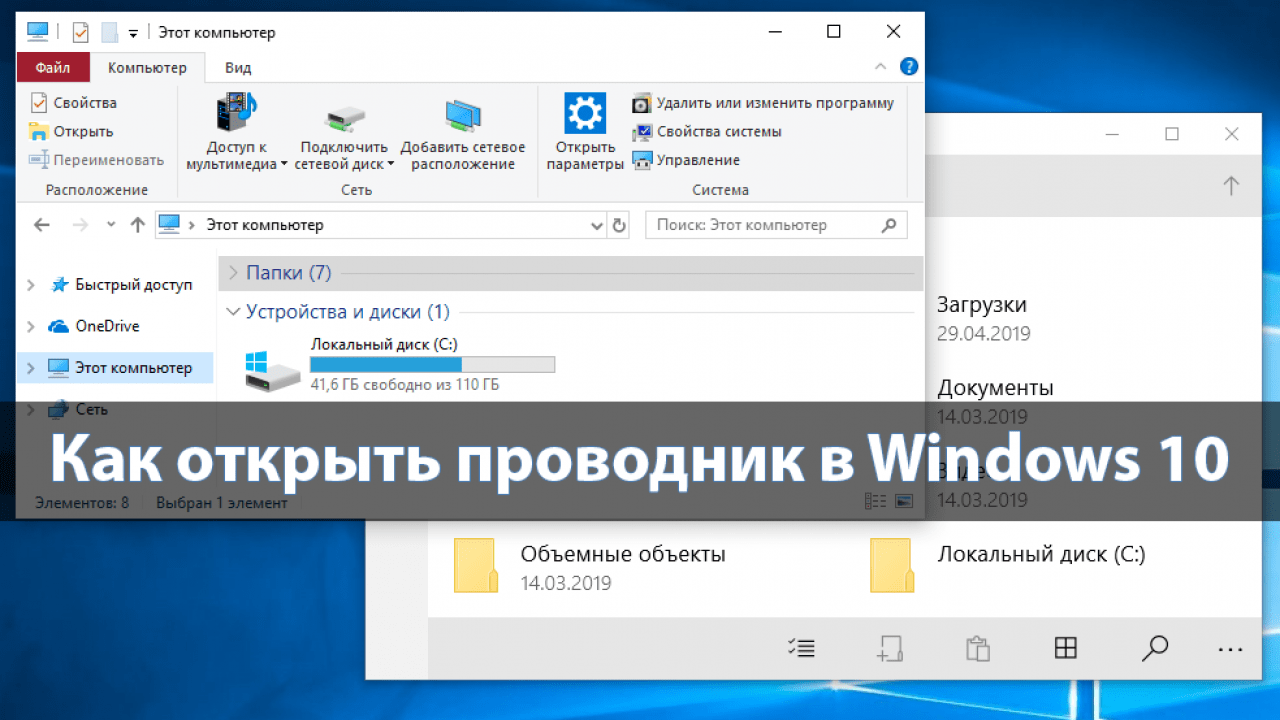
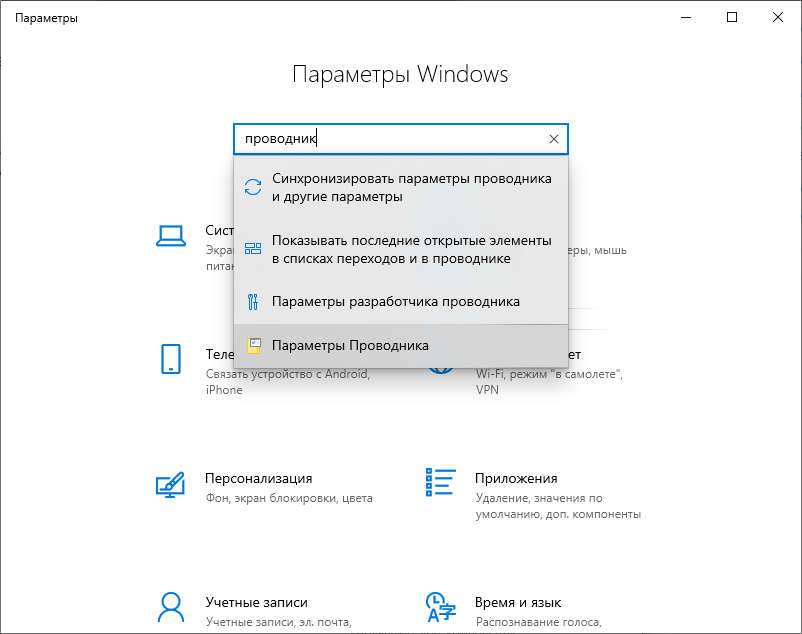
Как настроить Проводник в Windows 10
Представление по умолчанию Explorer предлагает доступ ко всем пользовательским папкам и дискам. В верхней части у вас есть несколько фиксированных вкладок, таких как «Файл», «Вид» и другие, которые отображаются в зависимости от того, что вы выбрали, и вашего текущего местоположения. Например, когда вы выбираете изображение, вы получаете меню инструментов изображения, а инструменты приложения – при выборе исполняемого файла. Дело в том, что список динамичен и постоянно меняется в зависимости от ситуации.
Поскольку мы имеем дело с настройкой проводника в Windows 10, большинство из них доступны в разделе «Параметры» на вкладке «Вид», а некоторые связаны с контекстным меню.
Настройте «Вид» в Проводнике
То, как вы хотите просматривать свои файлы, полностью зависит от вида работы, которой вы регулярно занимаетесь. На вкладке «Вид» в меню ленты вы можете переключиться с очень крупных (подходящих для изображений) на Большие значки на «Детали», которые добавляют дату, тип, размер к файлам, папкам и тегам, если вы их используете.
Затем вы можете Сортировать и группировать файлы и папки по размеру, дате, имени и т. Д. Если вы чувствуете, что чего-то не хватает, вы можете выбрать «Добавить столбцы» в подробном представлении.
Помимо видов файлов, вы можете добавить две боковые панели, чтобы расширить их. Это полезно для отдельных файлов, если вы не хотите использовать режим детализации.
Затем у вас есть панель навигации, которая добавляет древовидную структуру слева. Это поможет вам быстро перемещаться между папками.
Наконец, у вас есть еще несколько вариантов. включить
Настройте «Параметры папки» в Проводнике
В меню просмотра у вас есть параметры. Когда вы нажимаете на нее, она открывает всплывающее окно, которое предлагает множество вариантов, которые вы можете сделать. Они в основном для папок и поиска. Здесь у вас есть три важных конфигурации – Общие, Просмотр и Поиск. Мы собираемся посмотреть на первые два.
Изменить папку по умолчанию
Используете ли вы сенсорный экран?
Другие
Настроить параметры просмотра
Здесь вы получаете микро контроль над тем, что вы видите для файлов и папок. Прямо от значков, до меню, до полного пути, возможность скрывать пустые диски и так далее
Вот несколько вещей, на которые вы должны обратить внимание:
Автоматически введите в поле поиска:
Когда мы открываем любую папку, мы обычно ищем элемент. Если у вас обширная коллекция файлов и папок, включите эту опцию. Поэтому, когда вам нужно что-то найти, он наберет это в поле поиска и отфильтрует результаты.
Когда вы нажимаете на поле поиска или печатаете с включенной этой опцией, вы получаете пару опций фильтра. Это поможет вам сузить результаты поиска, чтобы найти тот файл или папку, которую вы пытались найти. Вы можете ограничить размер файла, тип, дату изменения и так далее.
Наконец, вам не нужно применять один и тот же вид ко всем папкам. Когда вы открываете конфигурацию вида в папке, вы только настраиваете внешний вид этой папки. Поэтому лучший способ – настроить папки, с которыми вы работаете, и оставить другие. Хотя вы можете применить текущий вид ко всем папкам с помощью кнопки « Применить к папкам ».
Если что-то не подходит, вы всегда можете сбросить вид папки.
Это в значительной степени вы должны знать о том, как вы можете настроить Explorer в Windows 10. Хотя я бы повторил, что все зависит от вашей работы, большинство потребителей на самом деле ничего не меняют, если в этом нет необходимости, но те, кто должен справиться с много файлов и папок, они действительно полезны.
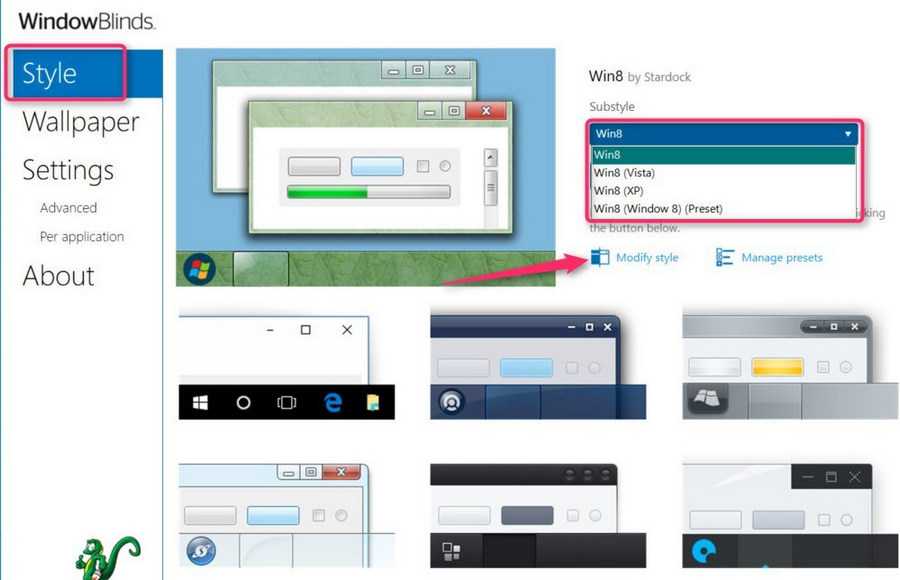
Темы
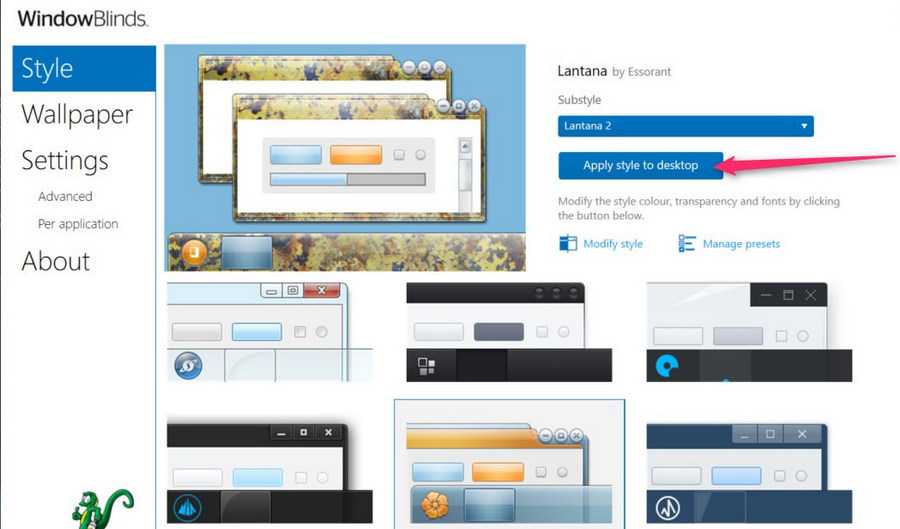
Каталог тем встречает нас в первом же окошке WindowBlinds «Style». Для различных версий Windows каталог тем разнится: в нём присутствуют как универсальные темы, подходящие для всех версий системы, так и таковые, что поддерживаются только конкретными версиями. У тем может быть несколько вариантов оформления. Любой из этих вариантов модифицируется под наши предпочтения. Для этого необходимо нажать кнопку «Modify style». Кстати, все проводимые нами изменения тотчас же отображаются на картинке-макете.
В разделе «Colours» можем настроить цвета темы.

Раздел «Transparency» предназначен для настройки прозрачности меню «Пуск», панели задач, верхушки окон и системного контекстного меню.
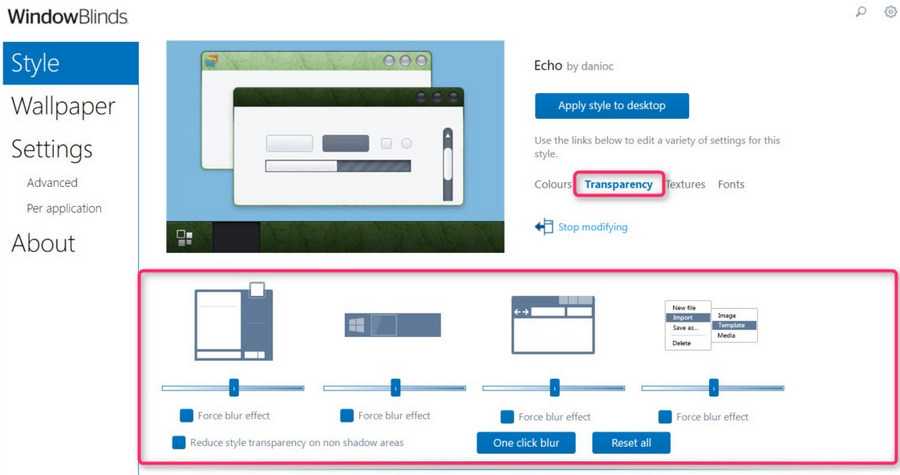
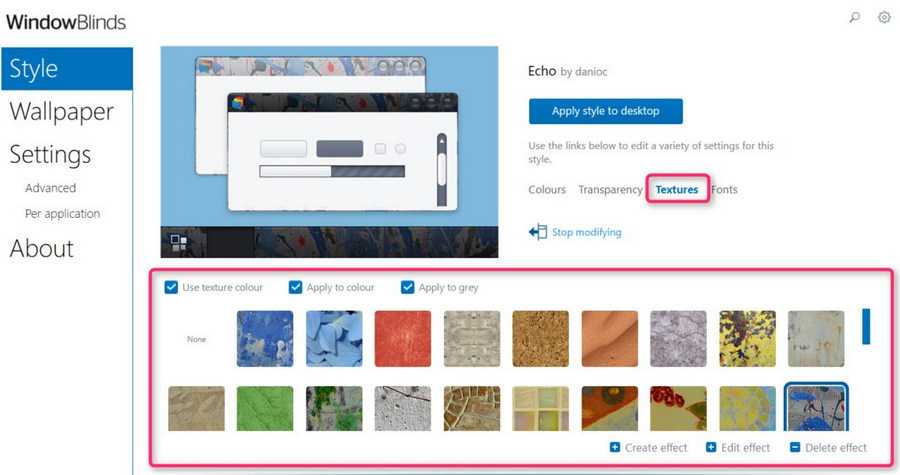
В разделе «Textures» можем выбрать текстуры для оформления отдельных областей системы.
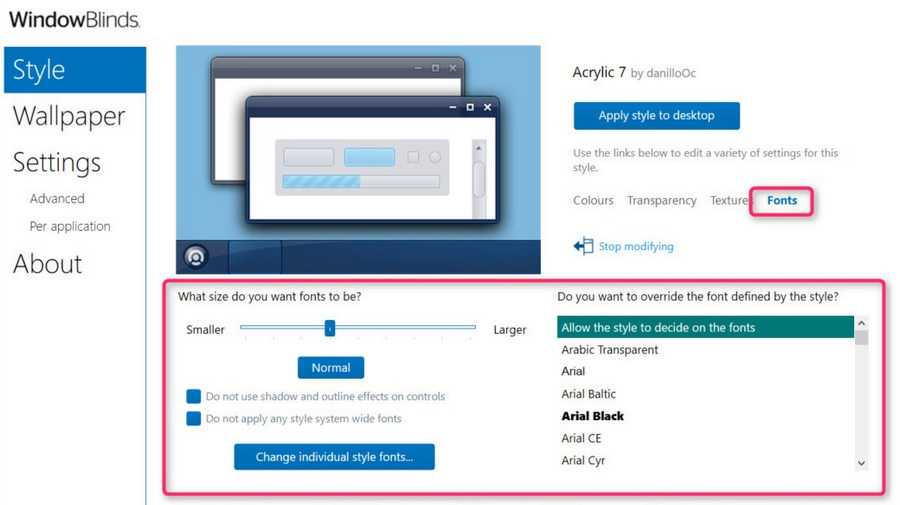
Раздел «Fonts» предлагает возможности для смены системных шрифтов и настройки их масштаба.
Настроенную на свой лад тему в итоге применяем кнопкой «Apply style to desktop».
Существующий в программе каталог тем можно пополнить таковыми с веб-сайта WinCustomize или с любого другого веб-ресурса, посвящённого кастомизации Windows. Поддерживаются темы формата «.wba», «.themepack», а также поставляемые в ZIP-архивах.

Useful keyboard shortcuts
While File Explorer has dozens of keyboard shortcuts, here are some of the most useful:
- Windows key + E — open a new instance of File Explorer from anywhere in Windows.
- Alt + P — show or hide the Preview pane.
- Alt + Shift + P — show or hide the Details pane.
- Alt + left arrow key — go back one folder in your history.
- Alt + up arrow key — go up one folder in the folder tree.
- Ctrl + N — open a new File Explorer window.
- Ctrl + E — activate the Search bar.
- Ctrl + Shift + N — create a new folder in the current folder.
- Ctrl + mouse wheel up or down — increase or decrease the size of icons and thumbnails.
Editors’ Recommendations
-
How to remove a Microsoft account from Windows 11
-
Microsoft plans to charge for Windows 10 updates in the future
-
The best Windows apps for 2023
-
Windows 11 vs. Windows 10: finally time to upgrade?
-
Common Windows 11 problems and how to fix them
3. Start Menu Button
The default Start button with the four window panes is serviceable, but it’s not particularly exciting. Let’s change that.
First, it’s time to choose the image you want. Technically you could use any image, but the best are those which have been specifically designed to show different image states in normal, hovered and pressed modes.
The Classic Shell forum has lots of different buttons to choose, ranging from Angry Birds, the Superman logo, or a retro XP look. Browse through the threads and once you find what you want, right-click the image and save it somewhere on your computer.
Launch Start Menu Settings, go to the Start Menu Style tab and tick Replace Start button. Click Custom > Pick image…, navigate to where you saved the image and double-click it.
If the image is too big, click Advanced button options… and click Button size. Here you can input the pixel width for the button. is the default, but 48 or 60 will often work best. Feel free to experiment with different values.
You’ll need to click OK each time to save the change.
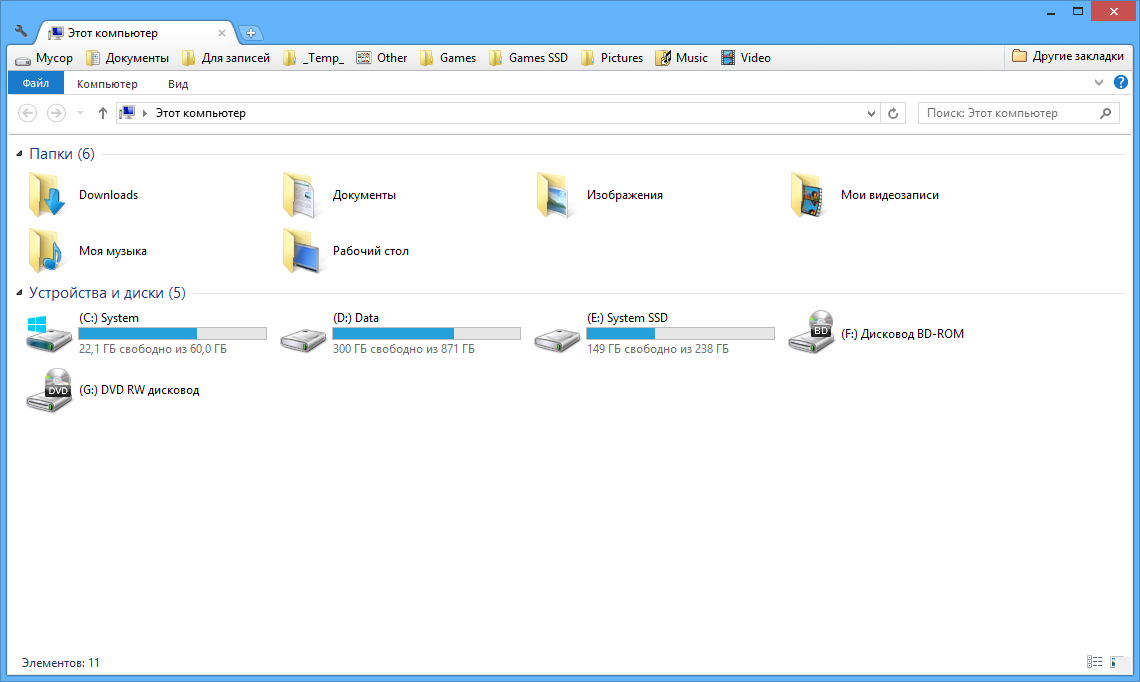
Изменяем вид по умолчанию Проводника Windows 10
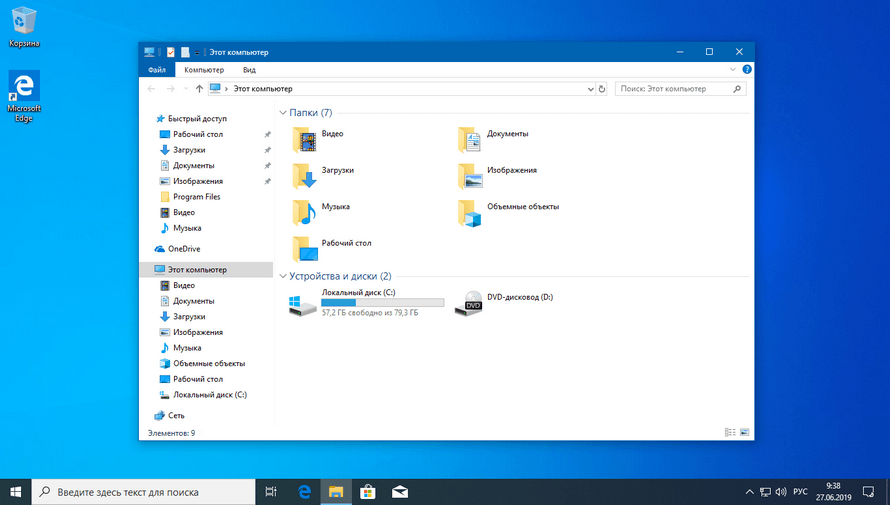
В Проводнике Windows 10 несколько изменился способ отображения его содержимого при открытии. По умолчанию Проводник открывает панель быстрого доступа вместо привычного списка дисков. Панель быстрого доступа показывает часто используемые папки и последние файлы.
Некоторым пользователям такое дело придется по душе, а кое-кто захочет вернуть вид, к которому привык в прошлых версиях Windows. И сейчас я расскажу, как вернуть прежний вид со списком дисков и сделать его постоянным.
Вот такой вид открывается по умолчанию в проводнике Windows 10.
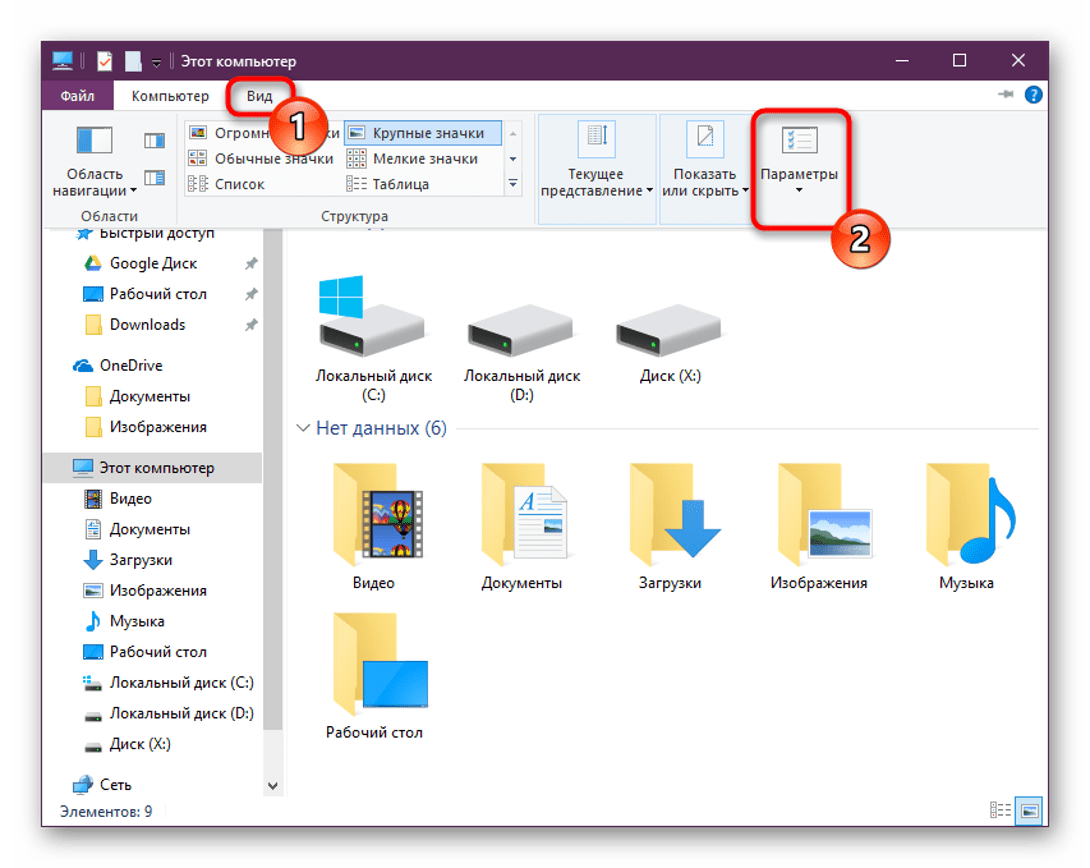
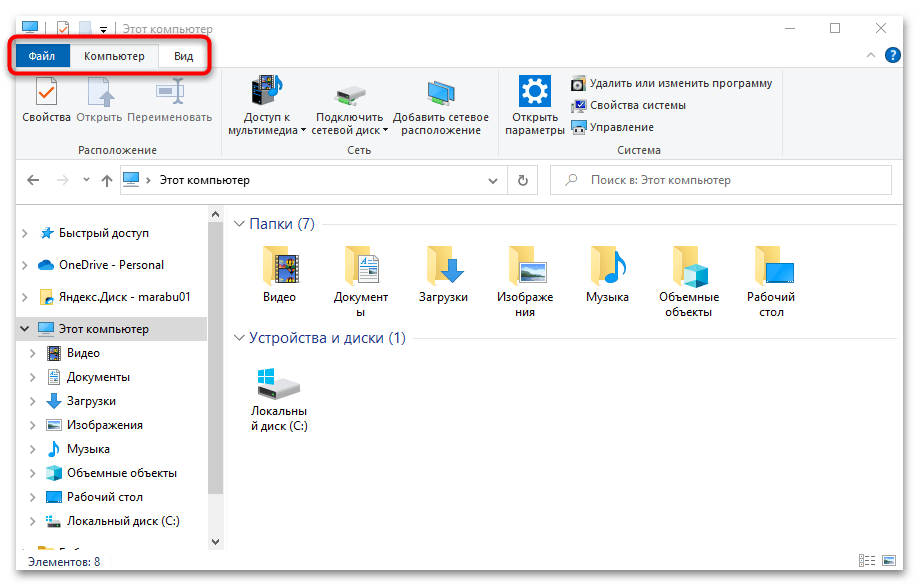
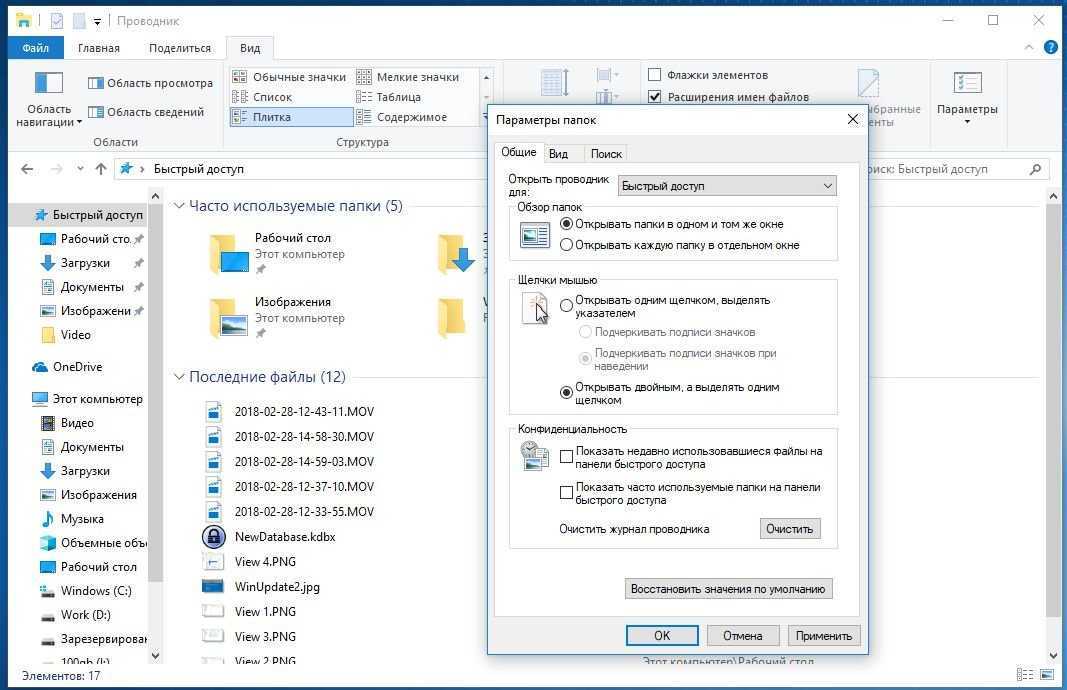
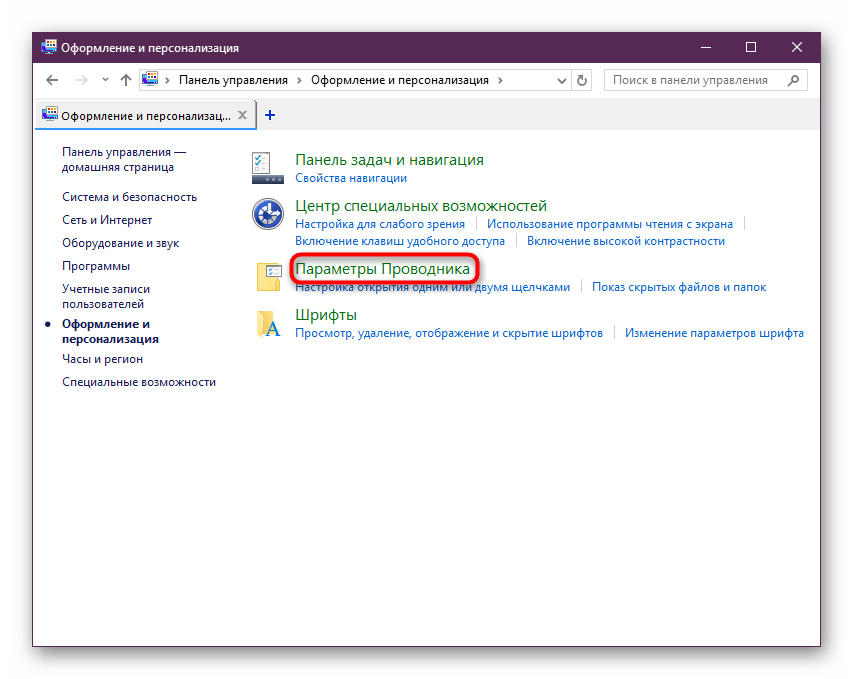
Переключаемся на пункт Вид в верхнем меню проводника. В самом последнем разделе справа нажимаем на Параметры и выбираем Изменить параметры папок и поиска.
В параметрах папок на вкладке Общие первый же пункт сверху называется Открыть проводник для. И справа скудный выпадающий список всего лишь из двух элементов: Панель быстрого доступа и Этот компьютер. Выбираем Этот компьютер и сохраняемся кнопкой ОК.
Теперь при открытии проводника будет привычный вид, как в Windows 7.
А вам какой способ отображения Проводника Windows 10 больше нравится?
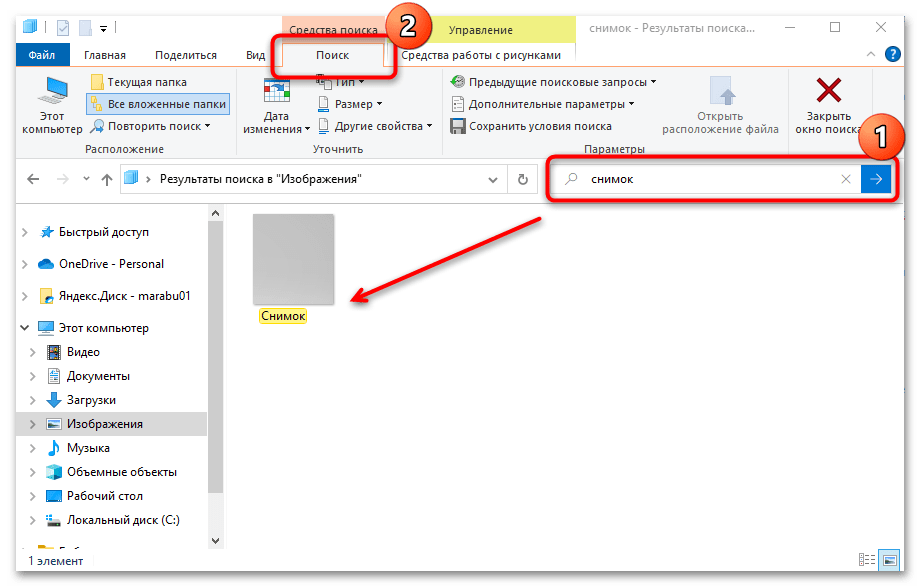
Searching
File Explorer has a search bar, just like most modern internet browsers. It’s an integrated part of Windows, but when you use the Search function in File Explorer itself, your search will be limited to the folder you currently have open (plus any files contained in folders inside that folder).
Michael Crider/Digital Trends
This is especially useful if you have dozens or even hundreds of files in a folder. When you type the name of the document in the Search function, it will pull up a list of relevant results. Word documents and PDFs might show up as results if they contain a word similar to your search term in the body of the file itself. If you’re not sure where exactly one of your search results is located, right-click it and select Open File Location to open the relevant folder instantly.
Clicking the search bar will also open the Search Tools portion of the Ribbon interface (which is usually hidden). This gives you options to narrow your search according to date, file size, file type, or within a specific folder.
![Customize windows 11 file explorer [new features + tips & tricks]](https://jsk-oren.ru/wp-content/uploads/5/4/2/542f24a6c63b91501ad24fa7ec7e704b.png)
Unfortunately, the File Explorer search doesn’t have all the functionality of a full Cortana search. If you use terms that are too general, you won’t be able to find what you need.
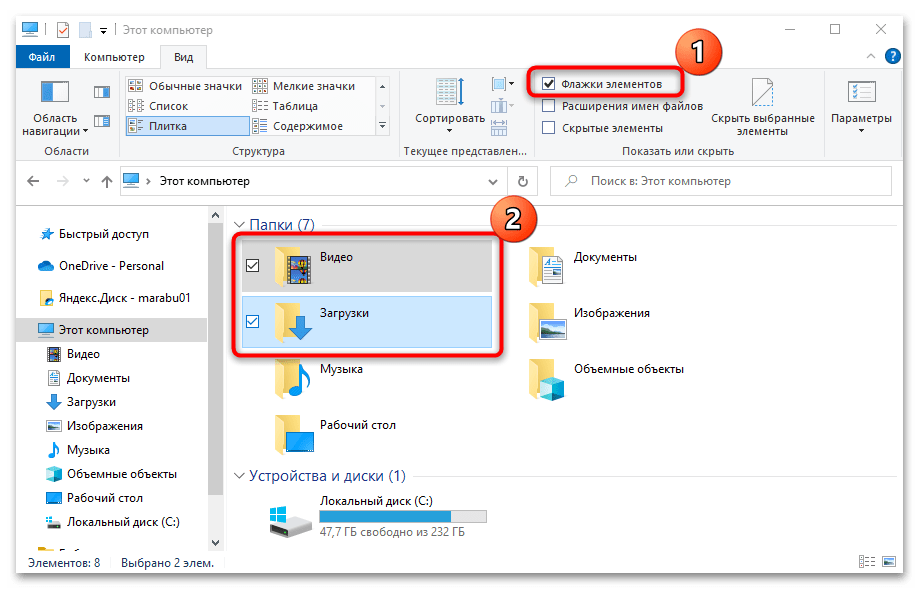
How to customize Explorer in Windows 10
The default Explorer view offers access to all user folders and drives. On the top, you have a few fixed tabs like File, View, and more show up based on what you select and your current location. For example, when you choose an image, you get a Picture Tools menu, while you get Application tools when you select an executable. The fact is the list is dynamic and keeps changing all the time based on the situation.
Since we are dealing with customizing Explorer in Windows 10, most of them are available in the Options section of the View tab, and some are related to the context menu.
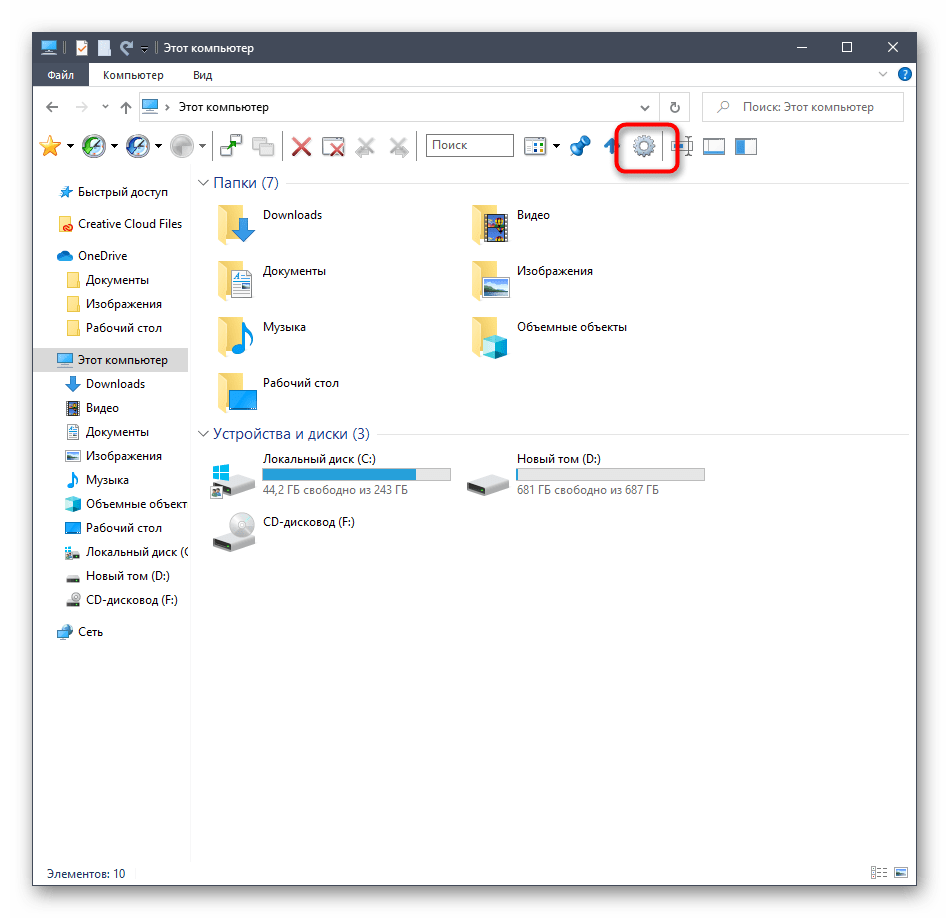
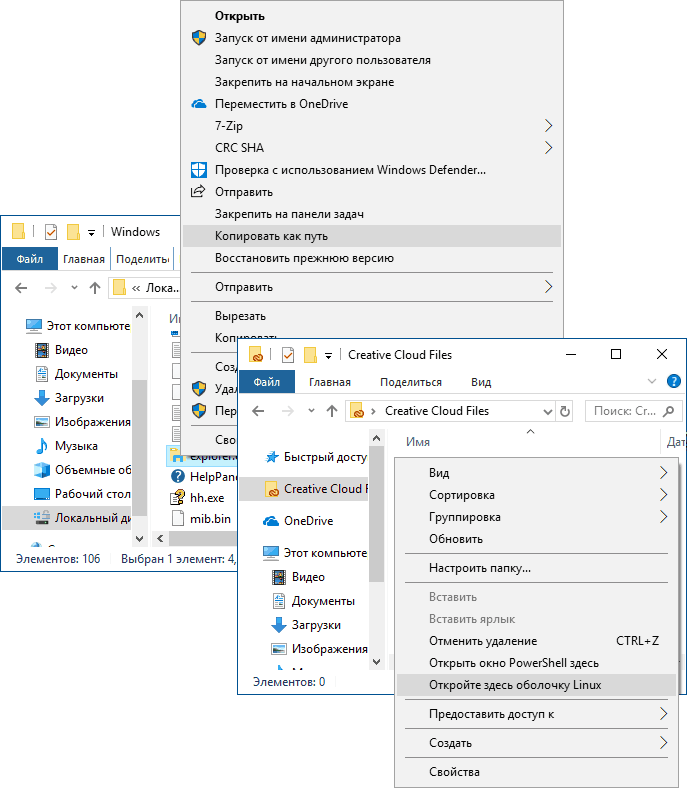
To customize File Explorer in Windows 10, simply right-click the down arrow at the end of the Quick Access Toolbar. From there, you can check the items you want to add and uncheck any you wish to remove. This allows you to personalize your toolbar by adding or removing icons with ease.
Customize “View” in Explorer
How you want to look at your files depends entirely on the kind of work you engage in regularly. In the view tab of the ribbon menu, you can switch from extra large (suitable for images) to Large icons to Details, which adds date, type, and size to the files, folders, and tags if you use it.
Next, you can choose to Sort & Group files and folders by size, date, name, etc. If you feel something is missing, you can select “Add Columns” in detailed view.
Apart from file views, you can add two side panes to extend them. It is useful for individual files if you do not wish to use details mode.
- Preview Pane: Useful for Images and media files.
- Details Pane: Useful when you deal with a lot of files where you need to check details like size, creation date, and so on.
Then you have a Navigation Pane, which adds tree like explorer structure on the left. It helps you to navigate between the folders quickly.
Lastly, you have a few more options. Enable
- checkboxes for easy selection of multiple items
- viewing of file extensions
- View hidden files and folders. More here on how to hide/unhide folders in Windows
Customize “Folder Options” in Explorer
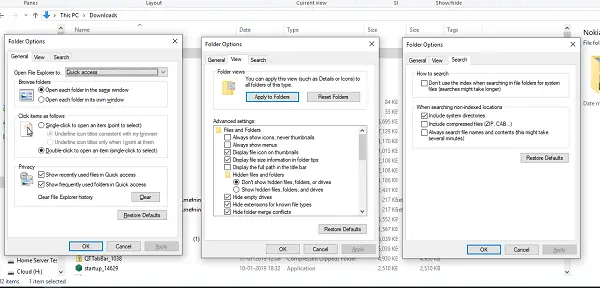
In the view menu, you have the Options. When you click on it, it opens a pop-up window which offers a plethora of choices you can make. They are majorly for folders and search. Here you have three significant configurations–General, View, and Search. We are going to look at the first two.
TIP: Make sure to check out Windows Explorer Tips and Tricks.
General Folder Options
Change Default Folder
Choose quick access when you want to go to your frequently used folders, and files without wasting much time. If you also want quick access to drives, enable the navigation pane, and you have the best of both.
Do you use a Touch Screen?
You can choose to open the folders with a single click, but it could be annoying when using a mouse. If you have a touch screen, a single tap can open the folder. Double-click with touch is slightly irritating.
Others
- Display or clear recently used files, and frequently used folders.
- Open every folder in their view.
Customize View Options
Here, you get micro control on what you get to see for the files and folders. Right from icons to menus, to full path, the option to hide empty drives, and so on. Here are few that you should look at-
Automatically type in the search box:
When we open any folder, we usually search an item. If you have an extensive collection of files and folders, enable this option. So when you need to find something, it will type it in the search box and filter the results.
When you click on the search box or type with this option enabled, you get a couple of filter options. It helps you to narrow down search results to find the exact file or folder you were trying to find. You can limit file size, type, date modified, and so on.
Restore Previous Folders on Login:
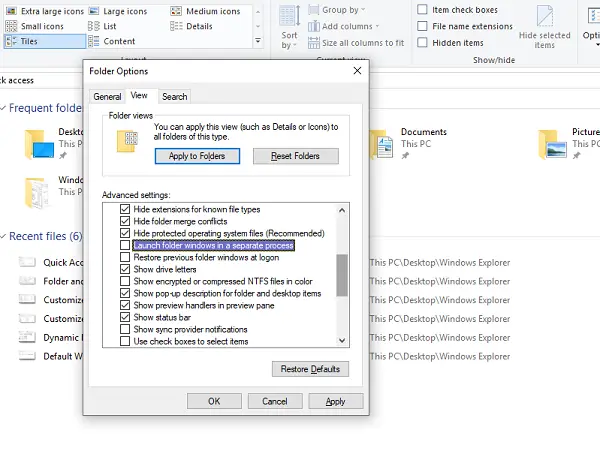
It helps you to resume work even faster as it will open the folders you work often. All you need to do is shut down those the computer without closing them.
Using these options in View, you can create a minimal or an illustrated view of the folders. Useful or not depends on your work.
Lastly, you don’t have to apply the same view to all folders. When you open the view configuration in a folder, you only customize the look for that folder. So the best way to go ahead is to customize the folders you work with and leave others. However, you can choose to apply the current view to all folders with “Apply to folders” button.
If something doesn’t fit, you can always reset the Folder view.
That is pretty much what you should know about how you can customize Explorer in Windows 10. Though I would repeat that everything depends on your work, most of the consumers don’t really change anything unless it’s a need, but for those who need to handle a lot of files and folders, these are really helpful.
Как вернуть старый Проводник в Windows 10
Не нравится стандартный файловый менеджер в «десятке»? Можно сделать его таким, каким он был в более ранних версиях Windows. Ничего сложного — пара минут, и готово.


В Windows 10 многие элементы интерфейса были переработаны. В первую очередь в глаза бросается измененный внешний вид проводника. Если ваше знакомство с продукцией Microsoft началось с «десятки», то дизайн файлового менеджера не вызовет особых проблем, ведь навигация в этой операционной системе вполне логичная и удобная. Но владельцам старых ОС подобная организация может быть непривычна. Это не беда, ведь всё можно исправить в пару кликов.
О программе
WindowBlinds – это платное комплексное решение всех тех задач, которые нам приходится выполнять при ручной установке бесплатных сторонних тем для Windows.
А задач этих немало:
• Установить программу-патчер, чтобы иметь возможность применять сторонние темы;• Скачать сами темы и закинуть их в нужную системную директорию;• Установить и настроить твикер для проводника;• Установить эффект Aero Glass и т.п.
При этом всём ещё и приходится рисковать: внедрение патчеров может иметь следствием сбои в работе системы, а иногда даже вылет в BSOD с дальнейшей невозможностью запуска. WindowBlinds же сама и патчер, и каталог тем, и твикер. Все отдельные задачи по смене системного дизайна решаются централизовано в интерфейсе одной программы.
С её помощью внешний вид Windows 7, 8.1 и 10 можно преобразить кардинально.

Темы WindowBlinds меняют стиль окон, панели задач, контекстного системного меню и внутреннего меню отдельных приложений, а в Win7 – ещё и меню «Пуск».
В некоторых случаях может меняться не только верхушка проводника, но и его фон.
Имеющиеся в каталоге WindowBlinds темы настраиваются: к ним можно применить прозрачность, выбрать акцентные цвета из разнообразнейшей цветовой палитры, использовать вместо однотонных расцветок примечательные текстуры.
Любителям эффекта Aero Glass программа может предложить базовую тему с этим стилем.

Ещё эффектнее тема с Aero Glass смотрится в сочетании с текстурами. В верхушках окон текстуры будут отображаться еле заметно, но их концентрация усилится на панели задач и в меню «Пуск».
WindowBlinds, как упоминалось, применяет темы к родному меню «Пуск» только в Win7. Для родного «Пуска» Win10 и стартового экрана Win8.1 стиль тем не работает. А чтобы он заработал, меню «Пуск» необходимо реализовать с помощью программы от той же компании Stardock — Start8 для Win8.1 и Start10 для Win10. Это платные продукты, стоят $5. В паре с продуктами, реализующими меню «Пуск», от других разработчиков WindowBlinds либо не будет работать вовсе, либо будет работать частично – например, применять акцентный цвет темы, но игнорировать текстуру, если таковая задана.
4. Musical Start Menu
If you search Windows for change system sounds and select the relevant result, you can change what sound is played for various actions, like a low battery, message notification, or error. All well and good, but what if you want to add some sound to your Start Menu?
Open Start Menu Settings and go to the Sounds tab. Here you can set a different sound for when you open Start, when you close it, when an item is executed, when something is dropped, or when you hover your mouse over the icon.
Select what you want to set a sound for and click … to browse to the audio file on your computer. It has to be in WAV format, so check out a site like WavSource for some to download.
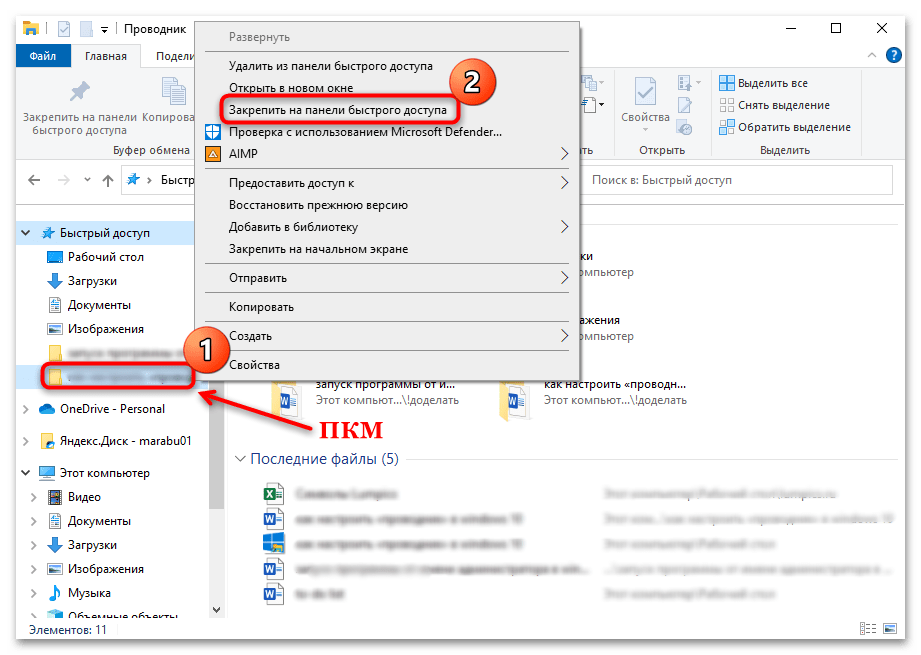
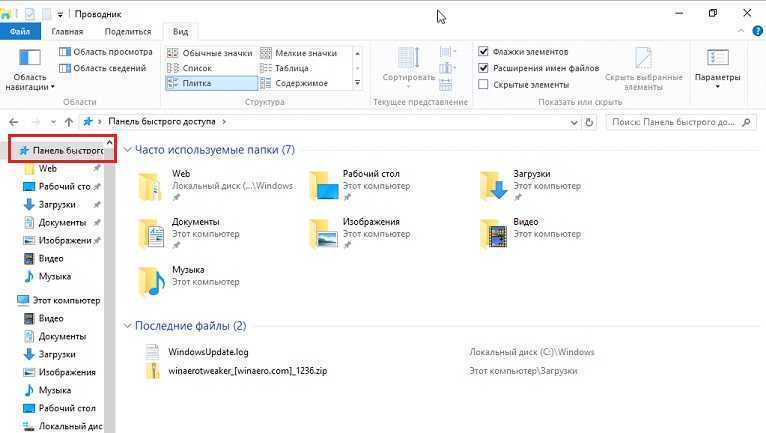
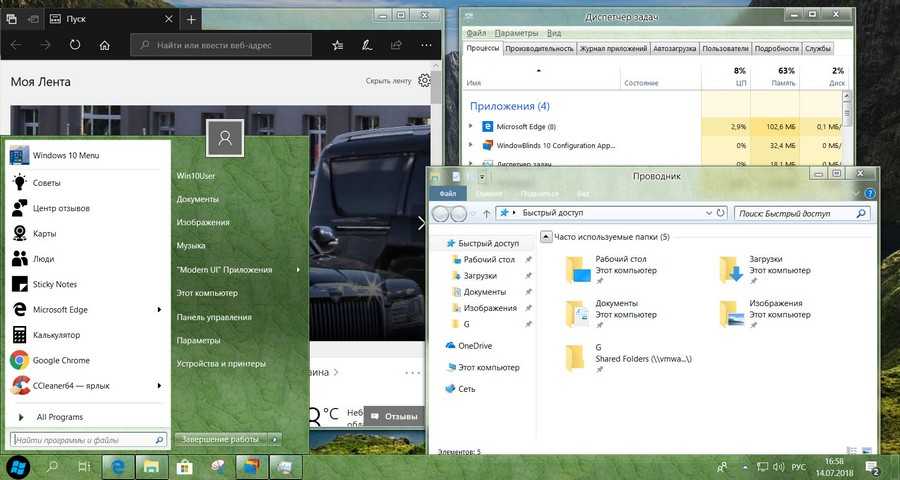
Quick Access
The Quick Access area, which by default is the first section of the Navigation Pane in the left-hand column, is essentially a Bookmarks bar for File Explorer. It shows both your most recently accessed folders and pinned folders (folders that you manually assign to this area) to get to and from any folder in Windows with ease. You can do this with any folder in Windows — just right-click or long-press any folder on any screen, then click Pin to Quick Access.
Michael Crider/Digital Trends
Now you’ll be able to open this folder from any other folder instantly. Dragging and dropping files and folders will move them (or copy them, if they’re on a separate drive). To remove a folder from the Quick Access view, simply click the Pin icon to the right of the folder label. To remove frequently accessed folders, right-click the folder, then select Remove From Quick Access.
OneDrive, Microsoft’s cloud storage service, gets a dedicated folder beneath the Quick Access area. Other folders on your computer are available in a tree view below OneDrive.