

XPS Viewer alternatives
There are other methods available on the internet that can be used instead of XPS Viewer. Some are applications that can be installed, whilst others provide an online web view.
GroupDocs
GroupDocs is a quick and free online tool to help you view your XPS and OXPS files. All that is required is for you to drag and drop your file, and it will convert and display it for you.
To use GroupDocs, open their webpage in any browser and simply drop your file over the given area.GroupDocs
SumatraPDF
SumatraPDF is a downloadable application that can be used to view almost any document. This includes .xps, .oxps, and .pdf.
SumatraPDF
Google Drive
Google Drive is an excellent tool as it also supports XPS formatting. All you need to do is upload the file to Google Drive and you can then view it easily.
Open Google Drive, click New, and then click File Upload from the drop-down menu.Google Drive upload
Now browse to upload the XPS file. Once uploaded, click on it to view it within the browser directly from Google Drive.
XPS document opened from Google Drive
Install XPS Viewer to open XPS file in Windows 11
Though XPS viewer is one of the built-in features in Windows, it is not enabled by default. Users will have to manually install the XPS viewer by adding it via the optional features in Windows 11 settings.
To install XPS viewer in Windows 11, follow the steps below.
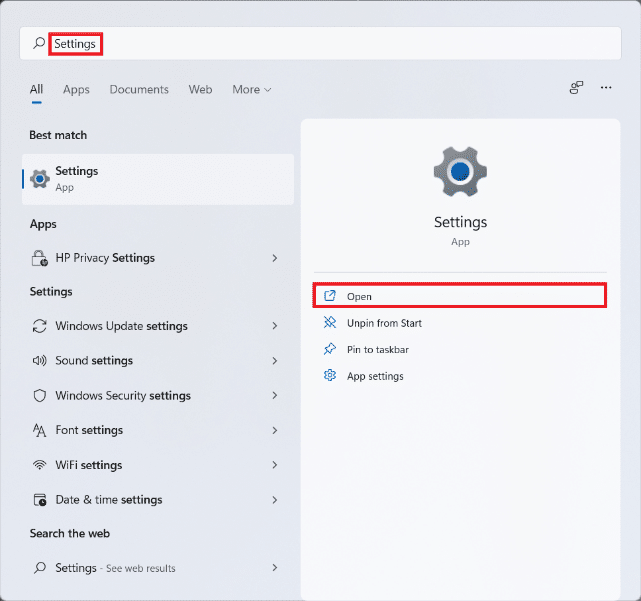
First, press Win + i keys to open Settings. Select Apps on the left pane, then select Apps & features on the right.
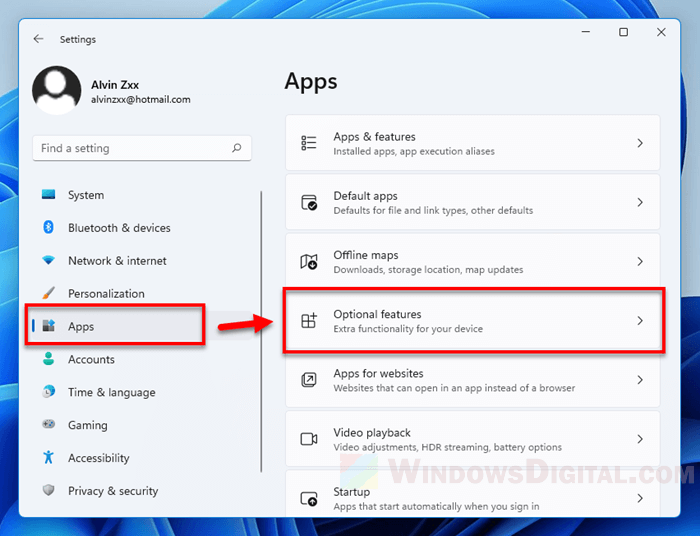
Next, click on the View features button next to “Add an optional feature”.

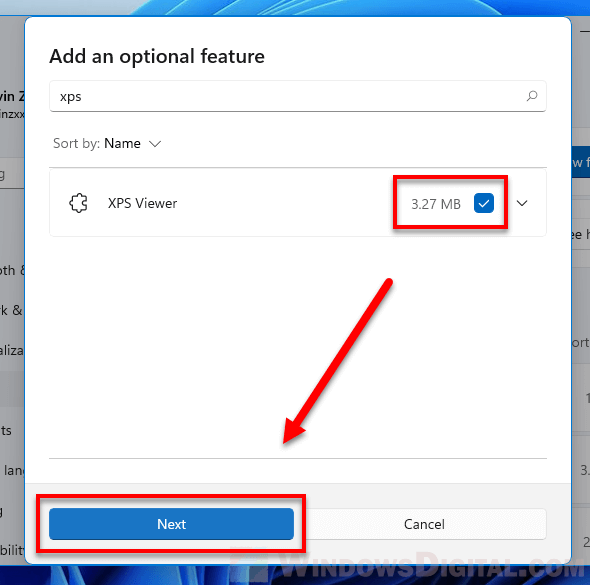
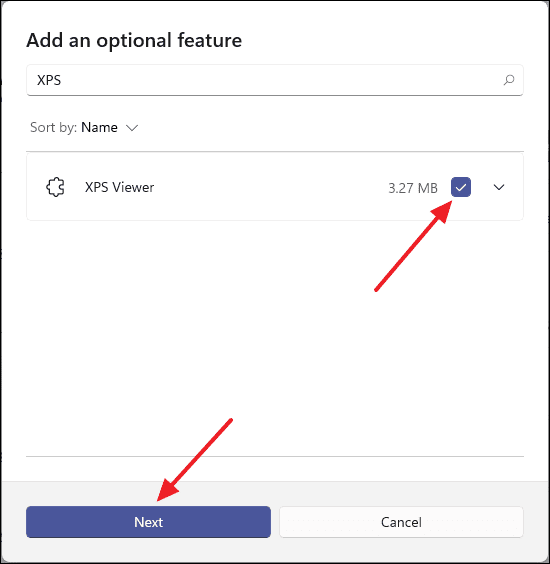
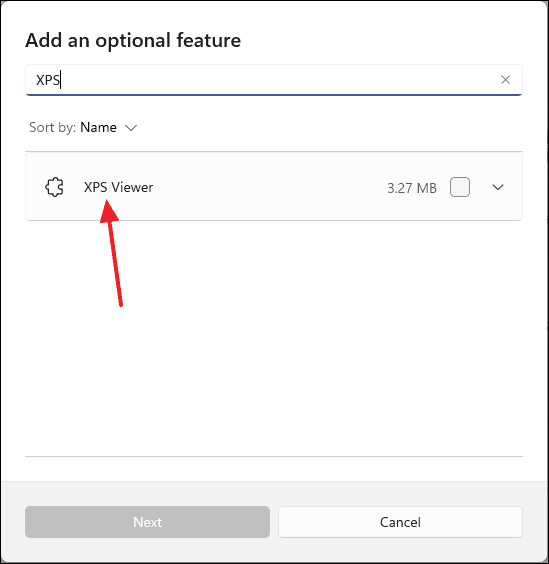
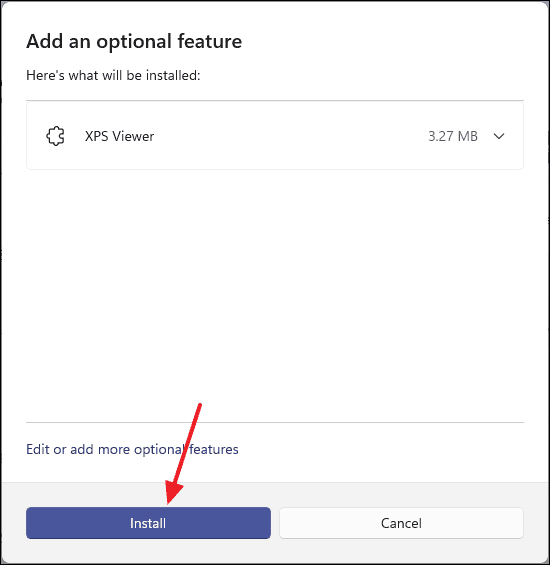
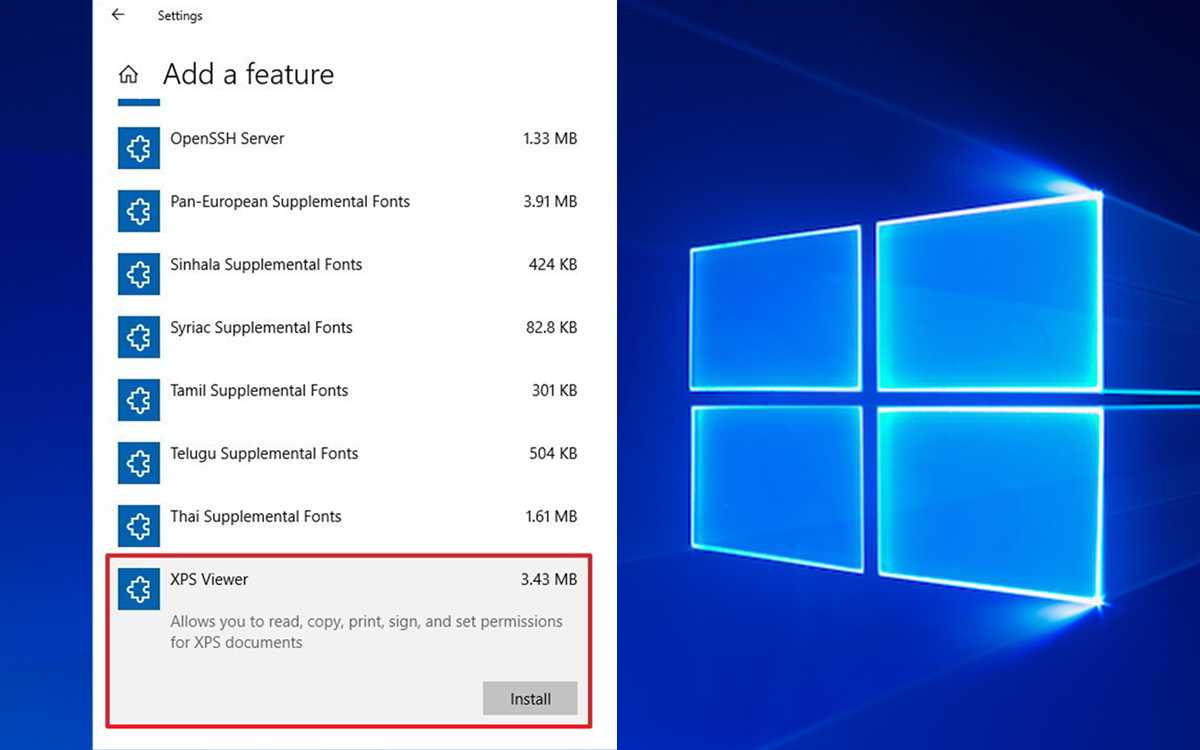
In the add an optional feature window, use the search bar to search for XPS Viewer. Select XPS Viewer from the search result and click Next to install it.
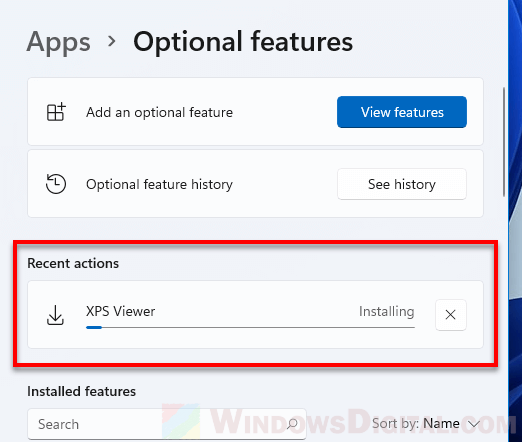
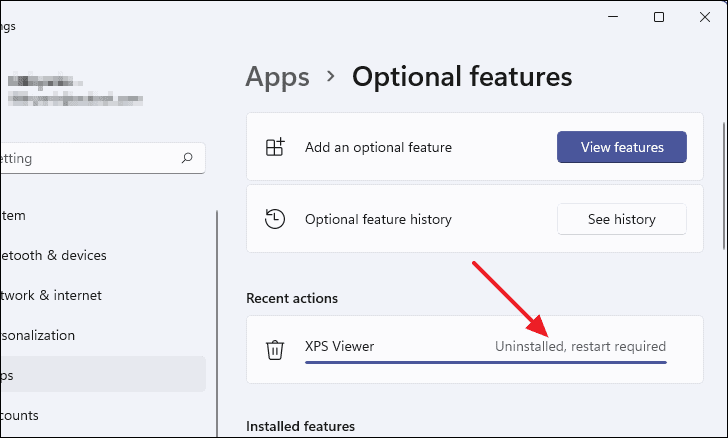
Wait for the installation to complete. It may take awhile depending on your PC. You can see the installation progress in the same Settings > Apps > Optional features window.
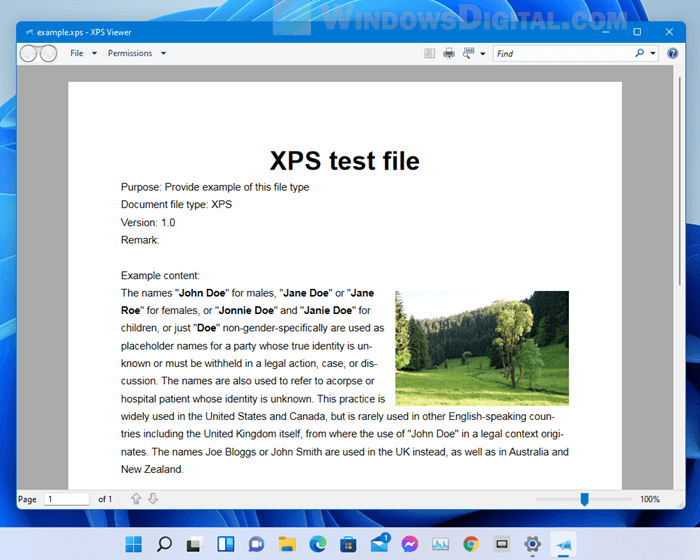
Once installed, restart your PC and you should then be able to open your XPS files.
How to Install XPS Viewer on Windows 10 for Free
The XPS Viewer files come with Windows 10 computers, but you still need to access and download the software.
- Type Add or Remove Programs in the Windows search bar.
- Click on the Optional Features link.
- Press the Plus icon to add new features.
- Scroll to the bottom of the list, check the box next to XPS Viewer and then press the Install button.
- XPS Viewer is now installed on your computer.
How to Uninstall XPS Viewer
If the XPS viewer isn’t the right software for you, or you still can’t open the files you need, .
Follow these steps to uninstall XPS viewer from your computer.
- Type Add or Remove Programs in your Windows search bar.
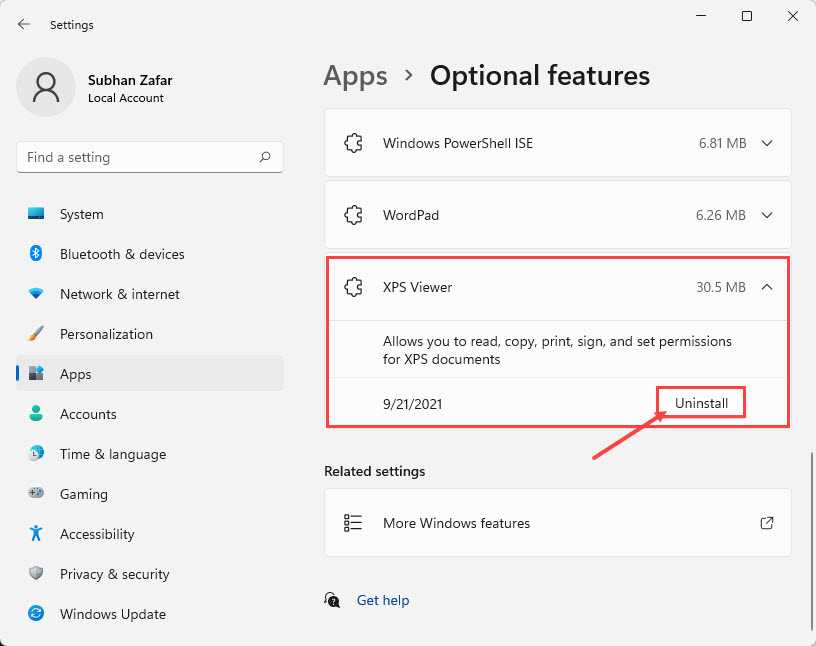
- Find XPS Viewer in the list of installed programs and click Uninstall.
- Confirm that you want to delete the program, and Windows will remove it from your computer.
Install XPS Viewer in Windows 11 via PowerShell or CMD
Alternatively, you can install XPS viewer by entering a command in Windows PowerShell or Command Prompt on Windows 11. Here’s how to do so.
In Windows 11, go to Start and search for Windows PowerShell. Right-click PowerShell in the search result and select Run as administrator. You need administrative privilege to run the command below.
In the elevated PowerShell, to install XPS Viewer, enter the command below.
DISM /Online /Add-Capability /CapabilityName:XPS.Viewer
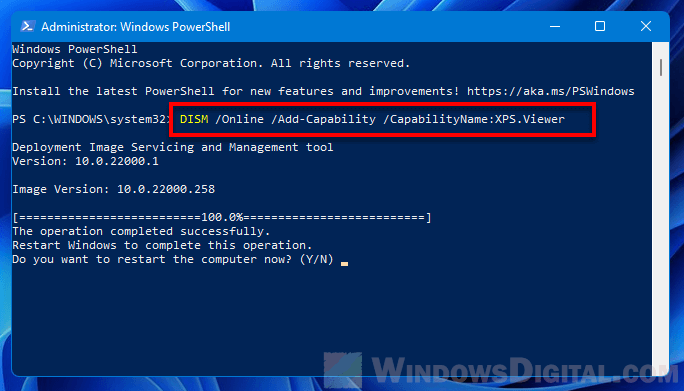
It may take a while for the installation to complete. PowerShell will show the progress as it installs the app. Once installed, enter “Y” to restart your computer.
The same command can also be used in an elevated (run as admin) Command Prompt or Windows Terminal in Windows 11.
To uninstall/remove XPS viewer from Windows 11, enter the following command instead.
DISM /Online /Remove-Capability /CapabilityName:XPS.Viewer
Method 1: Using Optional Features
To install XPS Viewer in Windows 11, you can utilize the Optional Features functionality. Here are the steps to follow:
1. Press the Windows key and search for «Settings.» Open the Settings app. 2. In the Settings app, click on «System.» 3. Select «Apps & features» from the left sidebar. 4. Scroll down and click on «Optional features.» 5. Click on «Add a feature.» 6. Search for «XPS Viewer» in the list of optional features. 7. Check the box next to «XPS Viewer» and click on the «Install» button.
Pros: 1. Easy and straightforward process to install XPS Viewer. 2. Allows you to access and view XPS files without the need for third-party software. 3. Integrates seamlessly with the Windows 11 operating system.
Cons: 1. May require an internet connection for downloading and installing the optional feature. 2. Limited functionality compared to advanced XPS editing software. 3. Does not provide tools for creating or editing XPS files.
How to convert XPS to PDF in Windows 11
The easiest way to convert an XPS file to PDF format in Windows 11 is to directly use the Windows built-in XPS Viewer to print the XPS file to PDF. But, this method requires you to first install the XPS viewer on your computer (using one of the methods shown above).
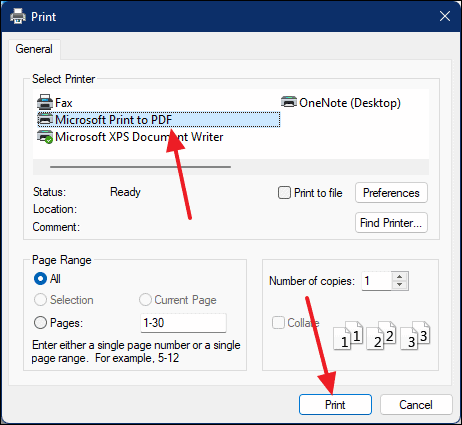
To do so, open the XPS file you want to convert to PDF with XPS Viewer. Next, click on File > Print.
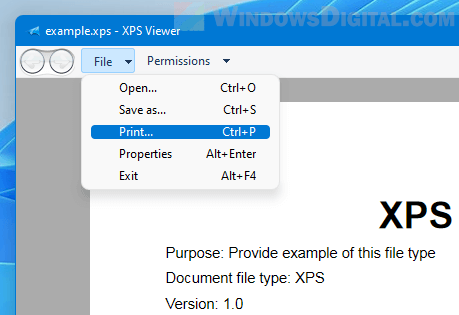
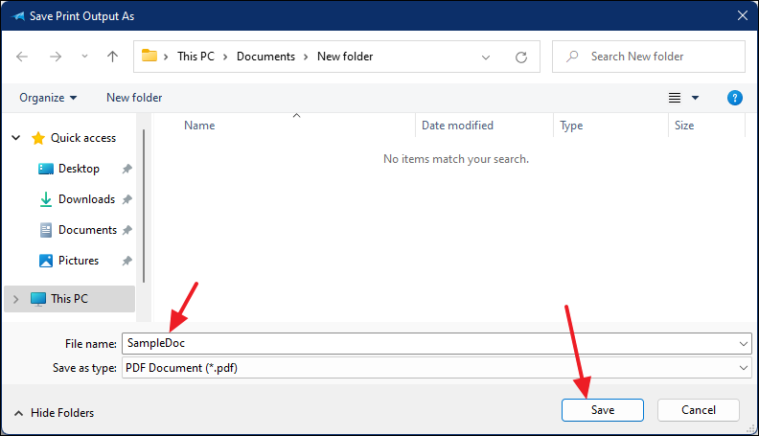
In the Print window, select Microsoft Print to PDF as the printer. Click Print and select a location where you want to save your PDF file.

You should then have a new PDF copy of the XPS file at the location you select.
Tip: You can create or convert any document to XPS or PDF file format in Windows 11 by printing them using “Microsoft XPS Document Writer” or “Microsoft Print to PDF” respectively. For example, when you open a webpage on Google Chrome, you can select File > Print and select “Save to PDF” or “Microsoft XPS Document Writer” as the printer to save the webpage as PDF or XPS file.
Method 3: PowerShell Installation
PowerShell is a more powerful command-line interface that can be used to install XPS Viewer in Windows 11. Here’s how:
1. Press the Windows key and search for «PowerShell.» Open the PowerShell app. 2. In the PowerShell window, type the following command: Add-WindowsCapability -Online -Name «XPS.Viewer~~~~0.0.1.0» 3. Press Enter to execute the command. 4. Allow the installation process to complete. 5. Close the PowerShell app after the installation finishes.
Pros: 1. Offers advanced scripting capabilities for installation. 2. Can be used for bulk installations or customized deployment scenarios. 3. Provides extensive control and flexibility over the installation process.
Cons: 1. PowerShell may be unfamiliar to novice users. 2. Requires precise command entry and accurate syntax. 3. May not be as visually intuitive as the graphical user interface.
Method 4: DISM Installation
DISM (Deployment Image Servicing and Management) is a command-line tool that can also be used to install XPS Viewer in Windows 11. Here are the steps:
1. Press the Windows key and search for «Command Prompt.» Open the Command Prompt app. 2. In the Command Prompt window, type the following command: dism /online /add-capability /capabilityname:Xps.Viewer~~~~0.0.1.0 3. Press Enter to execute the command. 4. Wait for the installation process to complete. 5. Close the Command Prompt app.
Pros: 1. Offers an alternative command-line method for installing XPS Viewer. 2. Enables more granular control over the installation process. 3. Can be used for advanced customization or scripting scenarios.
Cons: 1. Requires familiarity with command-line tools and syntax. 2. Command prompts may be daunting for users without technical experience. 3. Limited visual feedback compared to graphical user interfaces.
Работа с Microsoft XPS Viewer
Начнём с того, как создать документ этого формата. В этом нам помогут любые программы, из которых можно вывести файл на печать: блокнот, Microsoft Word или любая другая. Для примера я возьму ворд. Для любой программы механизм перевода будет примерно одинаковым.
Итак, мы взяли нужный нам файл, открыли. Жмём на «Файл» или, как в моём случае со старой версией ворда, на круг с рисунком;
Выбираем «Печать». «Быстрая печать» нам не подойдёт, потому что нам нужен диспетчер печати, где можно будет выбрать принтер


Это важно;
Выбираем в строке «Принтер» MicrosoftXPSDocumentWriter. Название у вас может отличаться от моего, но обязательно должны быть слова XPS и писать (на английском или на русском);
Жмём «ОК» и выбираем имя файла и путь, по которому его можно будет найти.
Помните, что после перевода документа в этот формат вы уже не можете его редактировать. Поэтому делать это стоит в самую последнюю очередь.
Хоть это и не очень удобно, файлы подобного расширения, распечатанные с помощью принтеров, поддерживающих этот формат, получаются намного чётче и ярче, чем ворд.
В чем заключается печать XPS
XPS (XML Paper Specification) — это формат файлов для хранения и обмена электронными документами, используемый в операционных системах Windows. XPS предоставляет возможность точного отображения и печати документов, сохраняя их оригинальную структуру и форматирование.
XPS-файлы могут содержать текст, изображения, графику, таблицы и другие элементы документа. Их главное преимущество заключается в том, что они являются универсальным форматом, который может быть открыт и распечатан на любом компьютере или принтере с поддержкой XPS.
Печать XPS может быть полезна в различных ситуациях, например, для сохранения документа в неизменном виде перед отправкой по электронной почте или для создания высококачественных печатных копий документов с точным воспроизведением их оригинального макета.
Для печати XPS-файла необходимо иметь поддерживающий его принтер или установить специальное программное обеспечение, которое позволяет открывать и печатать документы в формате XPS. После выбора принтера и настройки параметров печати можно получить качественную печатную копию документа, полностью соответствующую его исходному содержанию и внешнему виду.
Основными преимуществами печати XPS являются точность воспроизведения документа, высокое качество печати и возможность открытия и печати файлов на различных устройствах. Благодаря своей универсальности и надежности, печать XPS остается востребованной и удобной опцией для работы с электронными документами в современной компьютерной среде.
Установка драйверов для печати XPS
Для успешной работы с форматом XPS и печати файлов в этом формате необходимо установить соответствующие драйверы. В данной статье мы расскажем о том, как правильно установить драйверы для печати XPS, чтобы избежать проблем и обеспечить высокое качество печати.
Первым шагом при установке драйверов является определение вашей операционной системы. В зависимости от ОС, можно найти соответствующие драйверы на официальном сайте производителя принтера или на сайте Microsoft. Рекомендуется загружать драйвера непосредственно с официальных источников, чтобы гарантировать их совместимость и безопасность.
После загрузки драйвера необходимо запустить его установку. Для этого откройте загруженный файл и следуйте инструкциям на экране. Во время установки может потребоваться подключение принтера либо его внешних устройств. Убедитесь, что принтер подключен к компьютеру и включен перед запуском установки.
После завершения установки драйвера перезагрузите компьютер, чтобы изменения вступили в силу. После перезагрузки вы сможете приступить к печати файлов в формате XPS. Если у вас возникли проблемы при установке драйверов или в последующей работе с печатью, рекомендуется обратиться за помощью на форумы поддержки производителя принтера или к специалистам службы поддержки Microsoft.
How to use XPS Viewer
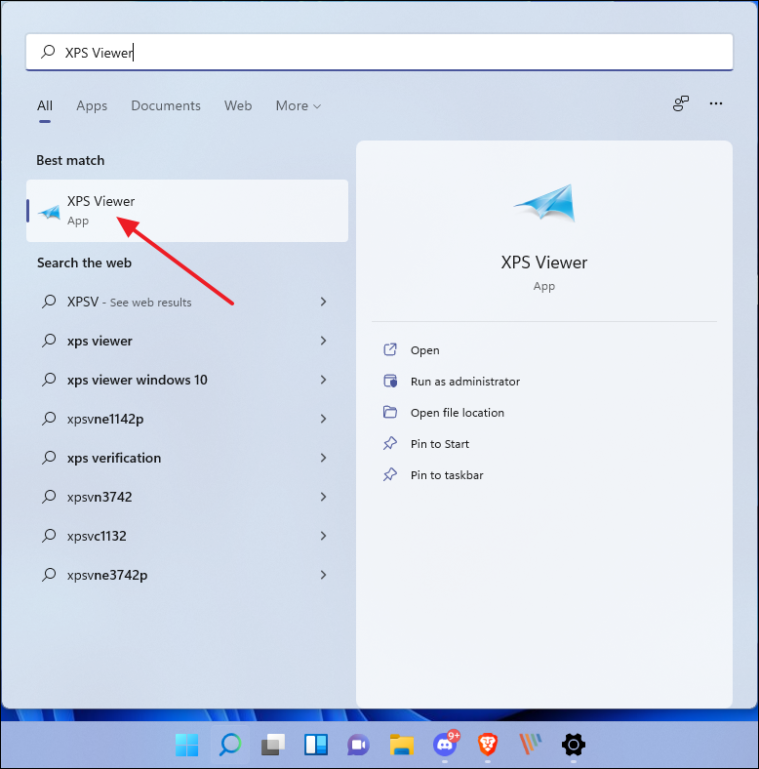
You can launch the application by searching for it in Windows Search, or the Start menu.Start Menu search for XPS Viewer
Alternatively, you can also type in xpsrchvw in Run or Command Prompt to launch XPS Viewer.
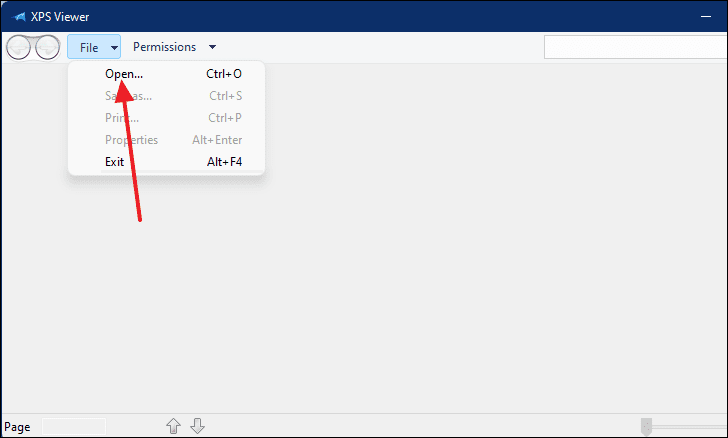
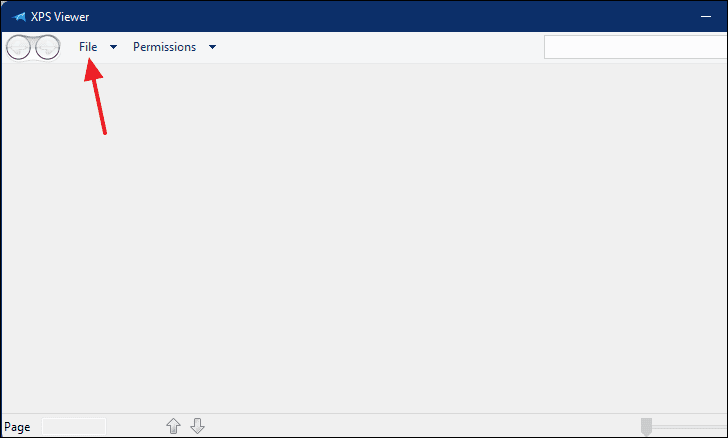
To open an XPS document, click on File from the top menu in the XPS Viewer, and click Open. You can then browse the saved XPS file and select it to open it in XPS Viewer.
Open an XPS file in XPS Viewer
Once a document is open, you can then save its copies, or change its permissions by clicking on the Permissions menu from the top, and then clicking Set permissions.Modify file permissions in XPS Viewer
You can also convert an XPS file to PDF format. To do so, simply click on the Print button at the top of the app, and then select Print to PDF. Click OK to save the document as a PDF file.XPS to PDF
Since XPS Viewer is a tiny application, it cannot do much of anything else, except for what we have already discussed.
Чем открыть формат XPS в Windows 11

Довольно часто при работе с ПК пользователи встречаются с файлами в формате XPS. Файл формата XPS — это графический формат на базе XML, который описывает структуру документа, расположение и внешний вид. Имеет расширения «.xps» и «.oxps». В своё время, а именно в 2006 году был создан как конкурент популярному формату PDF и использовался для векторной графики. Кроме того, предполагалось что он заменит бумагу, в целях сохранения экологии, однако этого не случилось. Если сравнивать два формата, то XPS гораздо легче и проще нежели Portable Document Format, хотя менее распространён. К тому же он не имеет поддержки скриптов и может снабжаться цифровой копией.
↑ Чем открыть формат XPS в Windows 11
Часто получается так, что ваша система не может обнаружить приложения для открытия такого типа файла. Начиная с Windows Vista просмотр таких файлов осуществлялся посредством стандартной программы XPS Viewer, включённой априори в системе. XPS Viewer — официальная утилита от компании Microsoft, которая позволяет как посмотреть, так и отредактировать файлы формата XPS. Начиная со сборки 1803 Windows 10 её перестали устанавливать, так как она не особо пользовалась спросом. По умолчанию в Windows 11 её нет, однако её можно включить как дополнительный компонент.
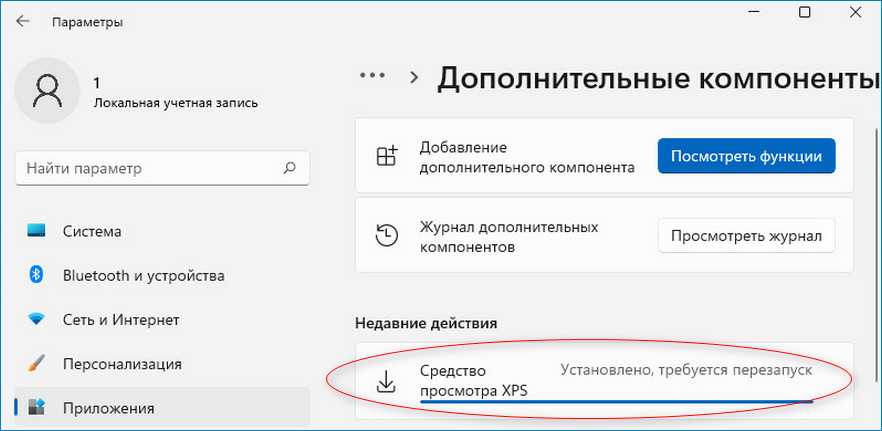
↑ Встроенное в Windows 11 средство просмотра XPS
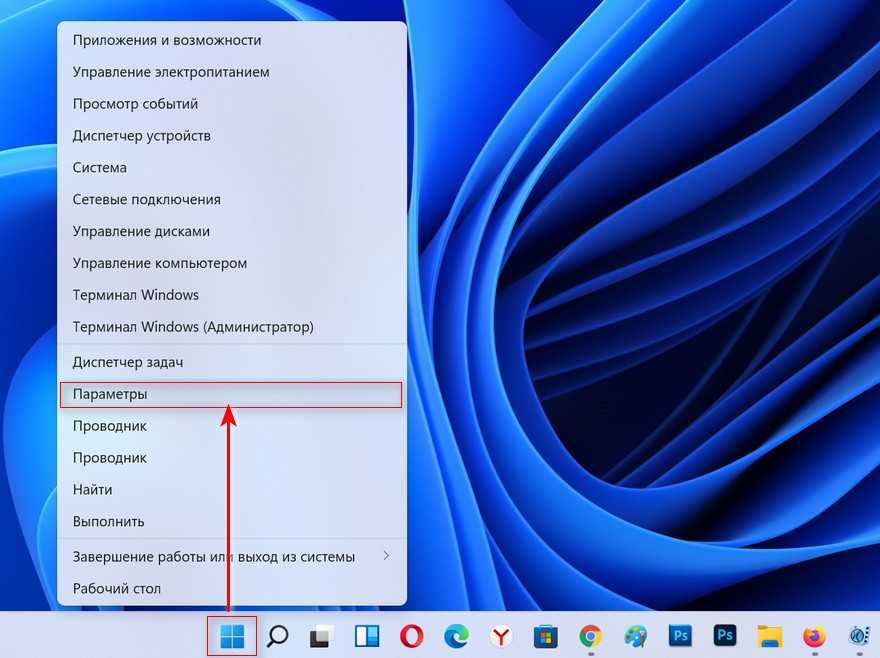
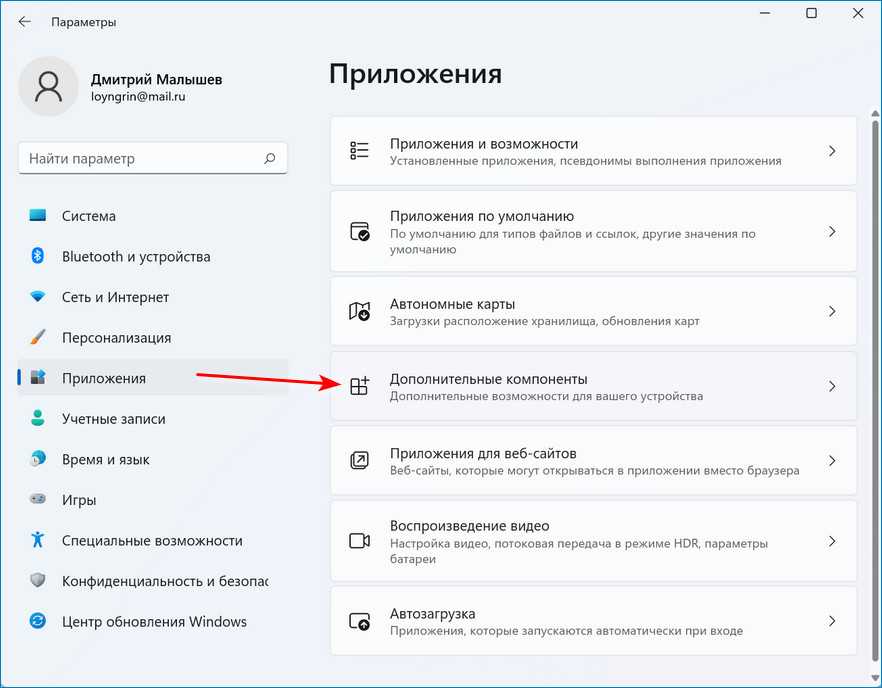
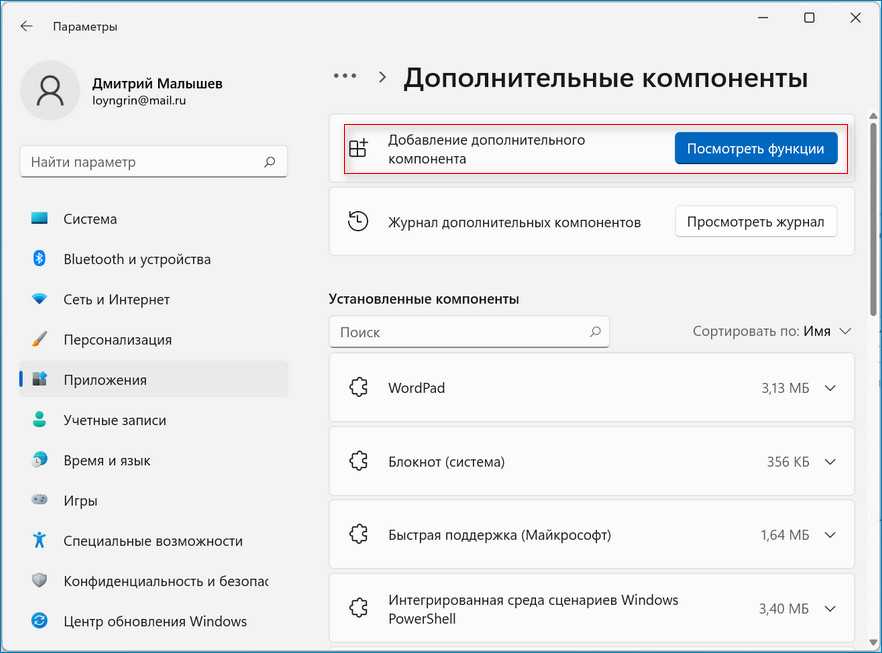
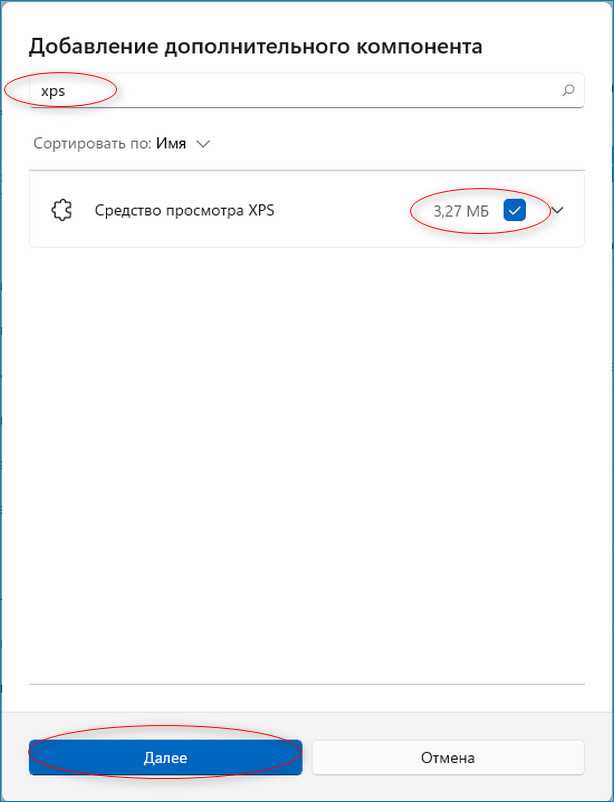
Первым делом нажимаем кнопку Пуск и переходим в раздел «Параметры». Можно также воспользоваться сочетанием клавиш «Win+I». Далее в левой части окна кликаем на «Приложения» и переходим к строке «Дополнительные компоненты». Находим пункт «Добавление дополнительного компонента» и справа выбираем «Посмотреть функции». Появится строка поиска. В ней пишем «XPS» и рядом с найденным результатом ставим флажок. После кликаем на «Далее» и «Установить». Ждём пока элемент установится. Конечно, для установки компонента нужно подключение к сети интернет. Перезагрузка ПК.
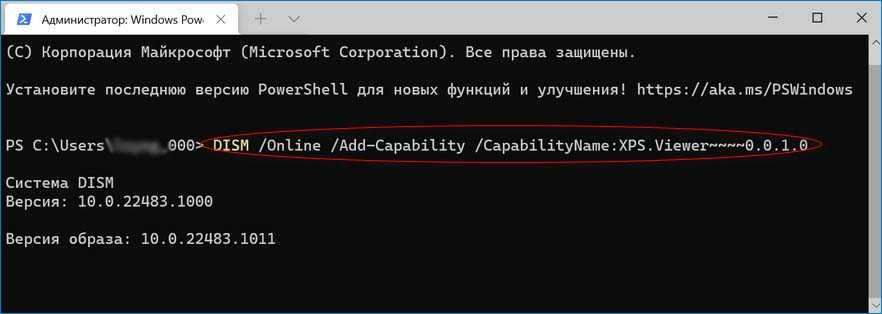
↑ Установка с помощью командной строки
Можно установить приложение с помощью cmd. Заходим в пуск и открываем командную строку от имени администратора. Вводим команду: DISM /Online /Add-Capability /CapabilityName:XPS.Viewer~~~~0.0.1.0 Нажимаем Enter и ждём пока утилита установится. Далее перезагружаем ПК.
↑ Как найти и пользоваться?
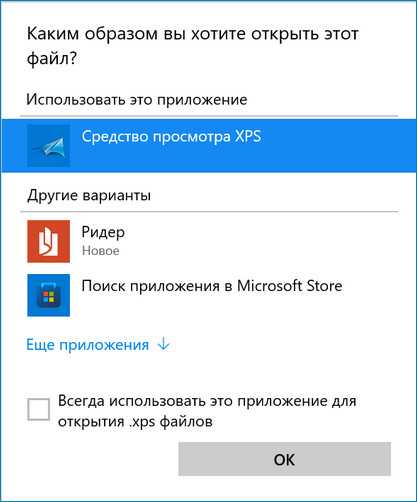
Заходим в поиск на панели задач и вводим «XPS Viewer». Производим запуск. В окне программы кликаем на «Файл» и «Открыть». Появится окно, в котором находим файл нужный нам для открытия. Напоминаем, расширение у таких файлов «.xps» или «.oxps». Далее требуется нажать кнопку «Открыть». Также в программу можно зайти с помощью команды «xpsrchvw.exe», которую нужно ввести в окно «Выполнить». Или можно просто два раза кликнуть ЛКМ на файл, который нужно открыть.
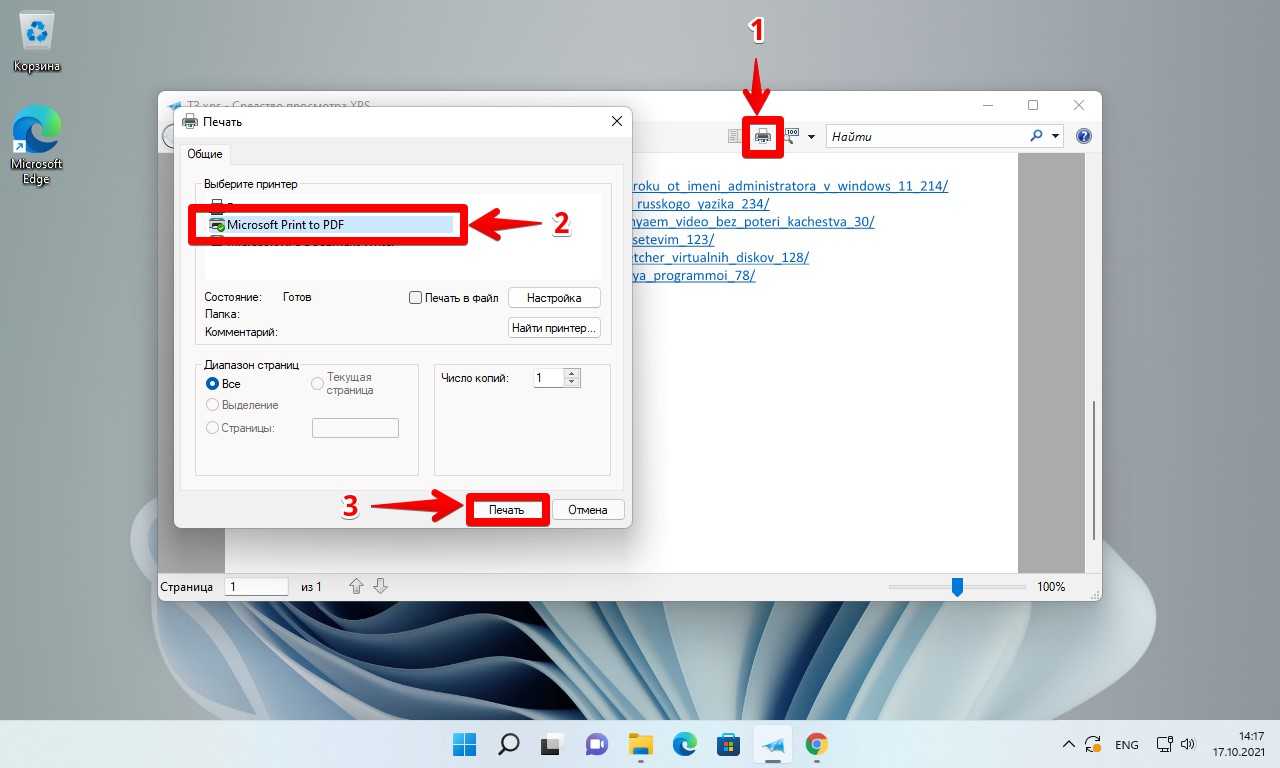
↑ Сохранение документов XPS в формат PDF посредством программы
Нажимаем на кнопку «Печать». Выглядит она как принтер. Во всплывшем окне нажимаем «Microsoft Print to PDF» и кликаем на «Печать». После выбираем куда и под каким именем сохранить файл.
↑ Удаление программы XPS Viewer
Для удаления приложения снова нажимаем «Win+I». Опять находим «Дополнительные компоненты». Ищем «Средства просмотра XPS» и кликаем по нему. Появится кнопка «Удалить», её и нажимаем. Удалить также можно с помощью cmd. Запускаем командную строку от имени администратора и вводим следующее:. DISM /Online /Remove-Capability /CapabilityName:XPS.Viewer~~~~0.0.1.0 Нажимаем Enter, ждём окончания установки и перезагружаемся.
↑ Сторонние приложения
Помимо стандартных приложений файлы формата XPS могут открывать и некоторые программы для создания и редактирования файлов PDF. Некоторые из них можно найти в Microsoft Store, такие как Perfect PDF Reader или PDF X. Также формат легко читают GroupDocs, SumatraPDF, Google Диск. Также можно файл конвертировать в PDF и открыть подходящим редактором, благо онлайн конвертеров хватает. Если поменять расширение «.xps» на «.zip», то есть вероятность, что получится открыть с помощью архиваторов WinZip, WinRAR или 7zip. 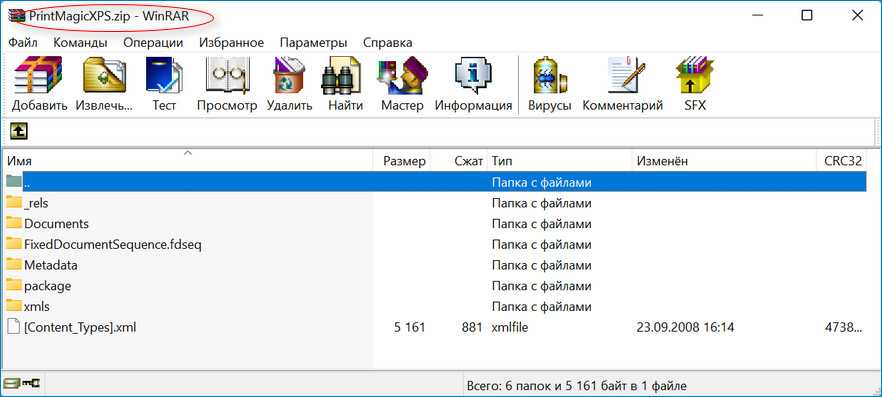 Не многие сейчас используют такой формат файлов, но если у вас есть такой в наличии, то теперь вы знаете как с ним поступить.
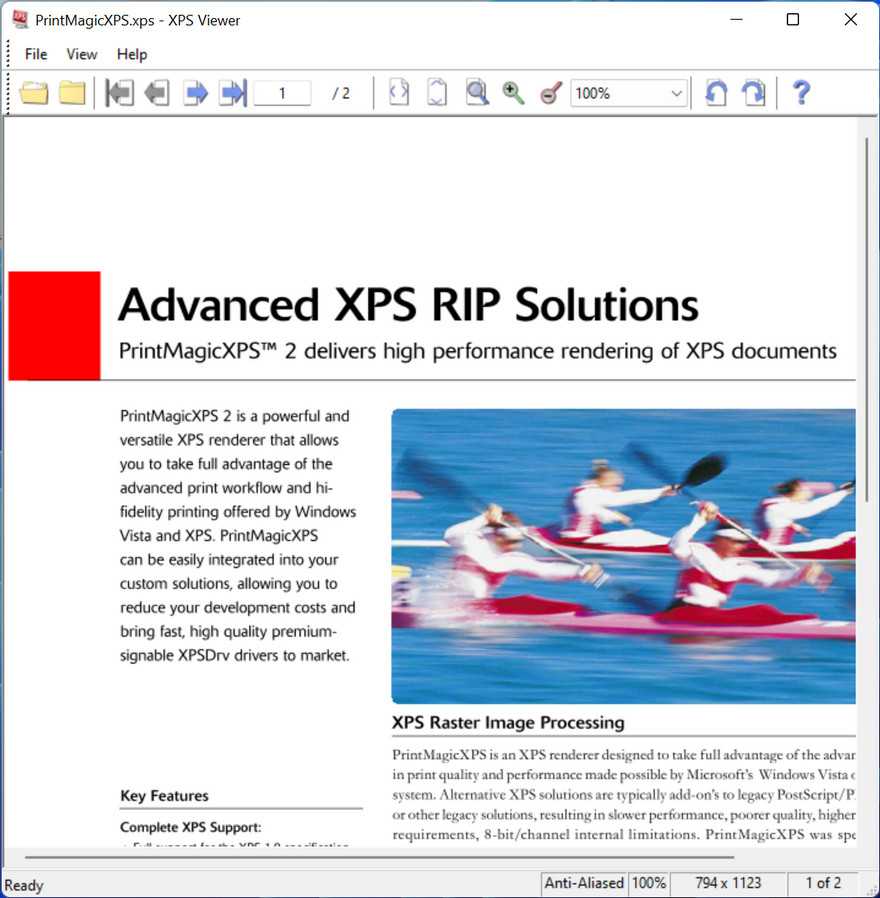
Microsoft XPS Document Writer (MXDW)
Microsoft XPS Document Writer is another hidden gem in both Windows 11 and 10. Similar to the method of creating a PDF document while printing and selecting the option Print to PDF, MXDW provides the same option, but for XPS.Print to XPS
This feature has to be enabled manually through Optional Features. To do so, type in appwiz.cpl in Run, and then click Turn Windows features on or off on the left.Turn Windows features on or off
In the pop-up window, scroll down and check the box next to “Microsoft XPS Document Writer,” then click Ok.
Turn on MXDW
MXDW will now be installed in a few seconds. You should now be able to see the option to Print to XPS on the print pages, which you can select to save files in .xps format.
In case you8 ever feel like turning off the feature, simply uncheck the box next to “Microsoft XPS Document Writer” on the Windows Features page.
Преобразование XPS в другие форматы
Формат XPS (XML Paper Specification) является открытым стандартом, разработанным компанией Microsoft для представления визуально богатого контента на печати и в цифровом виде. Однако, возможность работы с XPS-файлами может быть ограничена, поэтому иногда требуется преобразование XPS в другие форматы для дальнейшей обработки или публикации.
Преобразование XPS в PDF: Один из самых популярных способов преобразования XPS в другой формат – это преобразование в PDF. PDF (Portable Document Format) является универсальным форматом документов, который может быть открыт на разных платформах и устройствах. Существуют специальные программы, позволяющие преобразовать XPS в PDF без потери качества.
Преобразование XPS в изображения: Если вам требуется получить отдельные изображения из XPS-файла, вы можете воспользоваться специальными инструментами или конвертерами, которые преобразуют каждую страницу XPS в отдельное изображение (например, в JPG или PNG). Это может быть полезно, когда вам нужно использовать определенные фрагменты XPS-файла в других приложениях.
Преобразование XPS в текстовый формат: Если вам нужно получить только текст из XPS-файла, вы можете воспользоваться OCR-технологией (оптическое распознавание символов). Специальные программы могут сканировать содержимое XPS-файла и преобразовывать его в текстовый формат, который можно редактировать и использовать в других приложениях.
Преобразование XPS в другие форматы публикаций: Если вы хотите опубликовать содержимое XPS-файла на веб-сайте или в другом электронном формате, вам может потребоваться преобразовать XPS в другие форматы публикаций, такие как HTML или EPUB. Существуют специальные инструменты и программы, которые могут помочь вам выполнить это преобразование.
5 FAQs about Installing XPS Viewer in Windows 11
Q1: Is XPS Viewer free to install in Windows 11?
A: Yes, XPS Viewer is a free optional feature in Windows 11 that can be installed via the Settings app or command-line methods.
Q2: Can XPS Viewer open files in other formats?
A: XPS Viewer is designed specifically for viewing XPS files. It does not support opening files in other formats such as PDF or DOCX.
Q4: Can XPS Viewer be installed on older versions of Windows?
A: Yes, XPS Viewer is also available as an optional feature in previous versions of Windows, such as Windows 10 and Windows 8.
Q5: What should I do if XPS Viewer is already installed but not working?
A: If you encounter issues with XPS Viewer after installation, you can try reinstalling it or repairing the installation through the Settings app.
FAQ
Is XPS viewer free?
Yes, and download XPS Viewer for free.
Is the XPS viewer secure?
There are many different XPS viewers floating around the internet. Therefore to make sure that you don’t download an insecure version or, worse, one that is infected with viruses or spyware.
What is an XPS File?
XPS is an XML file markup containing all the page elements, such as text, graphics, raster images, and the fonts used. It’s Microsoft’s version of a PDF, although it never reached the same popularity as a PDF. It keeps all the documents original formatting so it can be shared and viewed by others, exactly the way it was designed.
Can I convert an XPS to PDF?
There are some tools that can convert an XPS file to a PDF. If you’re going to use an online program, I don’t recommend uploading sensitive information, as it may not be secured.
Download XPS Viewer now!
How to Install the XPS Viewer
The XPS Viewer FOD component can be installed using different methods. Follow one of the options below.
Method 1: Using Settings
- Open Settings, and click Apps.
- Click “Optional features.”
- Click “View features.”
- In the “Add an optional feature” dialog, type .
- Select the “XPS Viewer” checkbox, and click Next.
- On the next screen, click Install.
The above steps and screenshots are from Windows 11.
On Windows 10, follow the steps below:
- Open Settings, Apps & Features.
- Click “Optional features”. If “XPS Viewer” is not already installed, it won’t appear in the “Installed Features” listing.
- Click “Add a feature.”
- Type
- Select the “XPS Viewer” checkbox.
- Click “Install.”
RELATED: How to Restore Microsoft Print to PDF After Deleting it Accidentally
Method 2: Using DISM
To install the XPS Viewer using DISM, ensure the system is connected to the internet. And then, run the following commands from the admin Command Prompt:
dism /online /remove-capability /capabilityname:XPS.Viewer~~~~0.0.1.0
dism /online /add-capability /capabilityname:XPS.Viewer~~~~0.0.1.0
The above commands uninstall XPS Viewer and reinstall XPS Viewer by downloading the source files from Windows Update.
Method 3: Using DISM (using CAB file) offline
Methods 1 and 2 require internet access to download the FOD packages. To install the XPS Viewer or other FOD packages on a computer that’s offline (i.e., with no internet access), you must use the .cab file. The FOD .cab files will be available in the Windows FOD ISO.
The download links for the Language and Optional Features ISOs are below:
Windows 11, version 22H2 Language and Optional Features ISO (Link Source)22621.1.220506-1250.ni_release_amd64fre_CLIENT_LOF_PACKAGES_OEM.iso
Windows 10, version 2004 (and later) Features on Demand #1 ISO ()19041.1.191206-1406.vb_release_amd64fre_FOD-PACKAGES_OEM_PT1_amd64fre_MULTI.iso
Instructions
- Download the appropriate FOD ISO and mount the ISO. To mount the ISO, right-click on it and click “Mount”. The cab file name for the XPS Viewer is mentioned below:
XPS Viewer – FOD Info
Feature name: XPS Viewer
Capability name: XPS.Viewer~~~~0.0.1.0
CAB file name: Microsoft-Windows-Xps-Xps-Viewer-Opt-Package~31bf3856ad364e35~amd64~~.cab
The above CAB file will be present in the folder of the Windows 10 FOD ISO. Whereas in the Windows 11 FOD ISO, this file is located under the folder.
- Suppose the FOD ISO’s mounted drive-letter is . To install the XPS Viewer FOD component, run the following command:Windows 11
dism /online /add-package /packagepath:"H:\LanguagesAndOptionalFeatures\Microsoft-Windows-Xps-Xps-Viewer-Opt-Package~31bf3856ad364e35~amd64~~.cab"
Windows 10
dism /online /add-package /packagepath:"H:\Microsoft-Windows-Xps-Xps-Viewer-Opt-Package~31bf3856ad364e35~amd64~~.cab"
You’ll see the following output:
Deployment Image Servicing and Management tool
Version: 10.0.19041.844

Image Version: 10.0.19045.3086

Processing 1 of 1 - Adding package Microsoft-Windows-Xps-Xps-Viewer-Opt-Package~31bf3856ad364e35~amd64~~10.0.19041.1

The operation completed successfully.
That’s it!
One small request: If you liked this post, please share this?
One «tiny» share from you would seriously help a lot with the growth of this blog.
Some great suggestions:
Pin it!
Share it to your favorite blog + Facebook, Reddit
Tweet it!
So thank you so much for your support. It won’t take more than 10 seconds of your time. The share buttons are right below. ![]()
Bonus Tip
Here are some bonus tips for working with XPS files:
1. Secure Your XPS Files: If you are dealing with sensitive or confidential information in your XPS files, consider encrypting them or applying password protection. Many XPS viewers and conversion tools allow you to secure your files to prevent unauthorized access.
2. Optimize XPS File Size: XPS files can sometimes be large in size, especially if they contain high-resolution images or embedded fonts. To reduce the file size, you can optimize the XPS file by compressing images or removing unnecessary resources.
3. Explore XPS Viewer Features: Once you have successfully installed XPS Viewer, take the time to explore its features and capabilities. Familiarize yourself with the different viewing options, annotation tools, and printing settings to make the most of your XPS files.
Открытие печати XPS
Чтобы настроить печать XPS, вам необходимо открыть программу печати XPS на вашем компьютере. Для этого щелкните правой кнопкой мыши на пустой области рабочего стола и выберите пункт «Новый» в контекстном меню. Затем выберите «Печать» и «Microsoft XPS Document Writer».
Если у вас нет программы печати XPS, вам нужно установить ее на свой компьютер. Для этого откройте «Панель управления», выберите «Программы» и «Включение или отключение компонентов Windows». Затем найдите «Печать по умолчанию» и установите флажок рядом с «Печать XPS». Нажмите «OK» и дождитесь завершения установки.
После открытия программы печати XPS вам нужно выбрать файл, который хотите распечатать. Для этого щелкните на пункте «Файл» в верхнем левом углу окна программы и выберите «Открыть». Затем найдите нужный файл в проводнике и выберите его. Нажмите кнопку «Открыть» и файл появится в окне программы.
Теперь вы можете настроить параметры печати XPS в программе. Нажмите на пункт «Параметры печати» в верхнем меню и выберите нужные настройки, такие как ориентация страницы, размер бумаги и разрешение печати. После завершения настроек нажмите кнопку «Печать» и дождитесь окончания процесса печати.